Planning the coppering belts with a template and paper strips
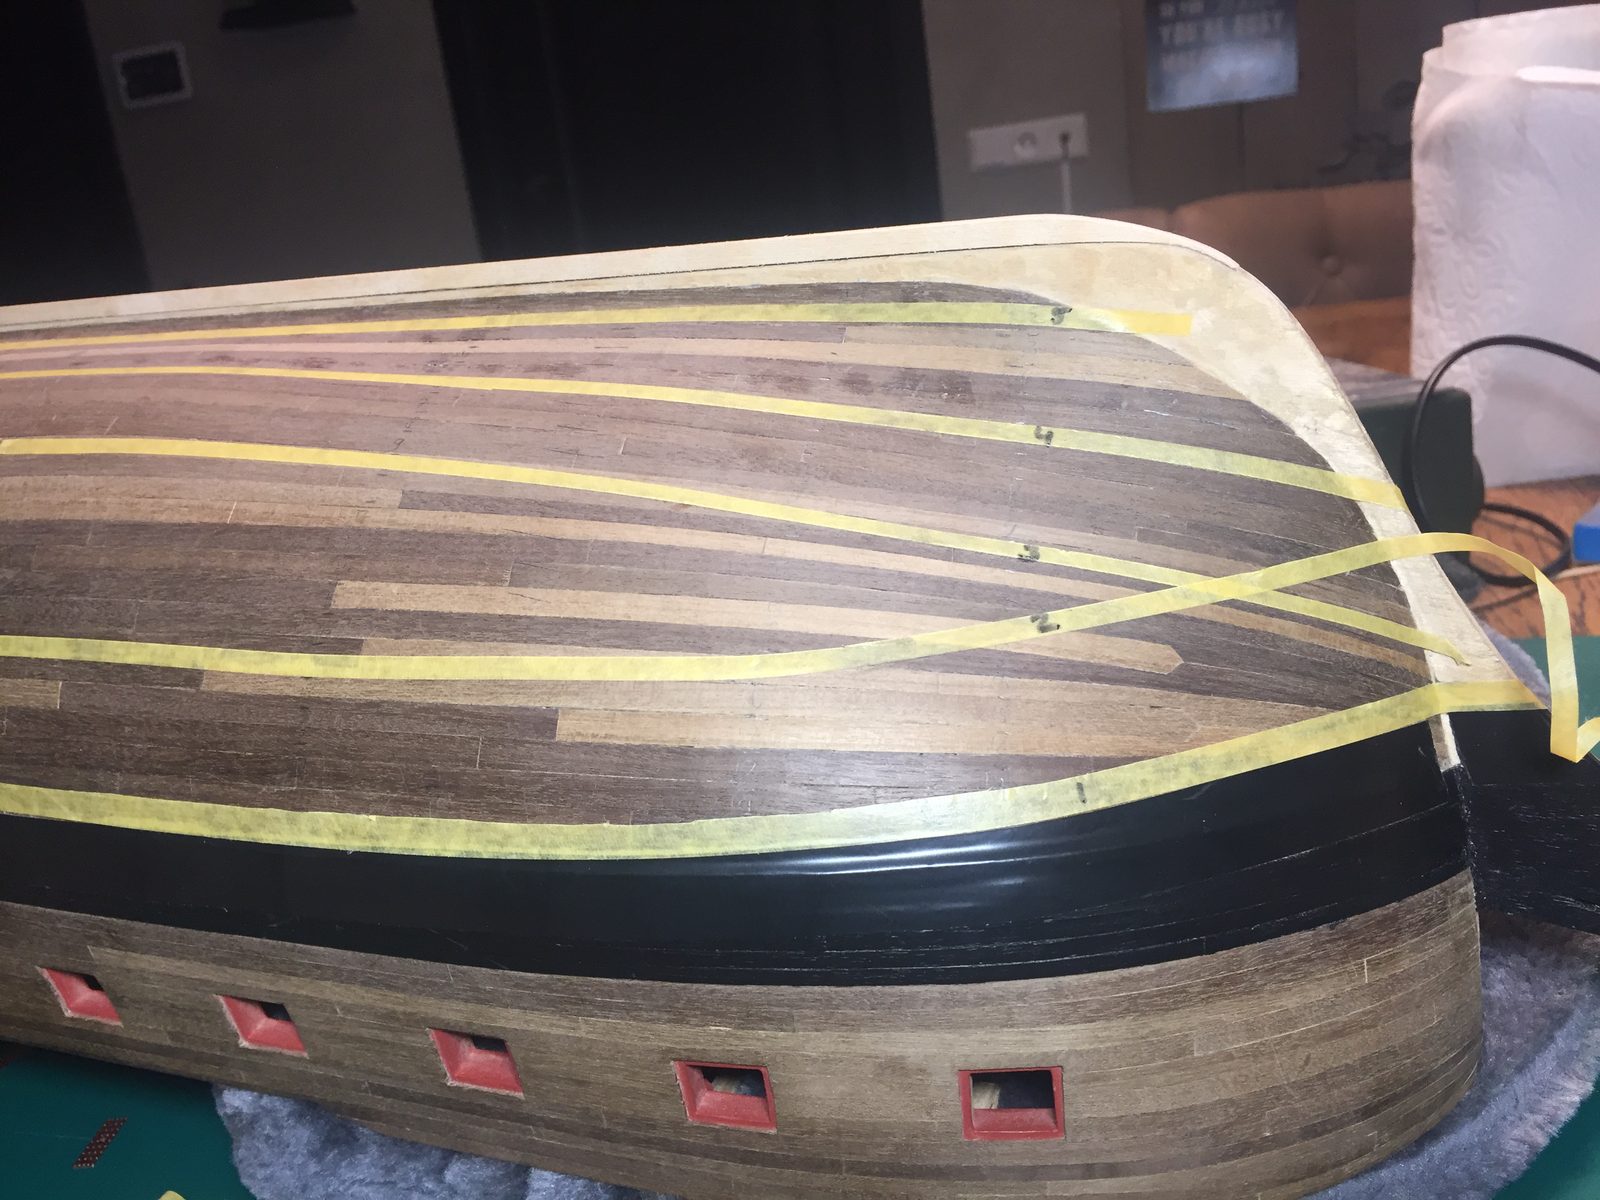
Mark out the belts for the copper plates along the sheer of a strake, using a template for the plate width and printed paper strips to see where the plates have to be cut at an angle.
What you need
- template of card or paper with the plate width marked on it
- masking tape (yellow)
- pencil
- computer and printer
- hobby knife and cutting mat
- ruler
- copper plates from the kit (a few loose ones for trial fitting)
- paper to print the plates at full size
- 1 x 1 mm strip for finishing along the waterline
Dimensions
- belt 1 along the waterline is one plate wide
- belt 2 sits at 12 plate widths from the garboard strake at the bottom and at 14 at the sternpost (so two stealers)
- five straight rows below the waterline
- first gore line at 11 plates from the waterline
- keel exactly one plate wide (about 6 mm)
- 1 x 1 mm strip along the waterline
- Time
- several evenings
- Difficulty
- hard
- When in the build
- Phase 5,
- From the log post
- Keel deepened and belts marked out · forum
Before you start
The waterline has been marked out and taped. The keel has been deepened to exactly one plate width (about 6 mm), rudder and sternpost are the same thickness. Any earlier plates that followed straight lines instead of the strakes have been removed; that is easy with a hobby knife under one corner and a small pair of pliers.
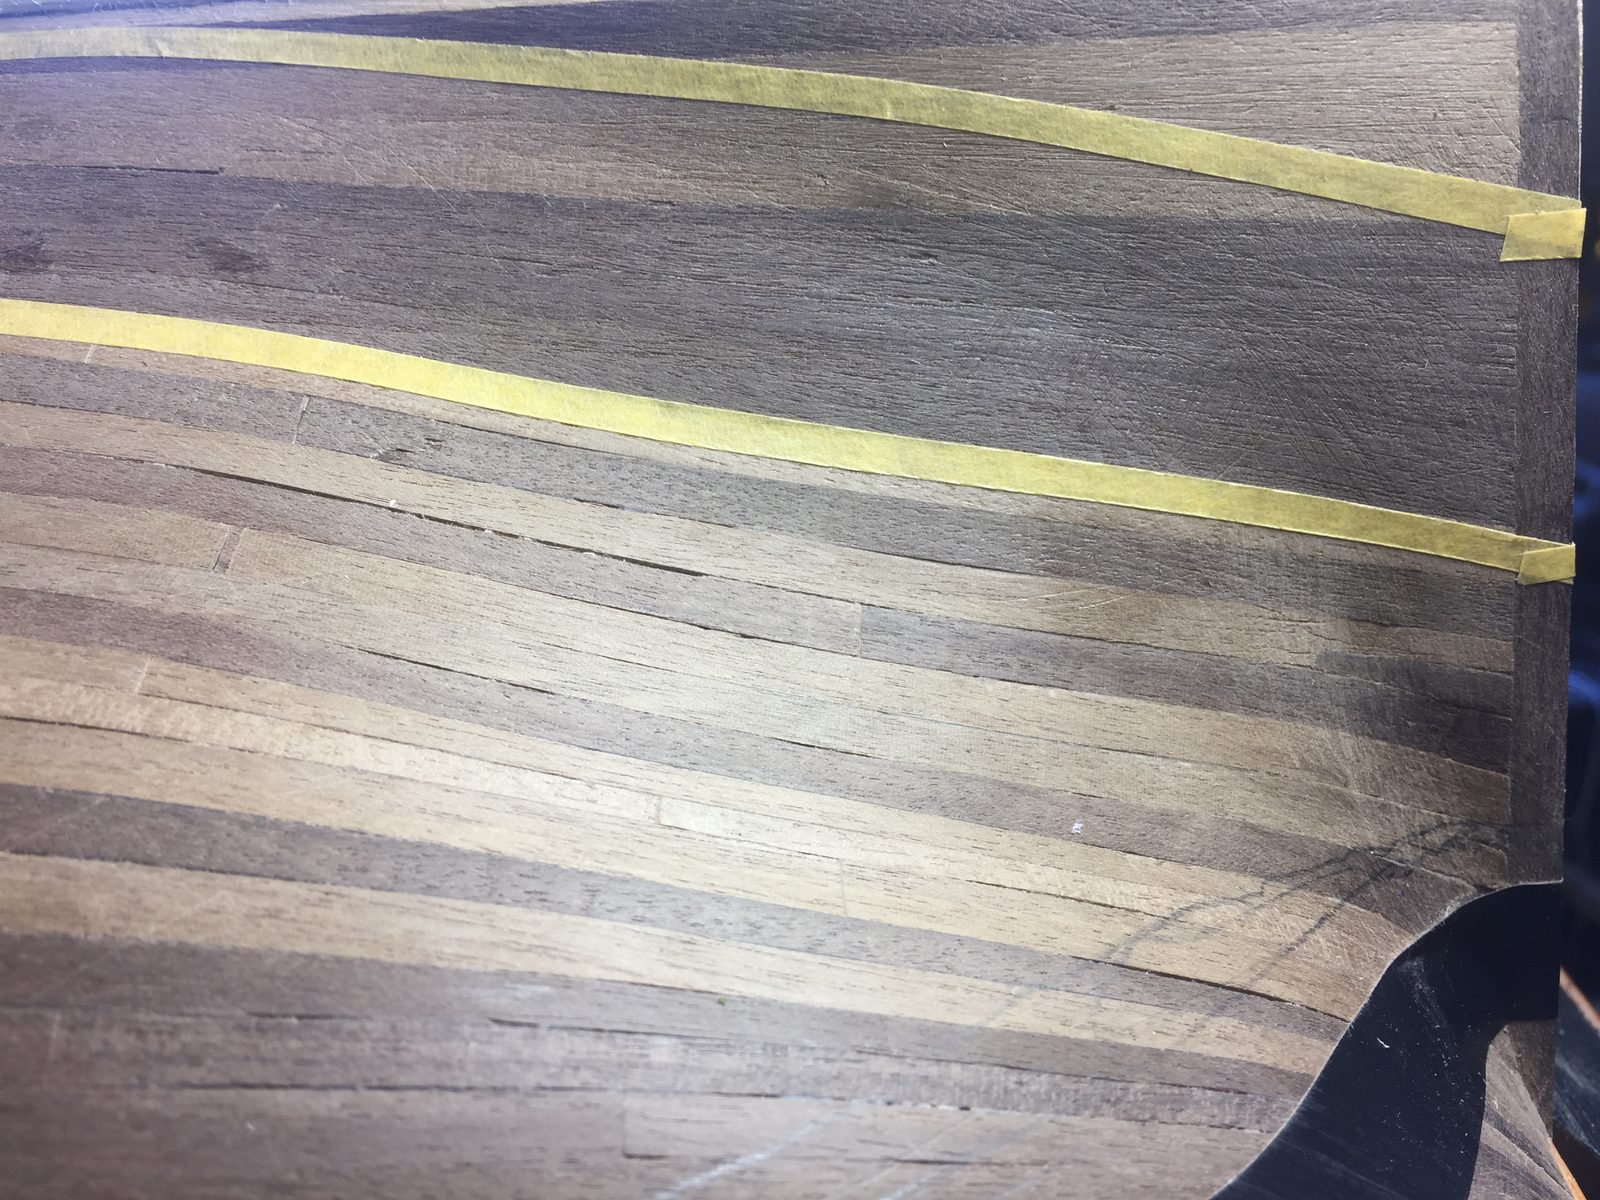
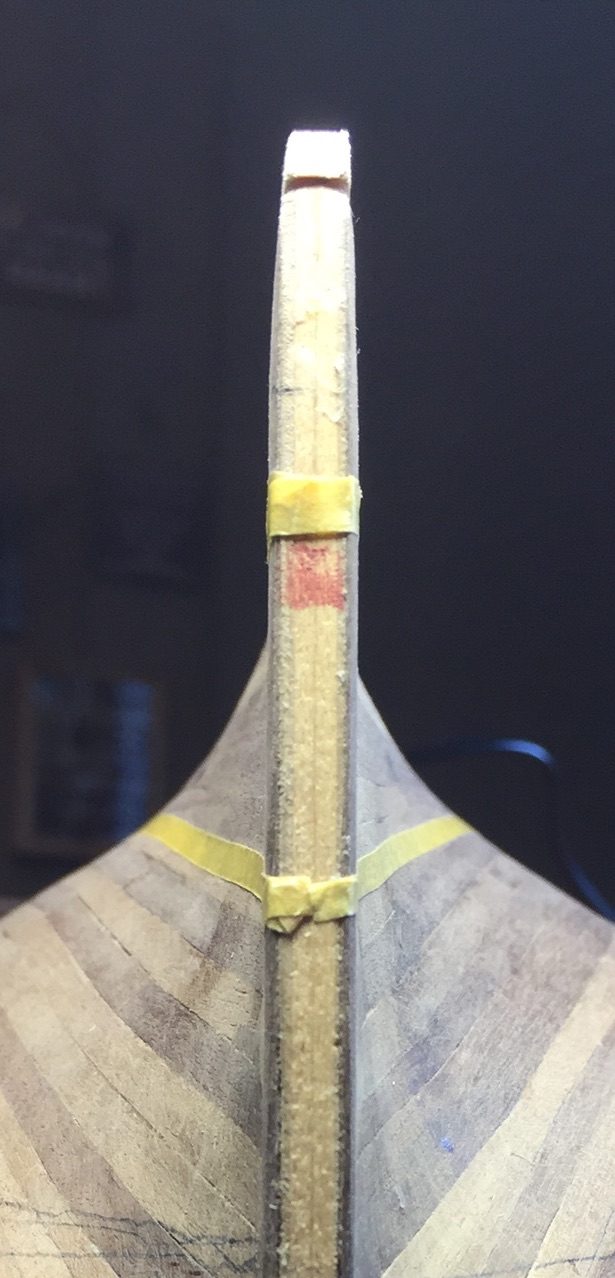
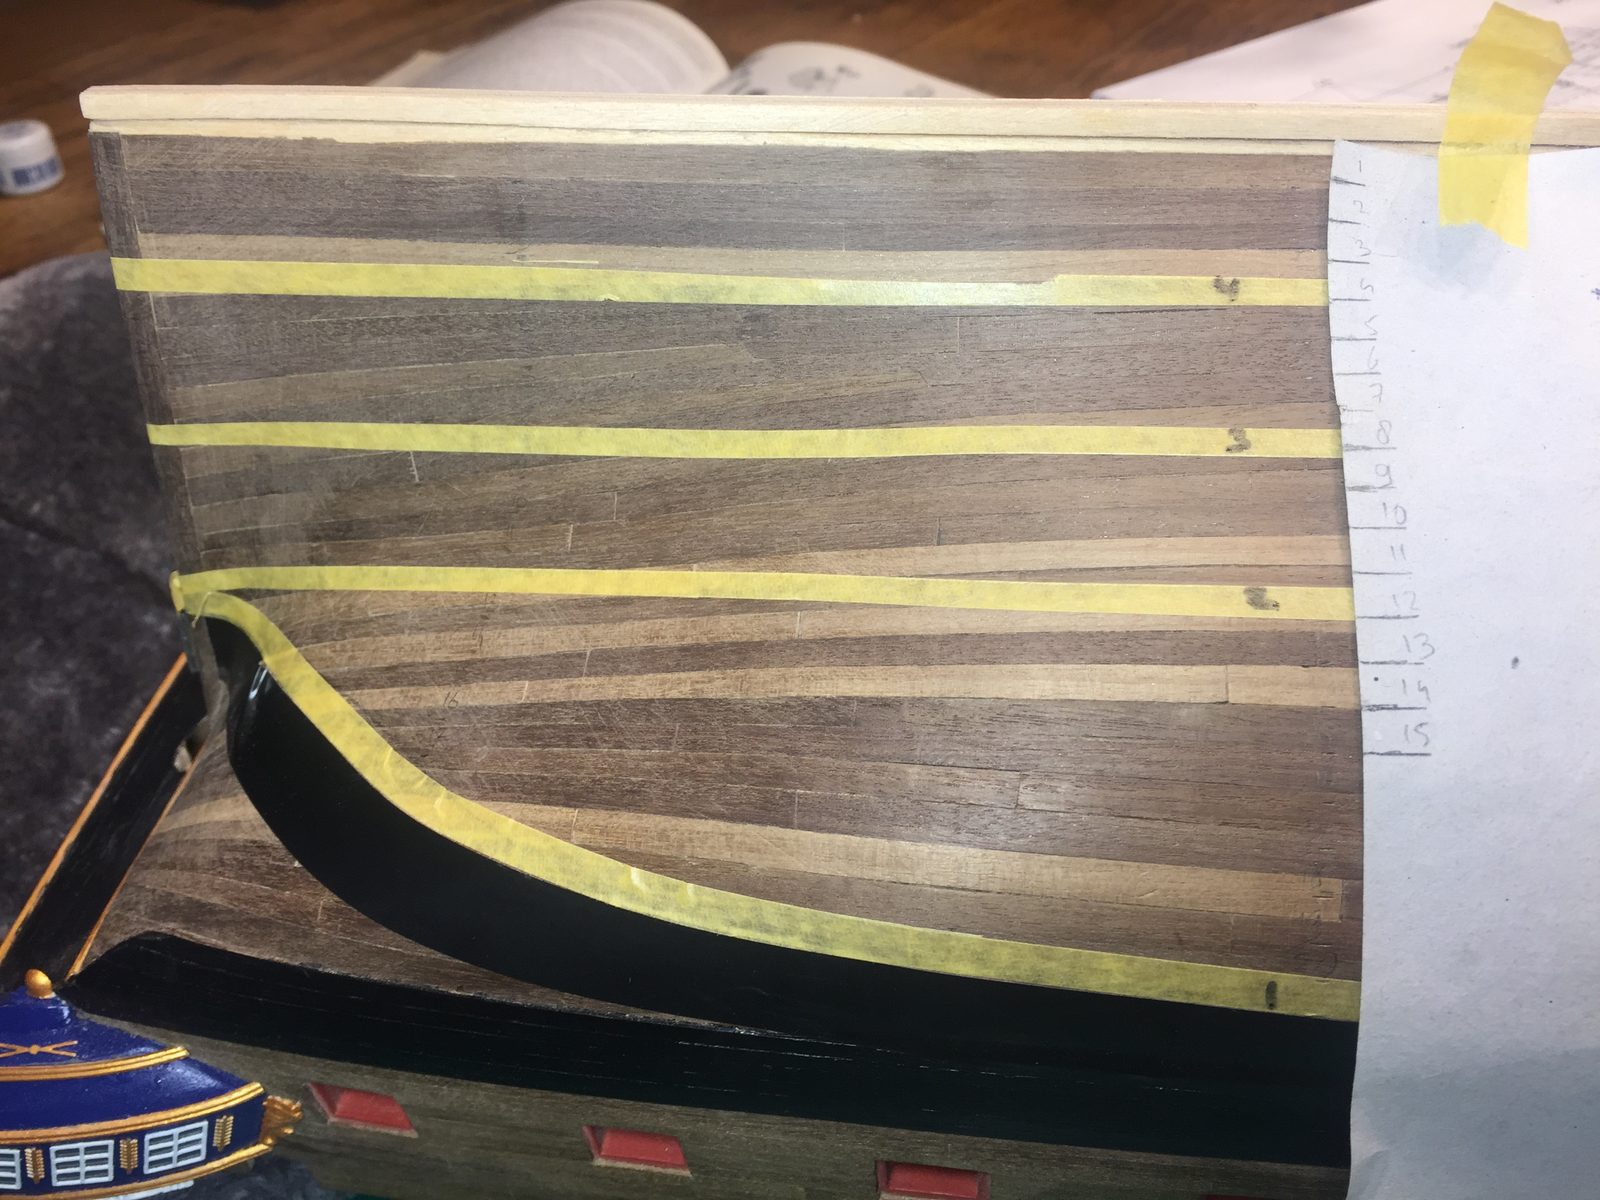
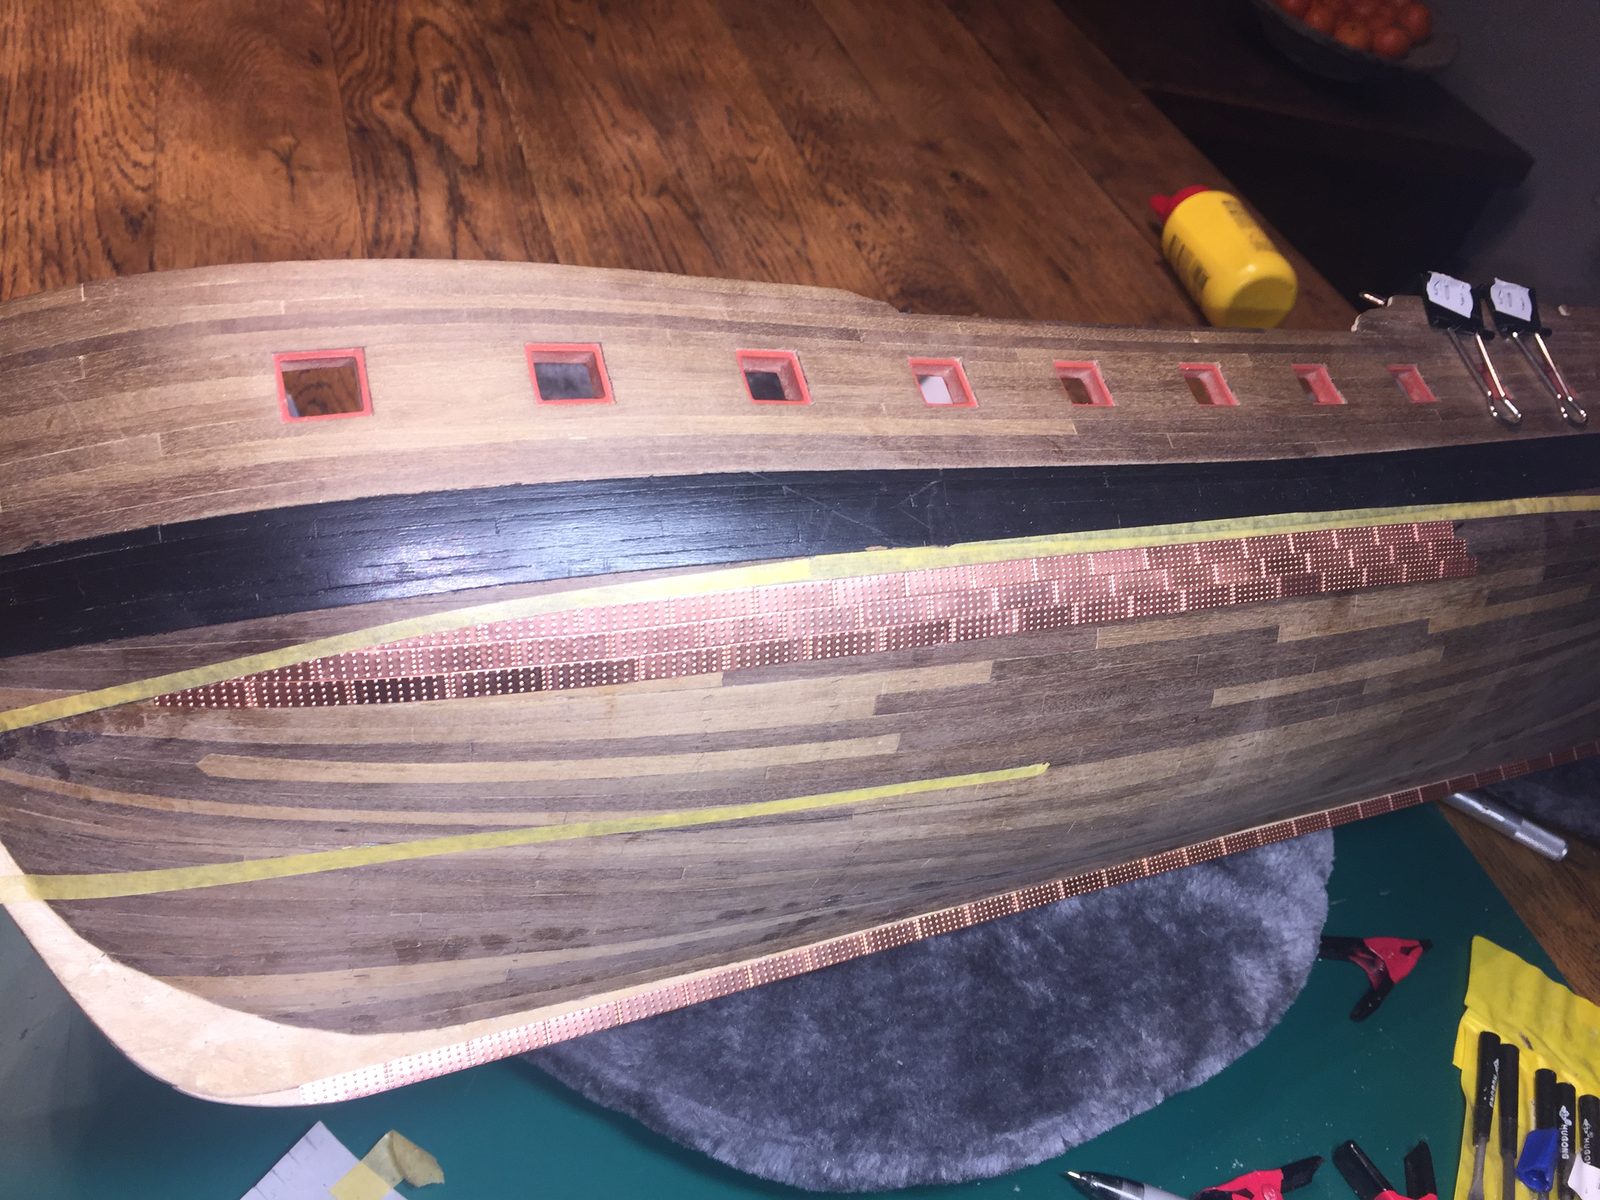
Somewhere about halfway up the hull, choose a strake with a good sheer and tape it off on both sides with masking tape. Look at the hull from astern and from the side: the belts must run in line with the planking, not with the straight line of the keel. This belt becomes the base from which you work up and down.
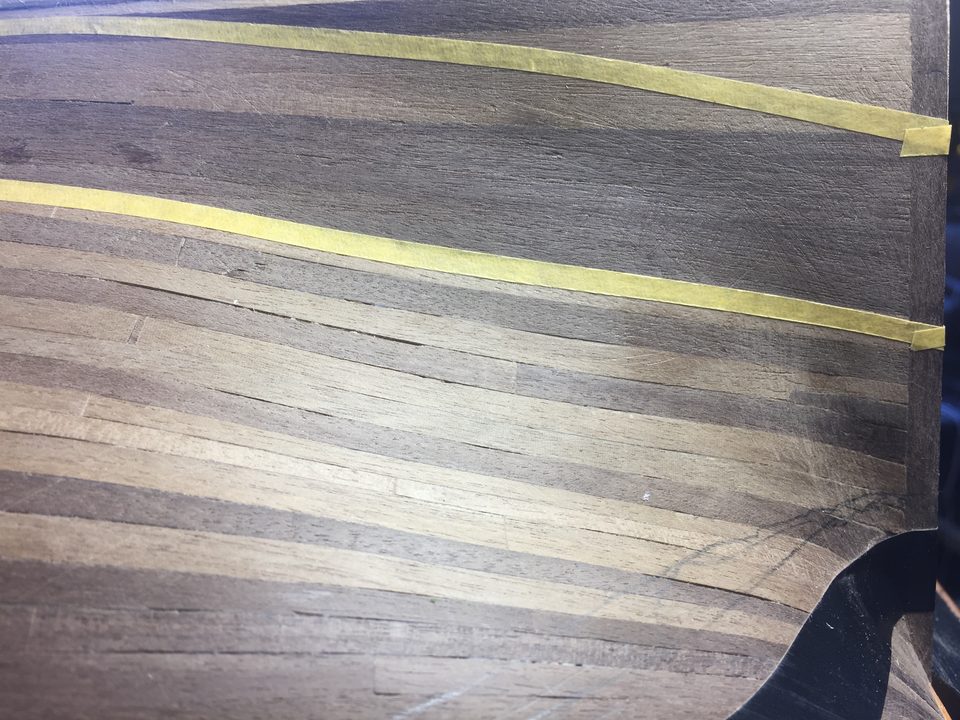
The chosen strake taped off on both sides: the two lengths of tape follow the sheer of the planking. 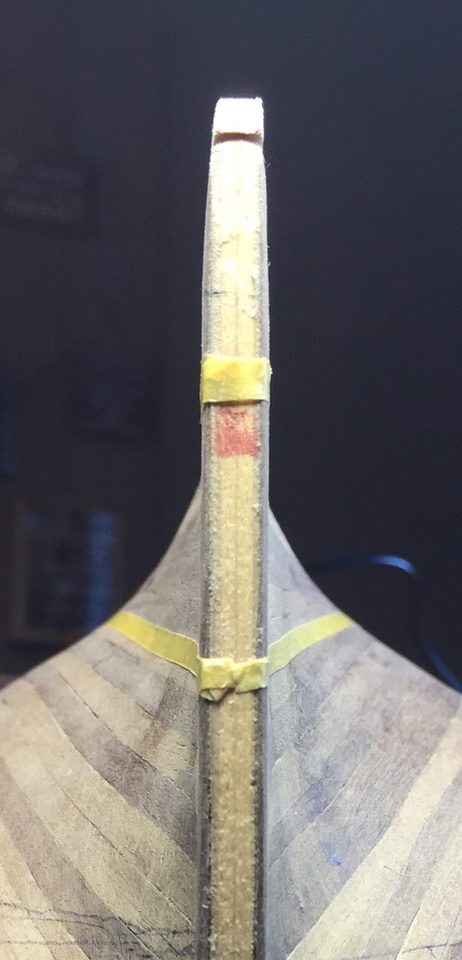
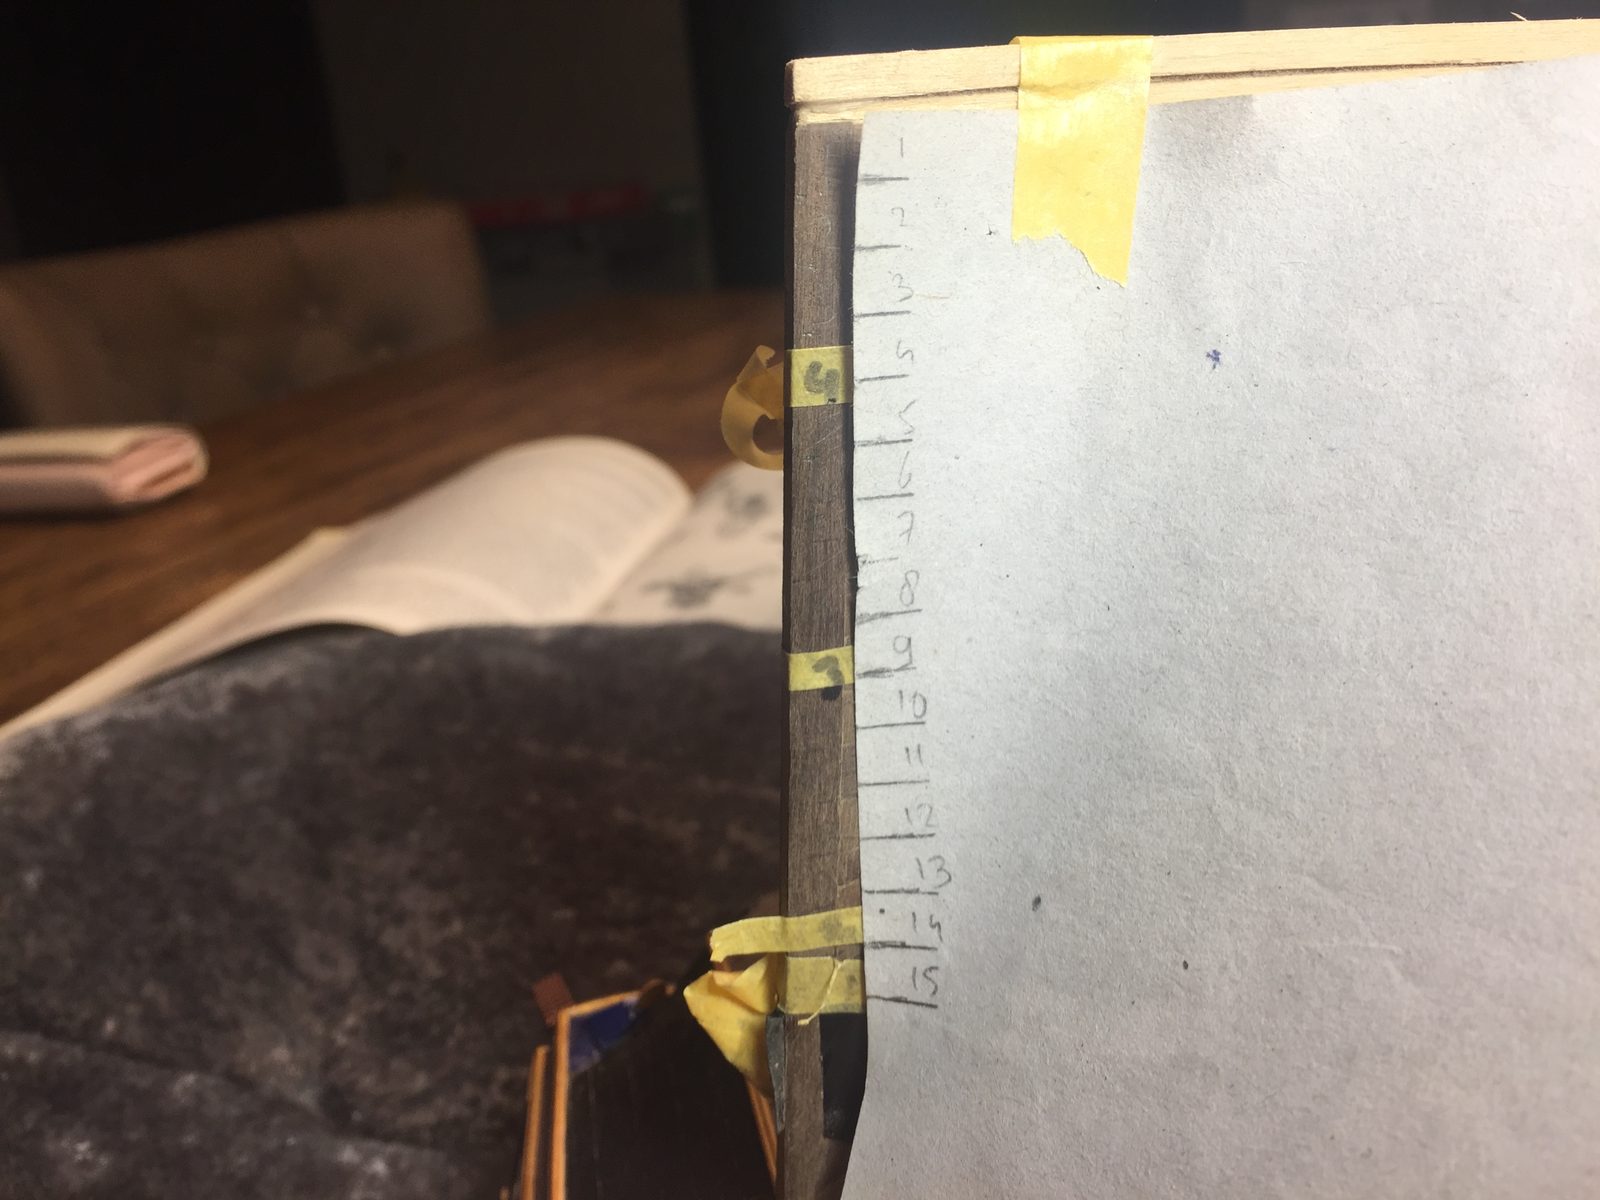
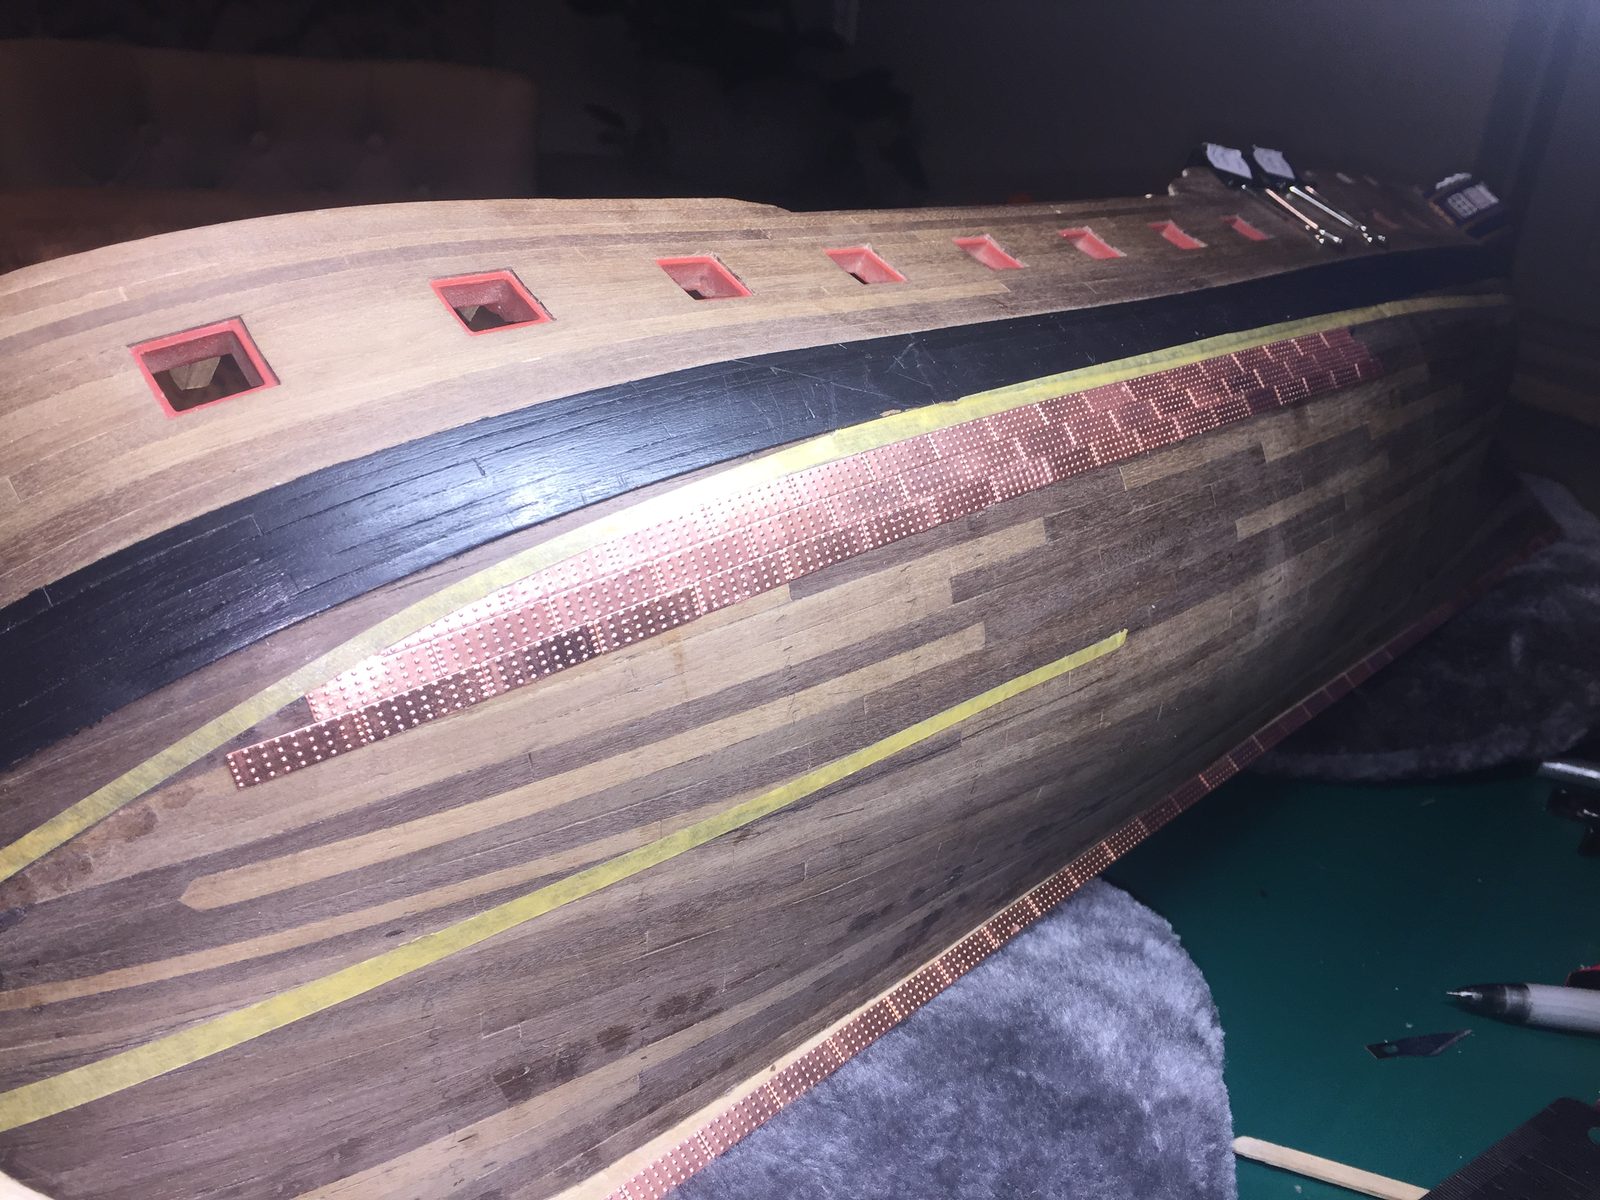
The same belt seen from astern: on either side of the sternpost the tapes come out at the same height. Tip from pietsan: The plates must follow your strakes, not the straight line of the keel. Choose a strake somewhere halfway up the hull, follow it neatly with the plates and then work upwards and downwards. At the bow the angled pieces (stealers) belong on the planking only; on the stem itself the plates run horizontally.
Watch out: We had started at the keel and carried that straight line across the hull. That way you do not come out right at stem and sternpost, because the hull is not the same width everywhere. Everything had to come off again.
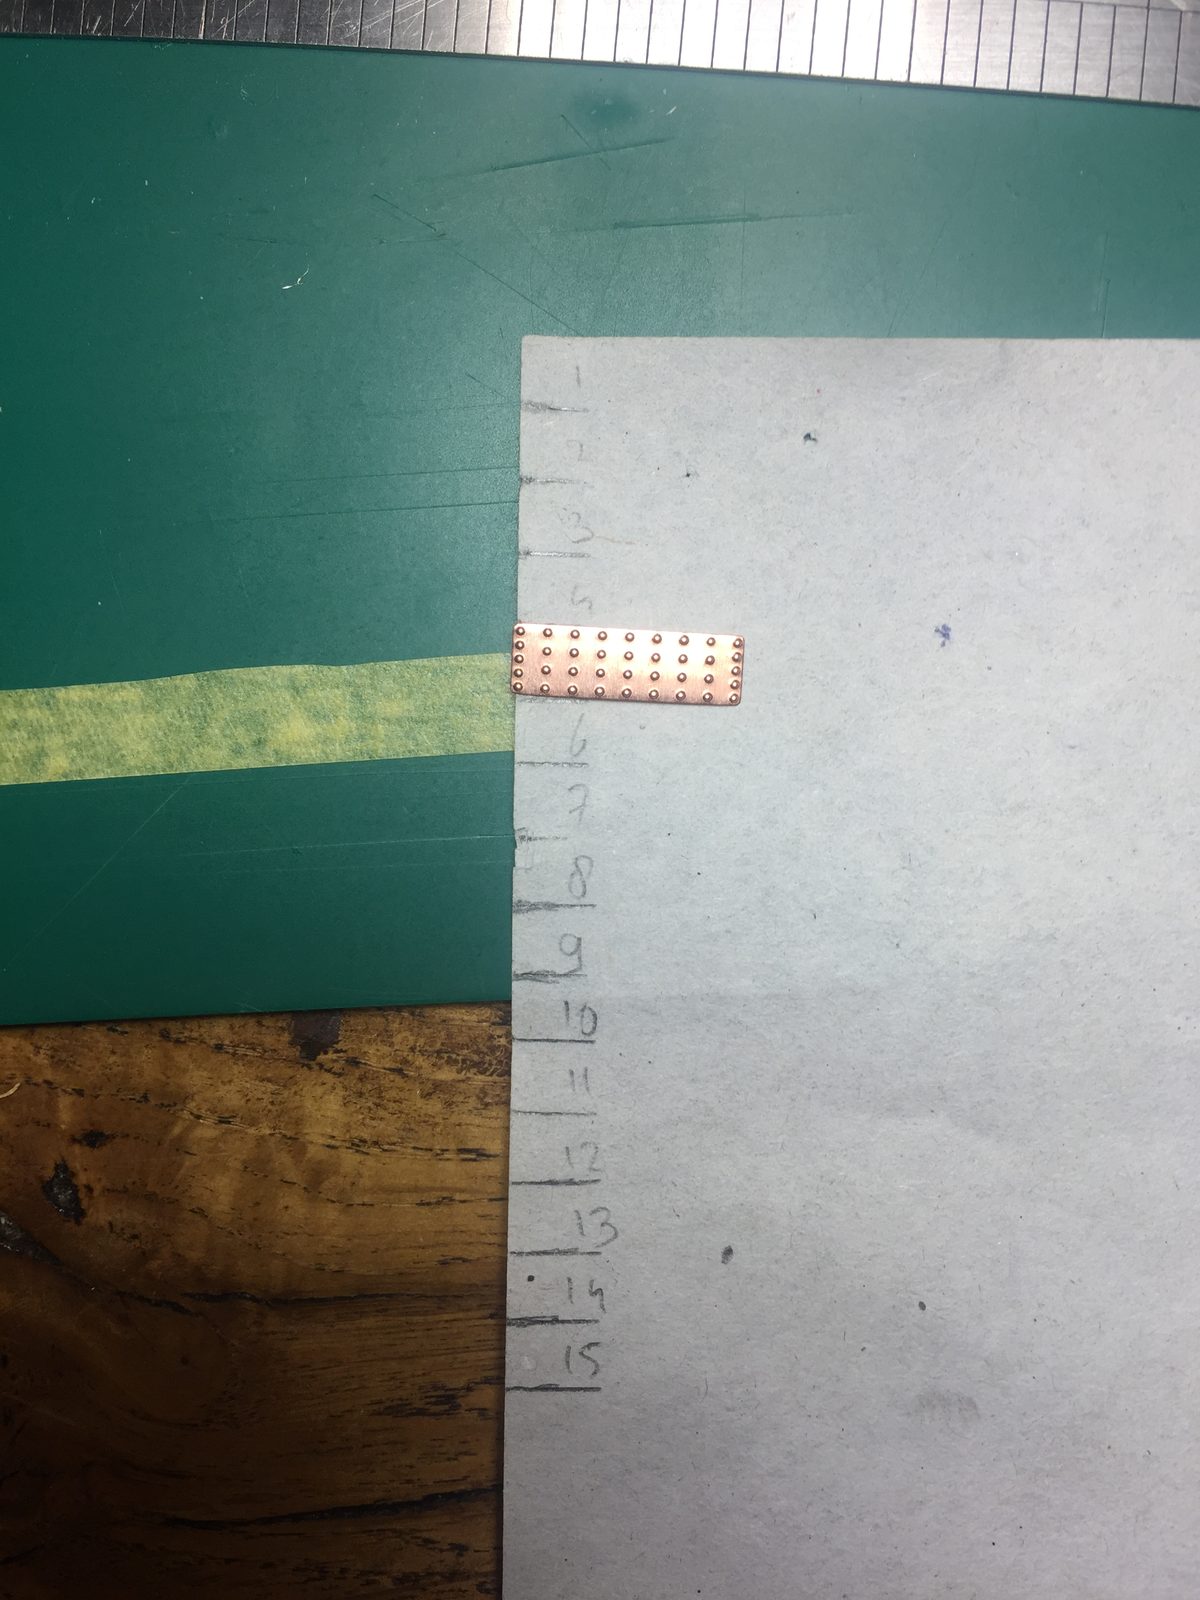
Lay a copper plate on a strip of stiff paper or card and mark off its width a number of times in a row, like a ruler in plate widths. Number the marks. With this you can count anywhere on the hull how many plates fit between two lines.
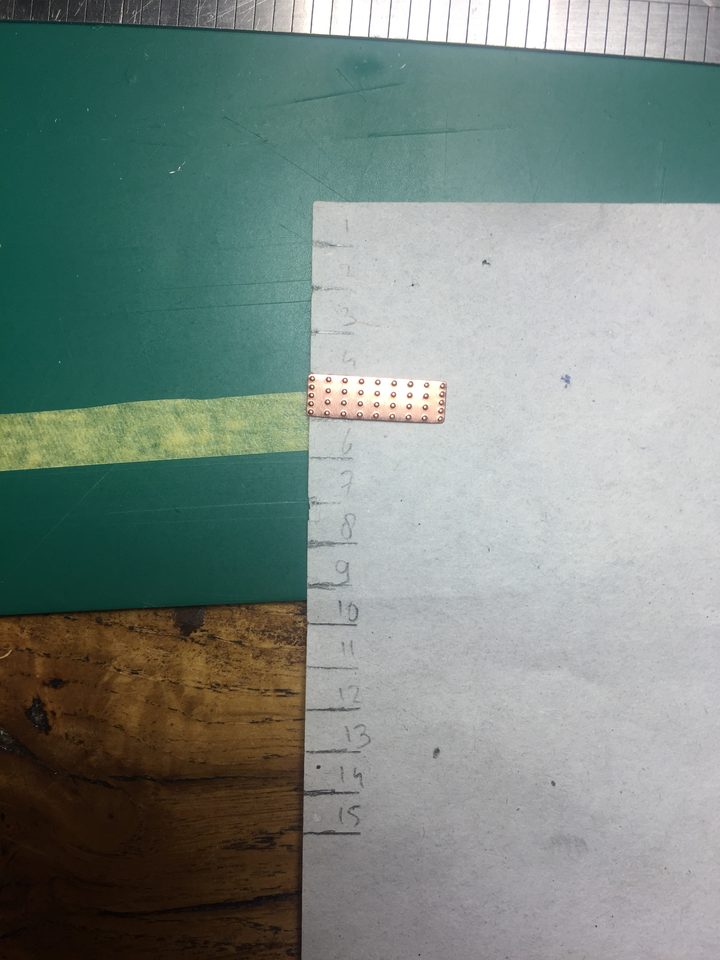
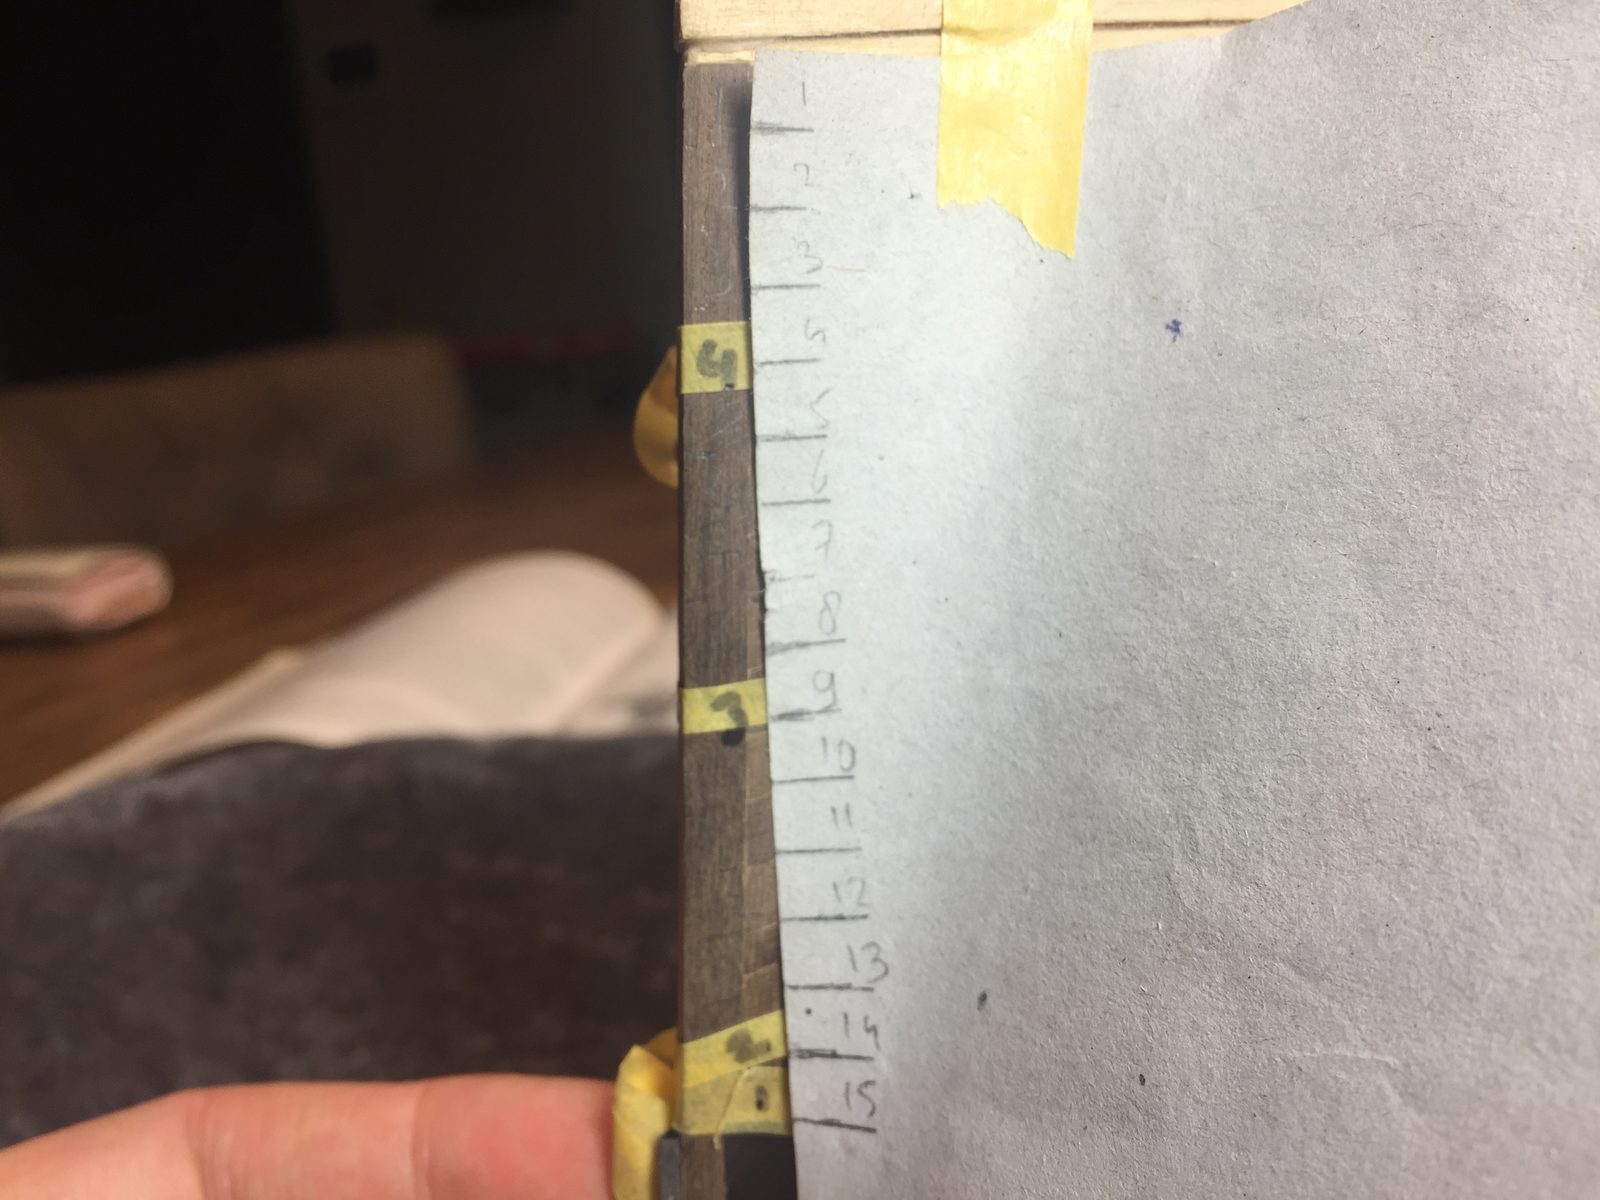
The template: a strip of paper with the width of one copper plate repeated, with the plate beside it as the measure. Hold the template across the hull in a number of places, starting from the garboard strake or the taped belt, and mark the required plate width with a pencil tick. Join the ticks with masking tape to form belts. Check from the side that every belt runs with the sheer as nicely as the leading belt.
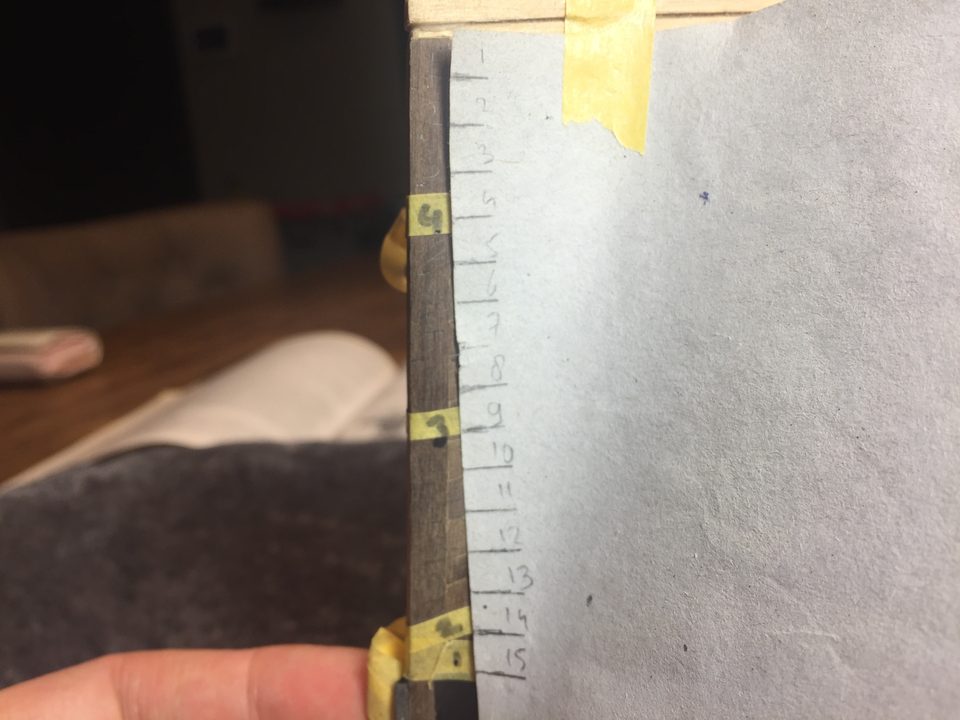
The template against the hull at the sternpost: at each position you count off the plate widths and make a tick. Tip from Hans Groenenberg: Look at Paulbo's log; his coppering starts on page 14. There he explains how he tackled the belts.
Use the template to count how many plates fit below a belt amidships and at the sternpost. For us belt 2 sat at 12 widths from the garboard strake at the bottom and at 14 at the sternpost. You take up the difference with stealers: here two, which come out at exactly one plate width.
12 widths amidships against 14 at the sternpost
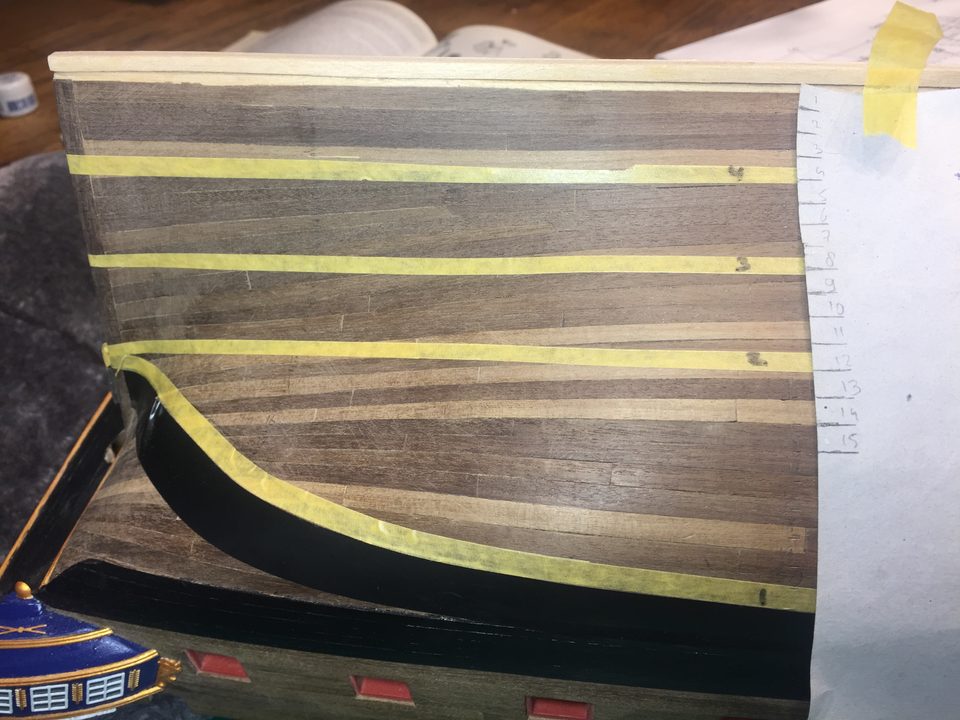
Amidships: belt 2 sits at 12 plate widths from the garboard strake, counted off on the template. 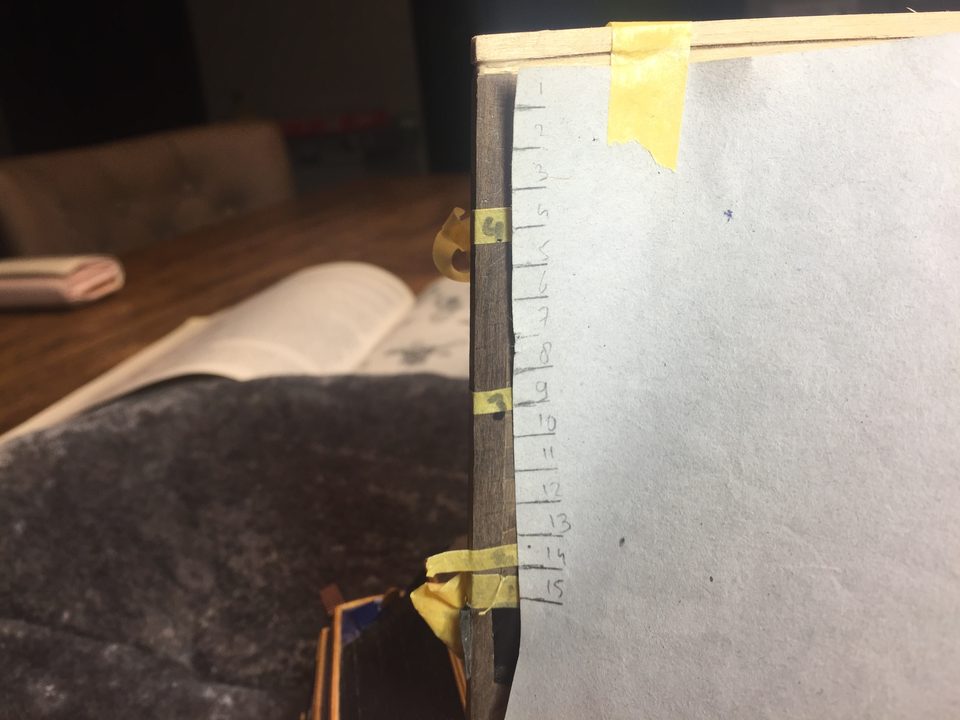
At the sternpost the same line comes out at 14 widths: a difference of two calls for two stealers. Reserve belt 1, directly below the waterline, as a band one plate wide. Look carefully at the curve at the sternpost: with whole plates gaps open up there, so the plates have to be cut to size on the short side as well. Cut the plates, do not use scissors: shearing pulls them out of shape.
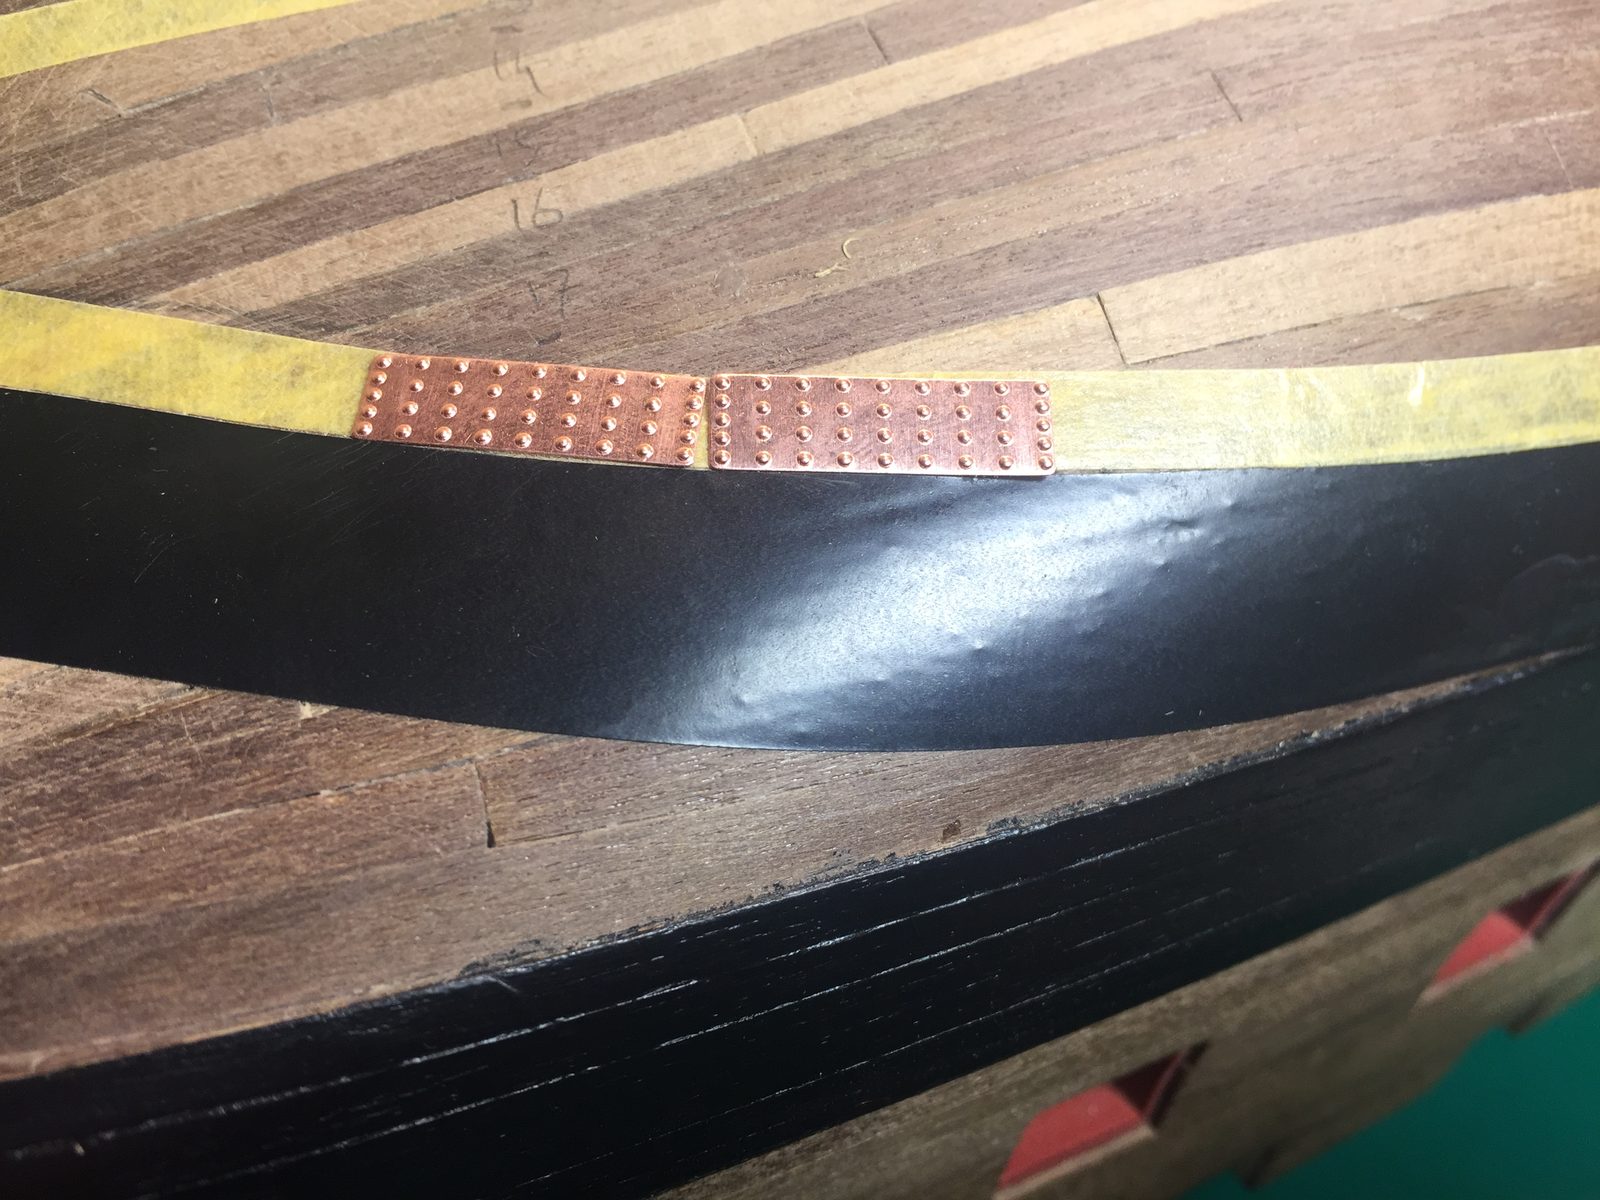
belt 1 is one plate wide
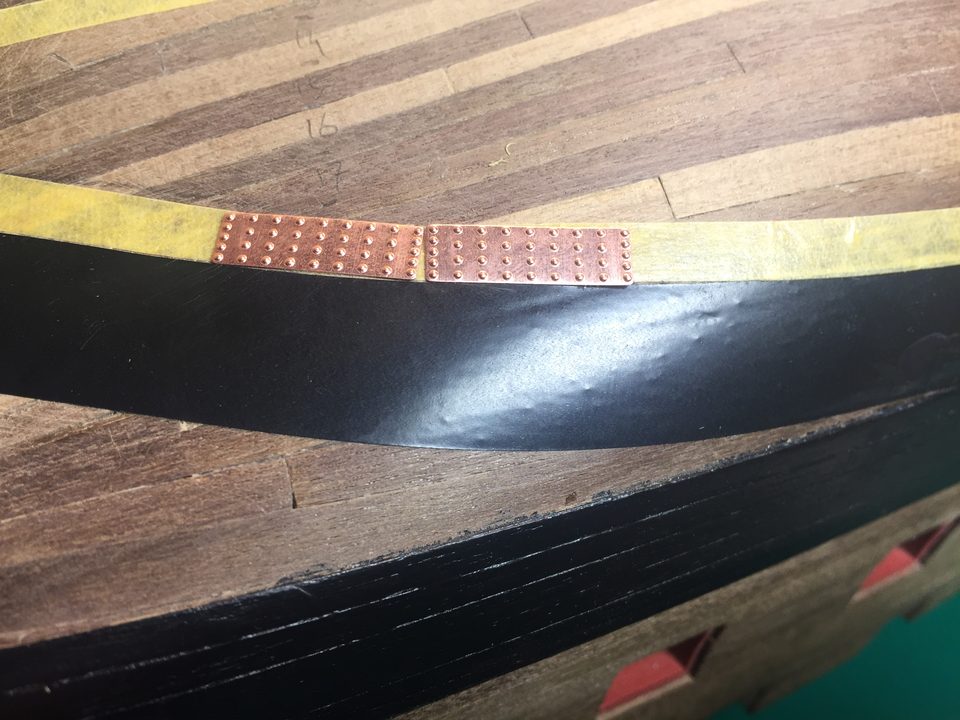
The first band against the waterline with a few loose plates: in the curve at the sternpost whole plates no longer fit. Tip from pietsan: Copper the waterline first, so you know for certain you will come out right there and can cut the plates neatly to size. Keel and posts follow a separate line: there the plates run horizontally, so do not carry the line of the hull planking onto keel and posts.
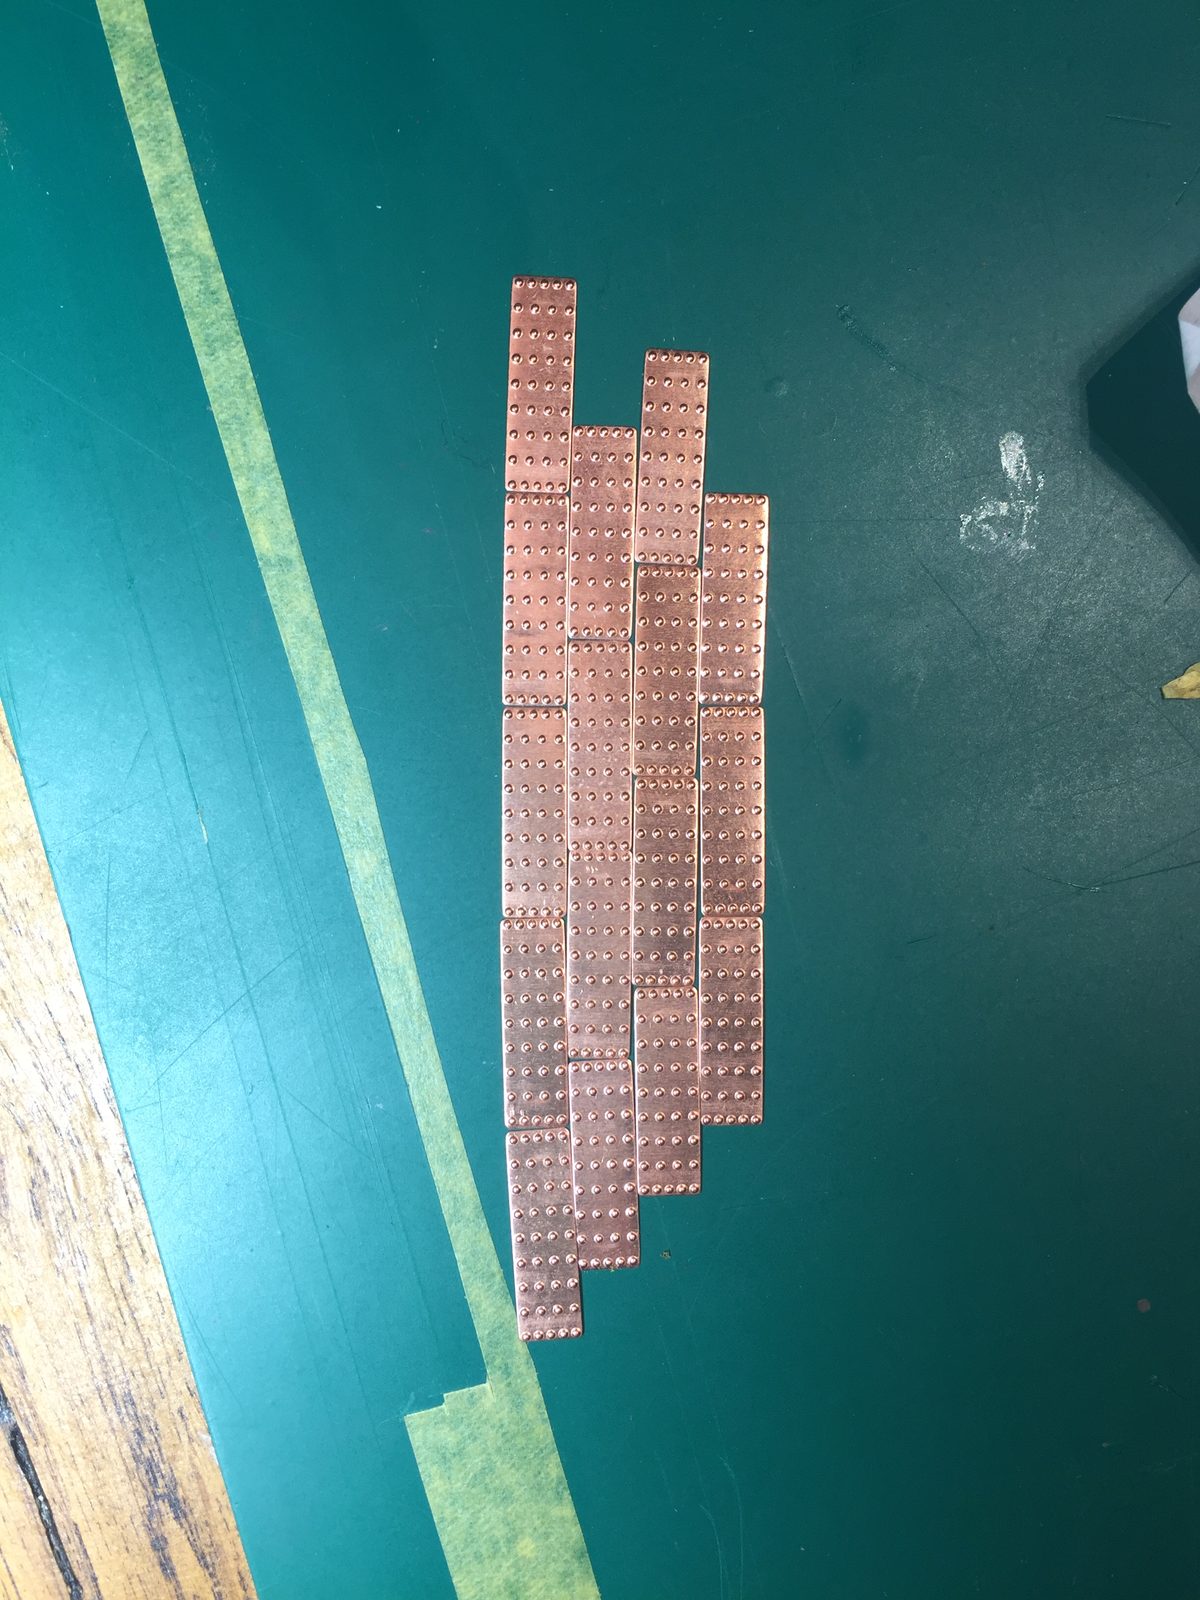
Lay a few rows of plates loose on the cutting mat to see the pattern. Ours stagger by a third rather than the half you see more often. The plates slide about easily, so do not expect a tidy picture; it is the stagger that matters.
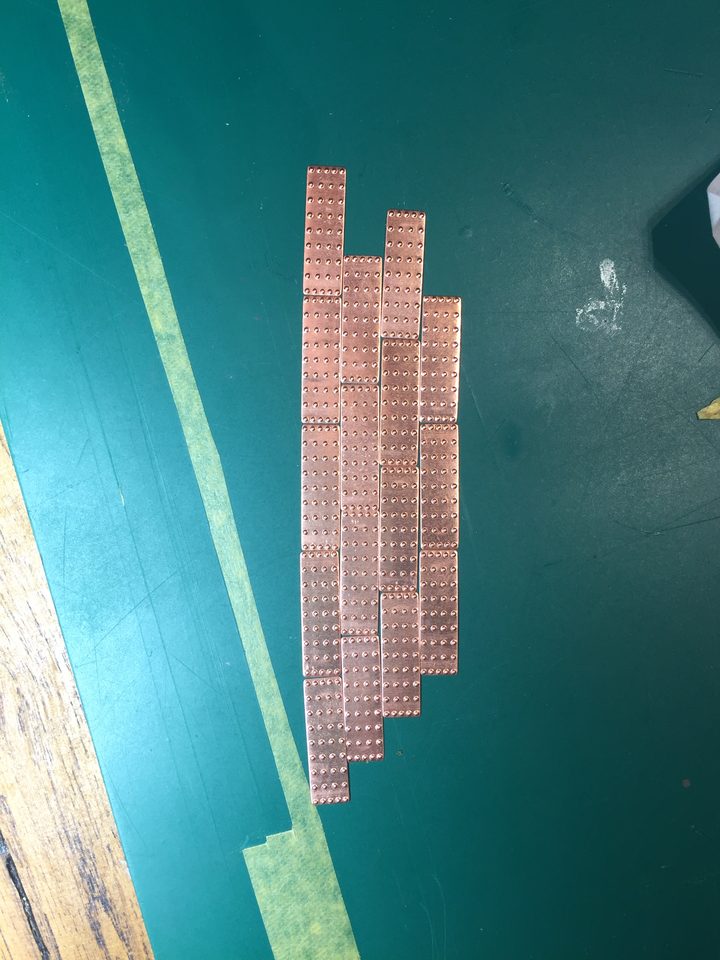
The pattern laid out dry on the cutting mat: the plates stagger by about a third per row. Tip from *Hans*: I do not believe it strictly followed a fixed pattern. Coppering was protection against worm and weed growth, not a handsome copper hull. Function over form.
Watch out: The manual (15.2) has you start at the keel, work from aft forward and stagger the rows by half, with one drop of thick CA in the middle of each plate; we started at the keel too and it went wrong because the rows then follow straight lines. Pietsan starts at the waterline and that worked. The kit also has an emergency measure for a crooked waterline (15.3): tape above the line and touch up the gap with copper paint; with a 1 x 1 mm strip that is not needed.
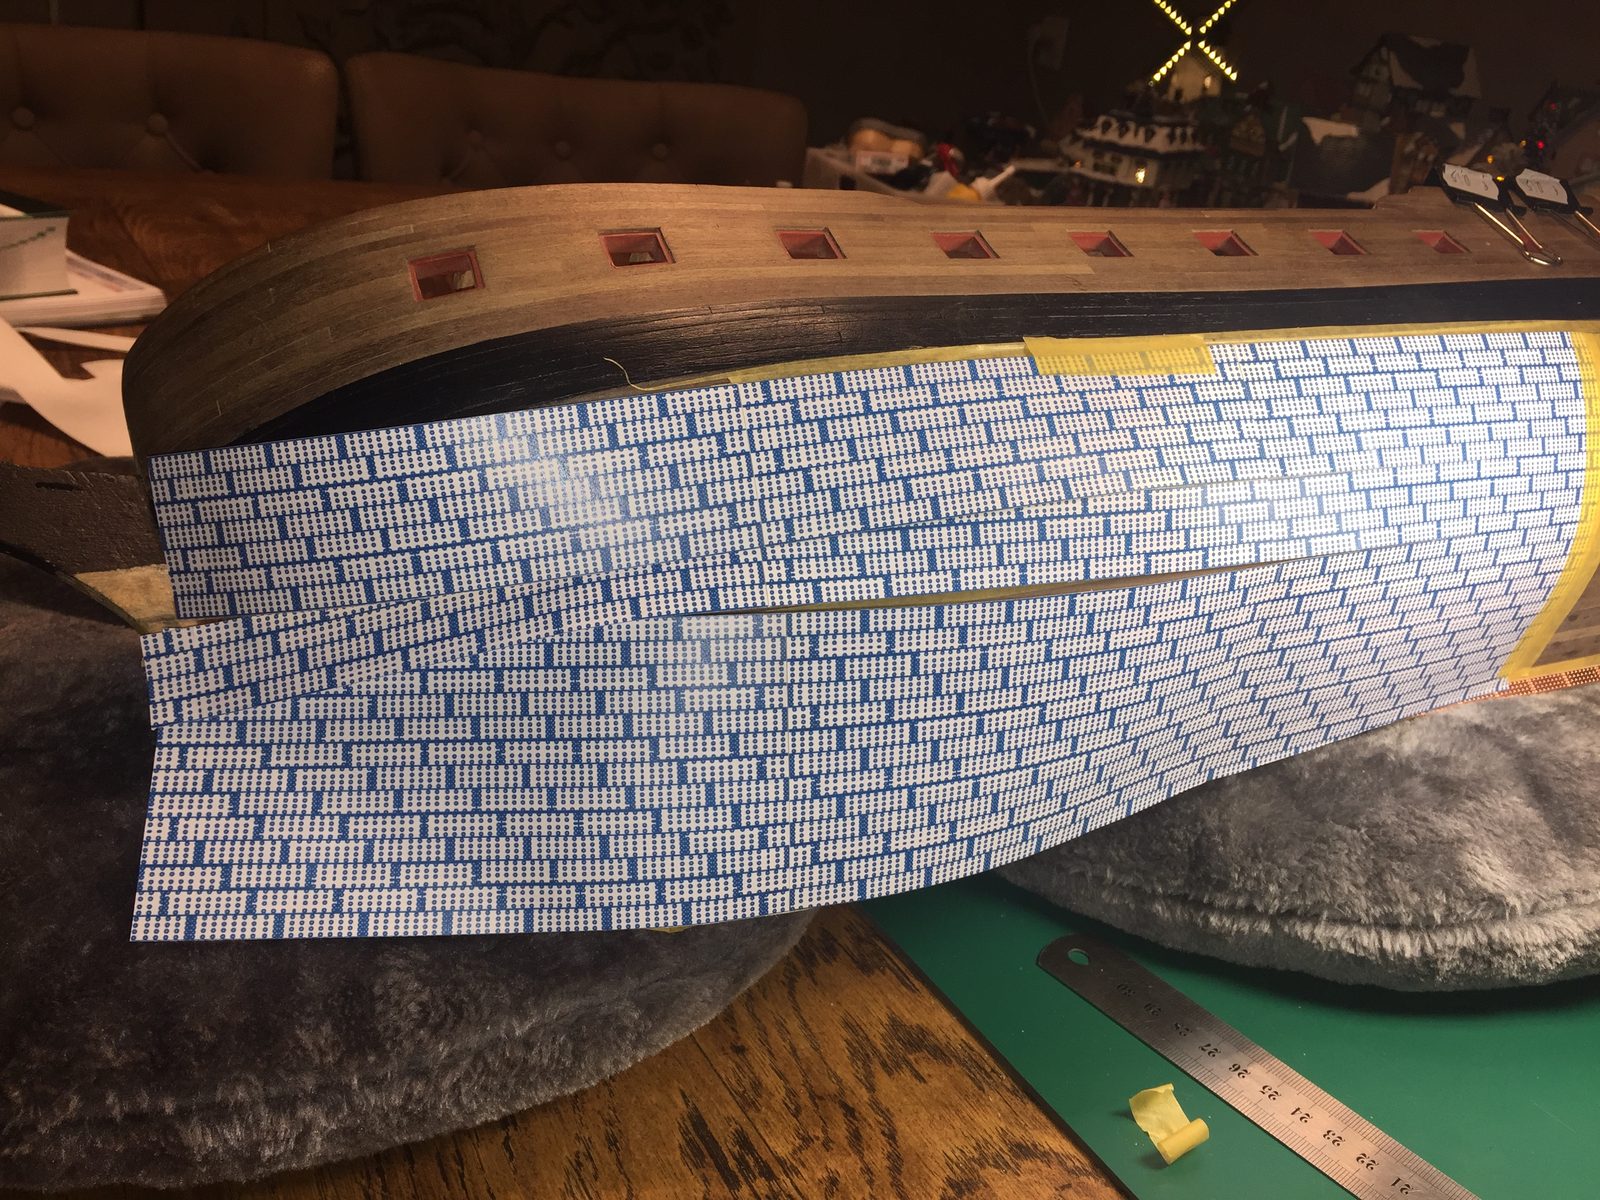
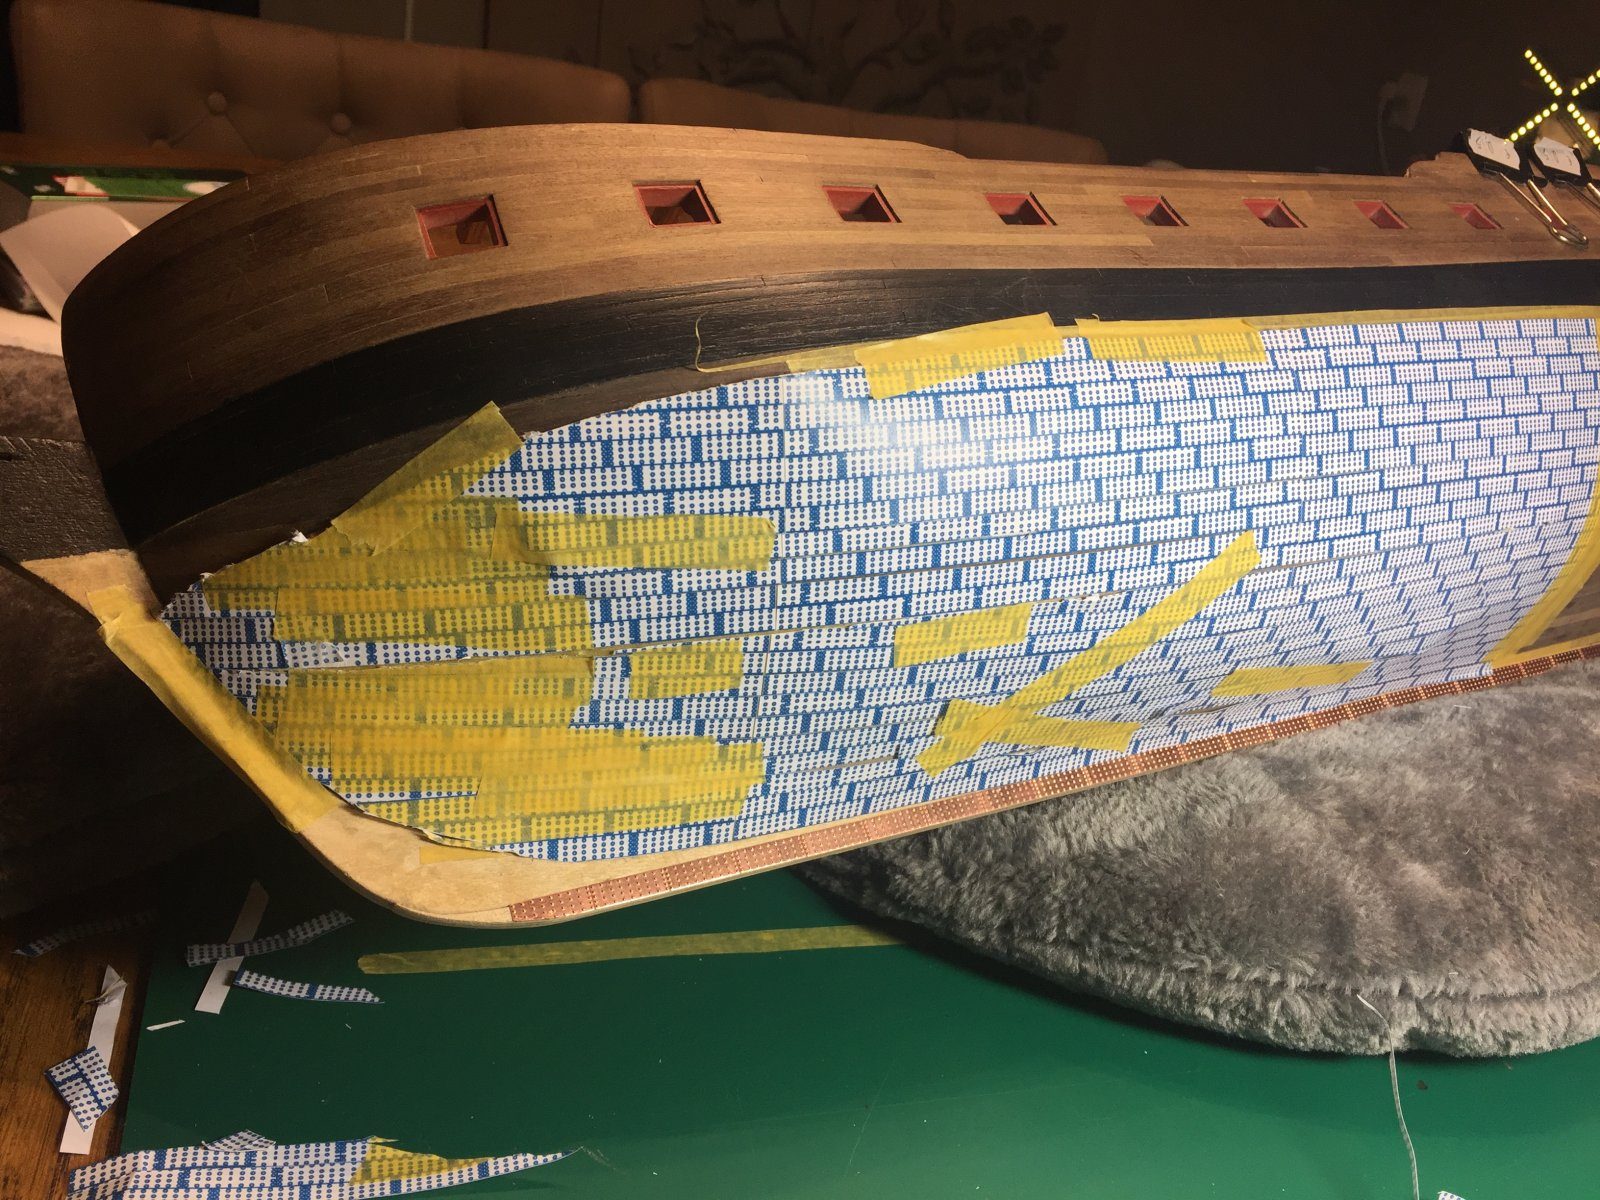
Reproduce the plates at full size on the computer, print them and stick the sheets together. Cut the sheet into strips, stopping just short of the end, so the strips stay joined but can lie on the hull separately like real rows. Only then do you see where the plates really have to be cut at an angle: for us the first gore line comes at 11 plates from the waterline, with one more right under the ship that you never see.
first gore line at 11 plates from the waterline
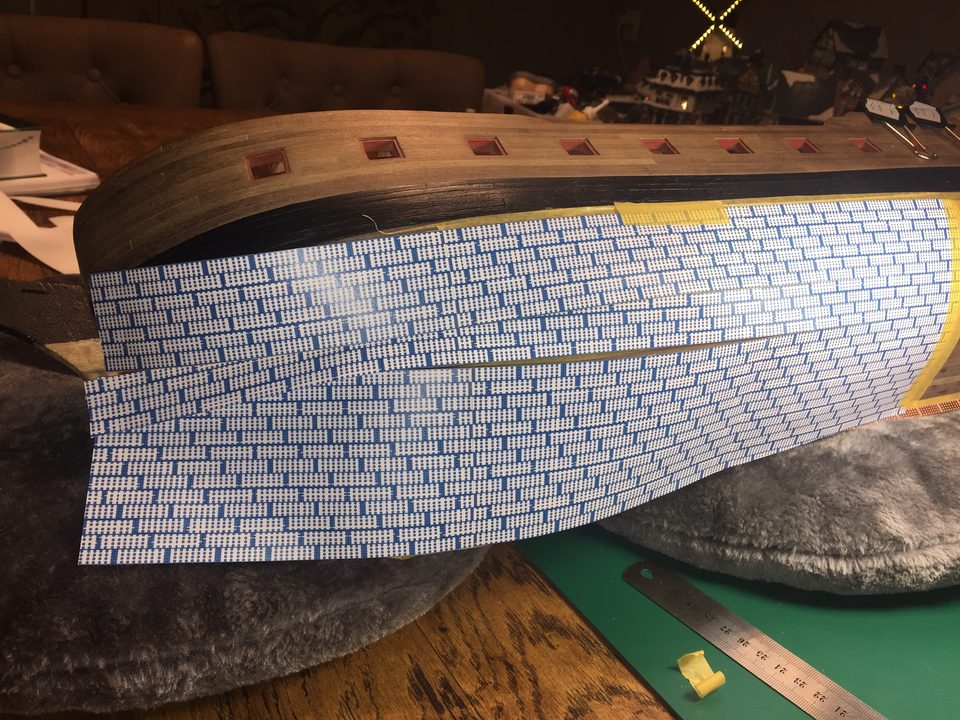
The printed sheet of full-size plates, stuck together and cut into strips. 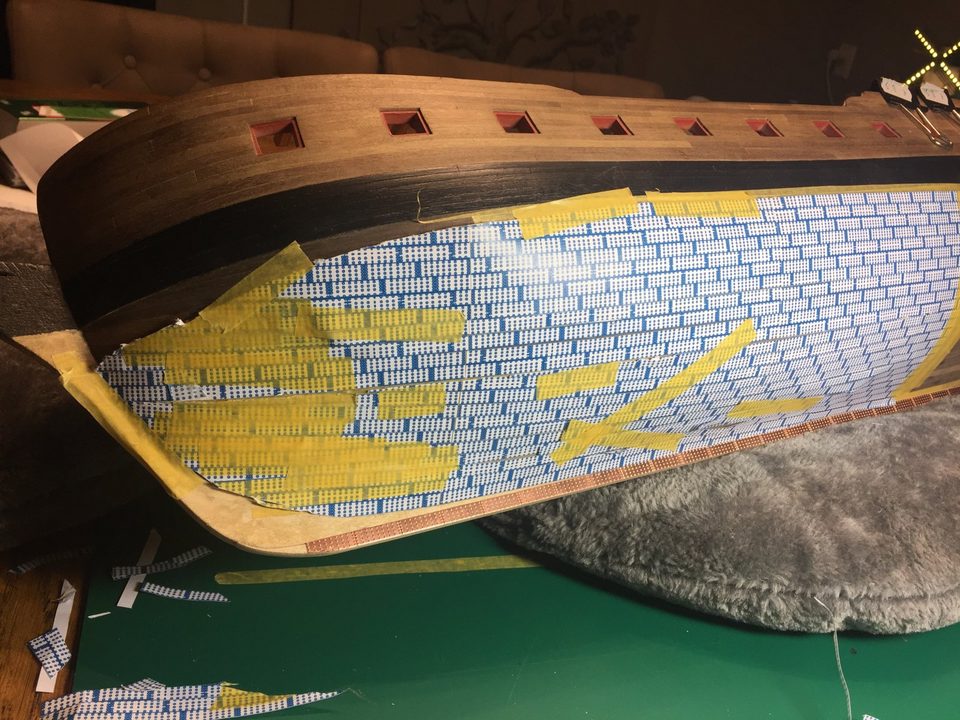
The paper strips laid loose on the hull: where the rows cross each other are the gore lines. Tip from Henkl: The knowledge base on henkvanluinen.com has an account by a former forum member of coppering his hull. It makes clear straight away that it is a big job you need to allow plenty of time for.
Watch out: The paper exercise did not work out exactly in the end; on the hull the plates shift differently from the paper. Use the strips as a guide, not as an exact measure.
Decide whether you want five straight rows below the waterline (as Paulbo did) or a single band (as Piet did); we went for five rows. Finish the top with a 1 x 1 mm strip along the waterline, as in the second example on Henk's website. Any unevenness in the top row then disappears behind the strip.
1 x 1 mm strip, five rows below the waterline
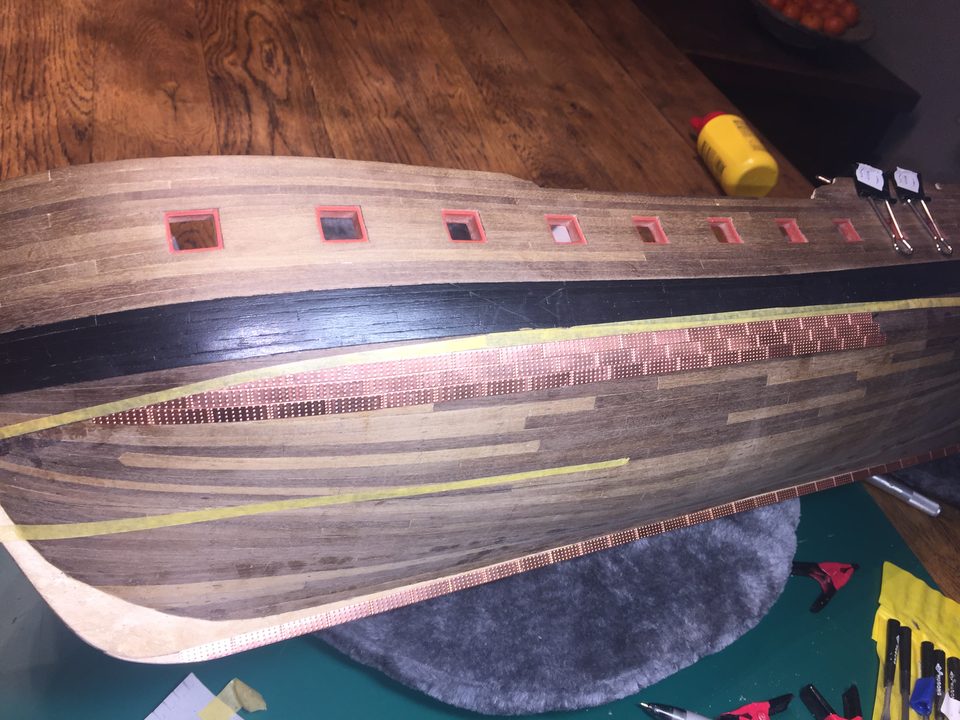
The new start along the waterline: the first rows of plates under the strip, with the yellow tape as the upper limit.
Result
With the belts along the sheer, the stealers at the sternpost and the paper strips as a guide, the first nine rows below the waterline went on intact; a little fudging here and there, but you only see it if you know. Next time we would start with this planning straight away instead of at the keel, which would save pulling off a few hundred plates.
Problems met with this technique
The plates followed straight lines instead of the sheer of the strakes. Marked out rows following the sheer of a plank, stealer plates at stem and stern, keel and posts horizontal. (Tips from pietsan, Henkl, Hans Groenenberg) to the register
The plates on the underside of the keel were not centred, so port comes out lower than starboard. Took everything off (came away easily) and started again. (Tips from pietsan) to the register
At its shallowest point the keel is only 1 or 2 mm deep. Glued on a piece to about 6 mm, exactly one copper plate wide. (Tips from amazone, Jaques, Henkl) to the register
Kit errata
Keel 1 to 2 mm at its shallowest point. Glued on a piece to about 6 mm, exactly one copper plate wide. to the register