Planking the upper deck off the ship with thread as caulking seam
Plank the upper deck off the ship with a king plank, 0.15 mm thread between the planks as caulking seam and temporary bulkheads underneath against warping, then scrape and oil.
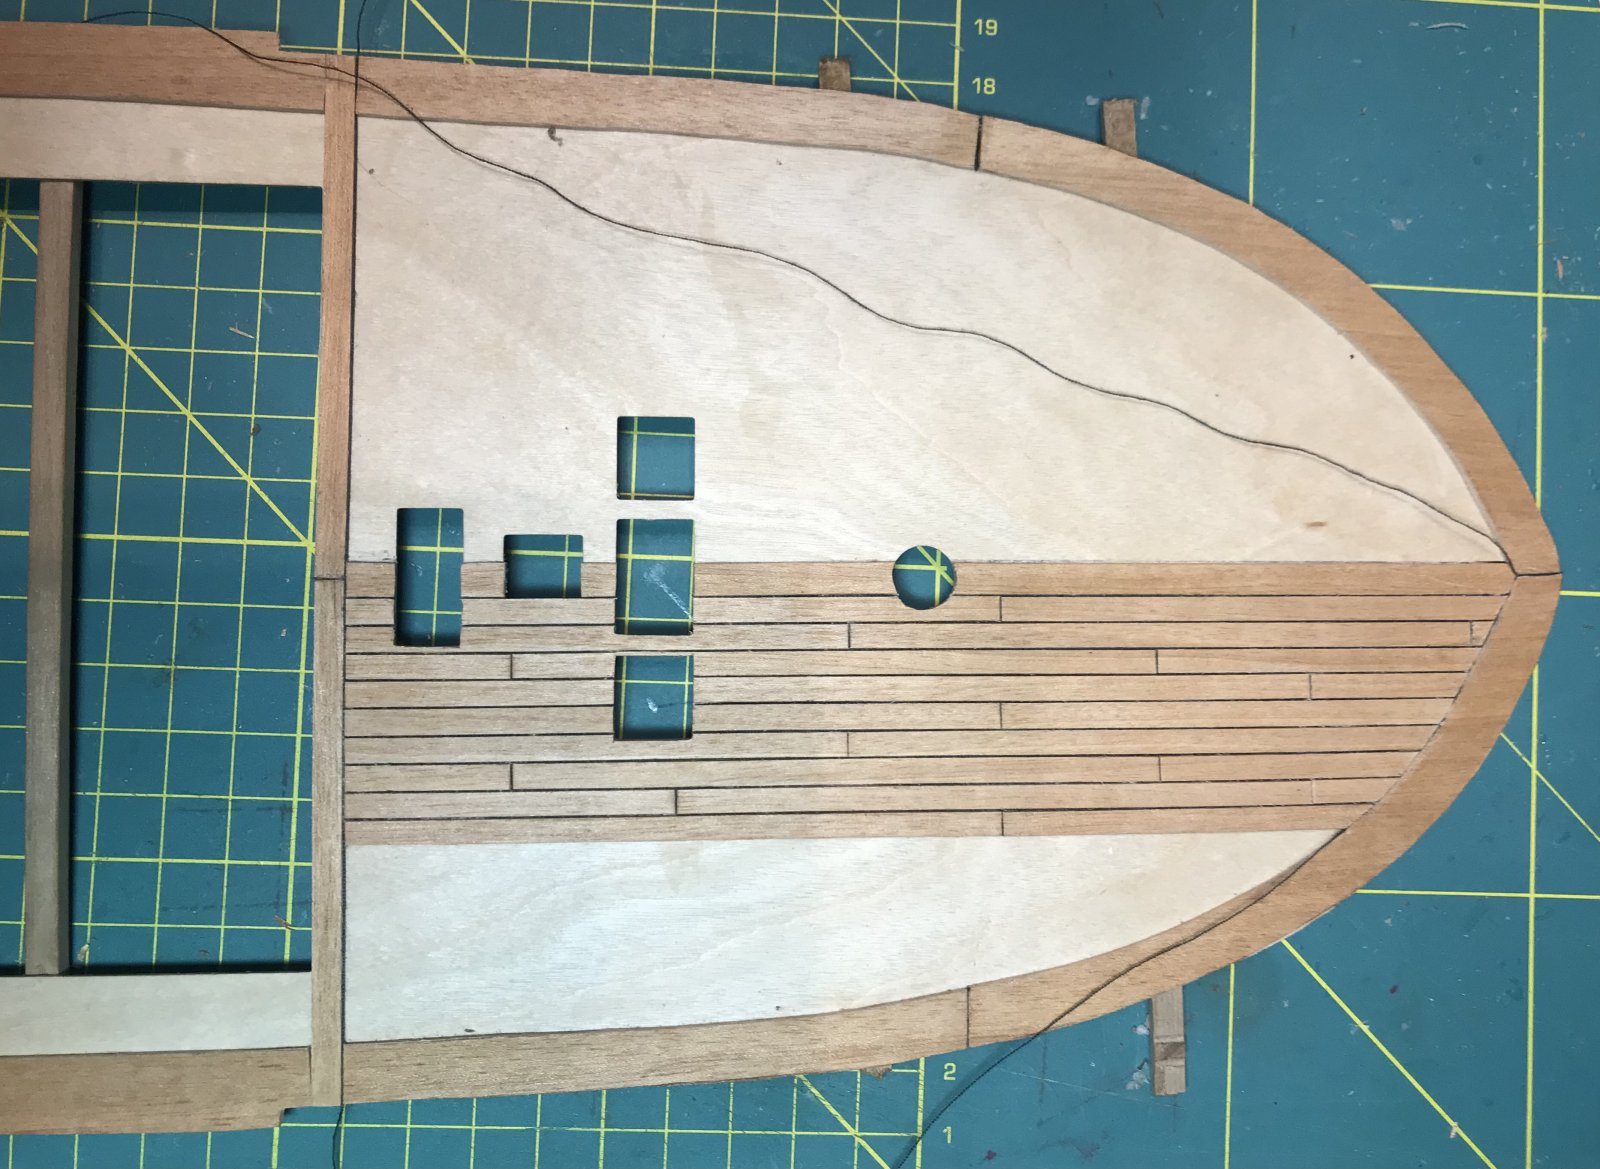
What you need
- hobby knife
- cabinet scraper
- small brush for the glue
- overhead transparency or masking tape to cover the gun deck
- deck planks 1 mm thick, 3.8 to 4.2 mm wide
- offcuts of the margin plank for the king plank
- thread 0.15 mm
- PVA glue
- scrap material for temporary bulkheads
- Rustins Danish oil
Dimensions
- thread 0.15 mm (real caulking seams 7 to 9 mm at 1:64 scale)
- margin plank 9 mm wide, 8 mm visible after 1 mm bulwark planking
- king plank 5 mm (a quarter wider than the other planks)
- deck planks 3.8 to 4.2 mm wide
- plank length: the manual keeps 150 mm for the upper deck (20.6, 9.6 m at scale); we kept the plank length of the gun deck (Mondfeld)
- Time
- several evenings
- Difficulty
- hard
- When in the build
- Phase 9,
- From the log post
- King plank laid with a sheer under the deck · forum
Before you start
The deck beams are glued and the guns on the gun deck are rigged. The plywood upper deck is still loose; plank it off the ship and fit it afterwards, it only needs to bend minimally to fit between the bulwarks. Cover the openings to the gun deck against dust and debris.
Take the plywood upper deck off the ship and plank it on the workbench; you can reach it far better and the margin plank will always fit properly. Meanwhile cover the openings to the gun deck, because planking produces a fair amount of mess.
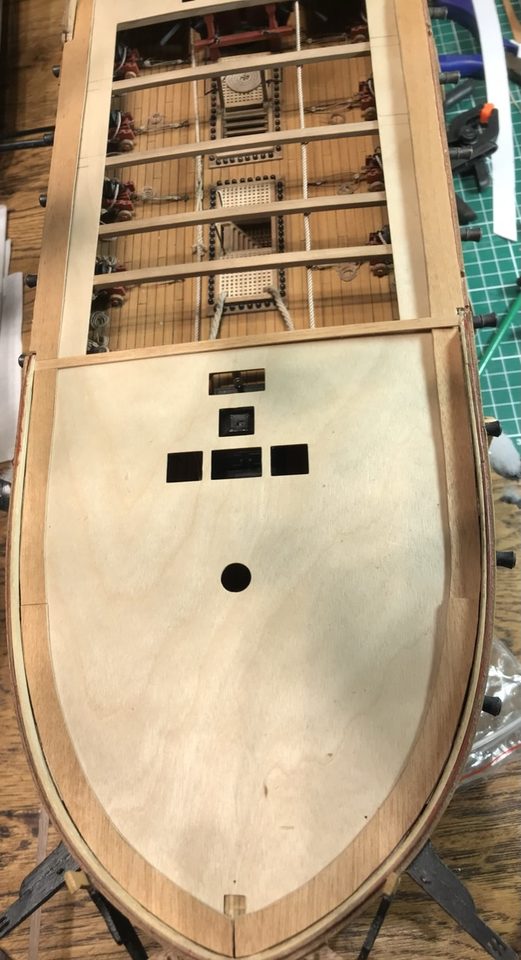
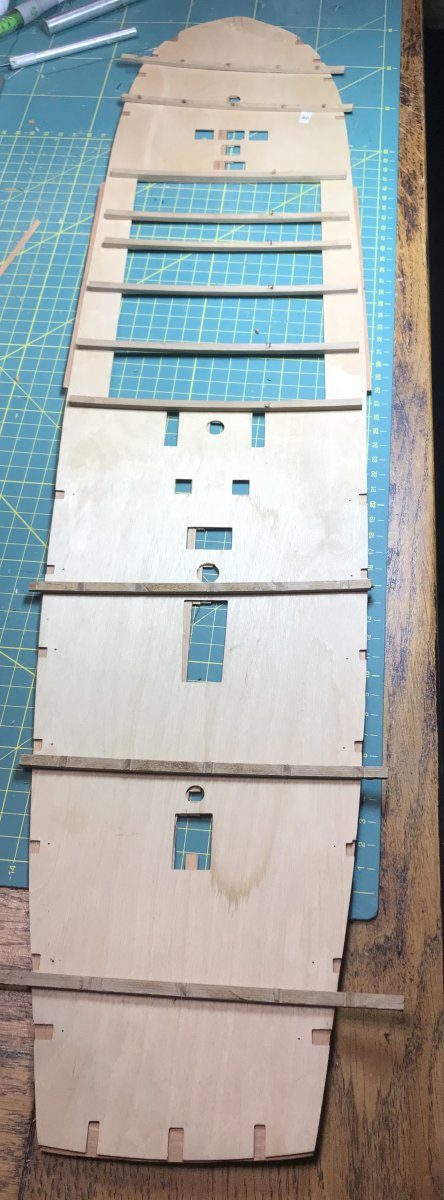
The bare plywood upper deck, still laid loose on the ship for a trial fit. Tip from Stephan Kertész: Cover the gun deck with overhead transparency, which is stiffer than plastic film. That way no debris and dust gets down below.
Watch out: Hans Groenenberg found it harder to fit a fully planked deck than to plank on the fixed deck. You take that risk deliberately.
Make the margin plank 9 mm wide and from two pieces, in sections, because trees that long did not exist. On top of it comes the 1 mm bulwark planking, so 8 mm remains visible on deck: exactly twice the width of the deck planks.
9 mm wide, 8 mm visible
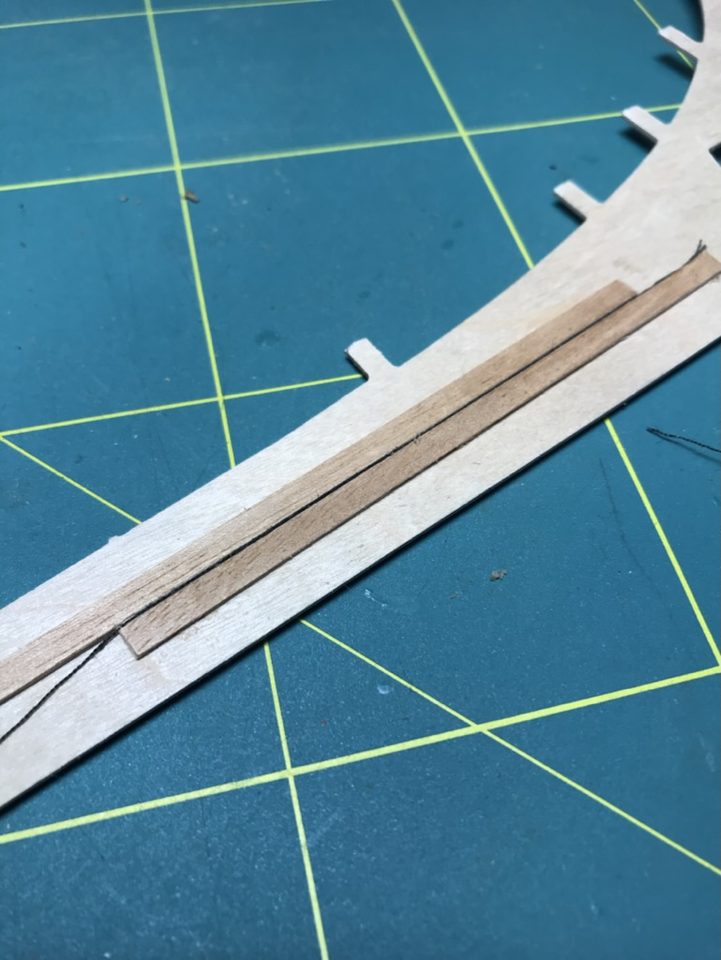
The margin plank follows the curve of the deck at the bow; the loose sections lie ready on the cutting mat. Watch out: Lay a margin plank along the waist too, even if it may not belong there. Otherwise you get a ridge, and that does not work for the planksheer.
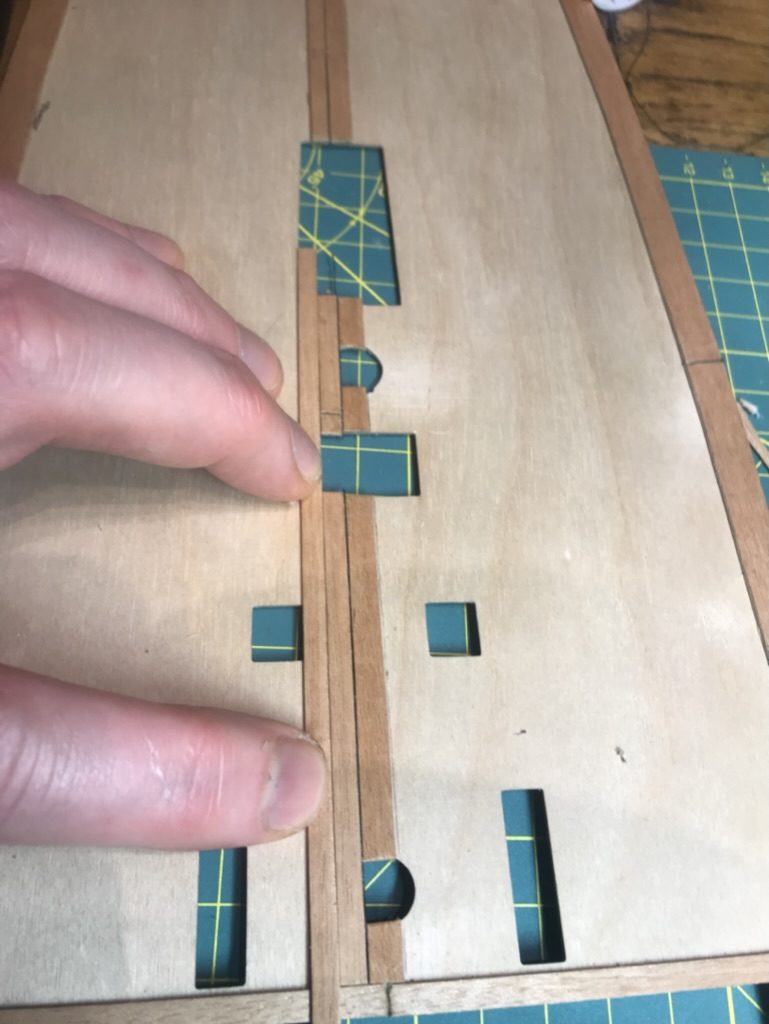
Start in the middle with a king plank, a quarter wider than the other planks: here 5 mm. There is none in the kit, but as it is all short pieces you can make it nicely from the offcuts of the margin plank.
king plank 5 mm
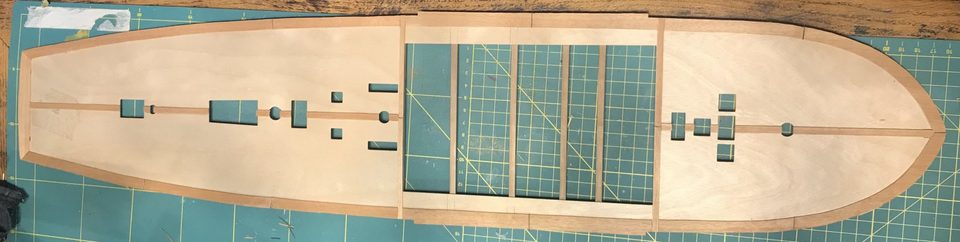
The 5 mm king plank along the length of the deck, with the cut-outs for hatches and mast. First lay a trial seam with and without thread side by side. Thread of 0.15 mm corresponds at 1:64 scale to a real caulking seam of 7 to 9 mm. See whether you like the seam before laying the whole deck that way.
thread 0.15 mm
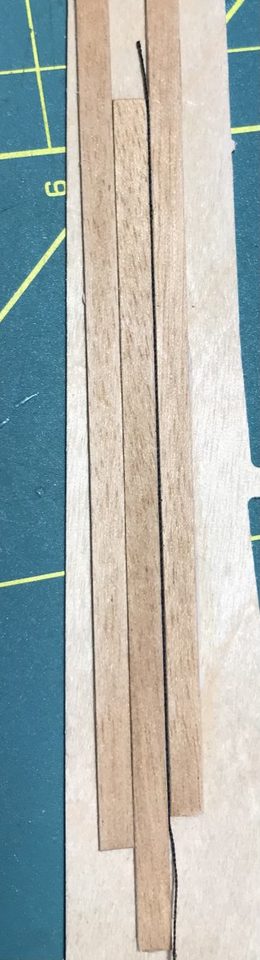
Test piece: on the left a seam with thread between, on the right without. Tip from Hans Groenenberg: In the past it was done much more often with thread in between, and it is being used again on the Kolderstok fluyt. I would do it.
Watch out: The oil-based pencil that worked so well on the gun deck had run out and the shops were shut. So the thread was also an emergency measure that turned out well.
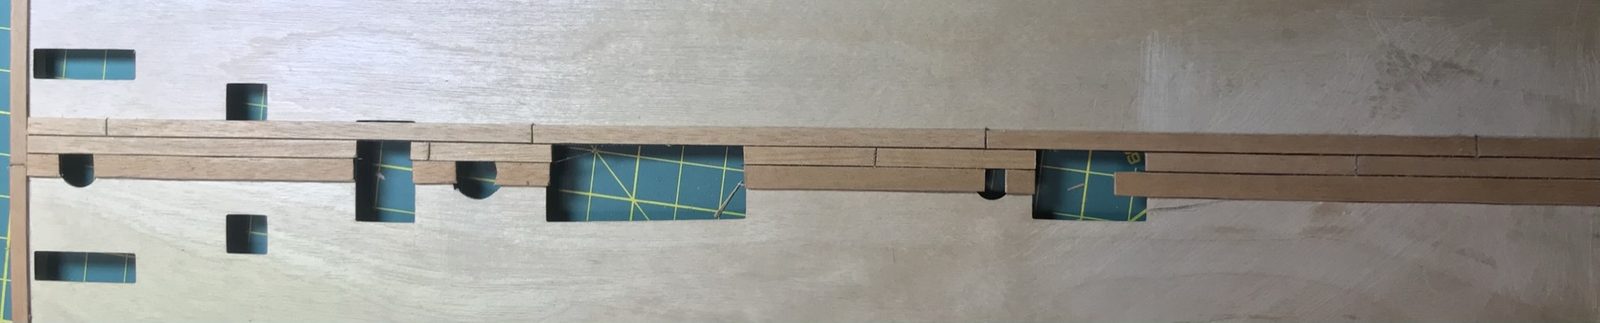
Cut bulkheads with the sheer of the deck from scrap material and glue them temporarily along the whole underside. That way the deck follows the correct sheer while being planked and does not warp. Lay the deck on the model regularly to see whether it is going well.
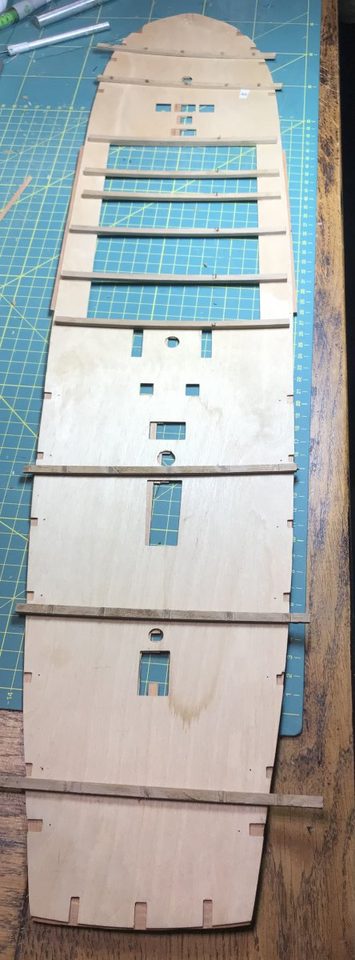
The underside of the deck with the temporary bulkheads that hold the sheer. Tip from Herby63: Your workbench and cutting mat are flat, but the deck has a sheer along its length and across its width. Planking it flat makes the deck stiffer, and then it may no longer take that sheer later. Ideal is a jig in the shape the deck has to take.
Watch out: My first idea was to put the deck under the cutting mat after every session. That is exactly the fixing flat that Piet and Herby advised against.
Lay the planks one by one next to the king plank and lay a length of thread between each plank. Glue the sides of the planks as well, so the thread is held firmly. Keep to a fixed planking pattern, the three-butt shift from zu Mondfeld (0-1-3-2).
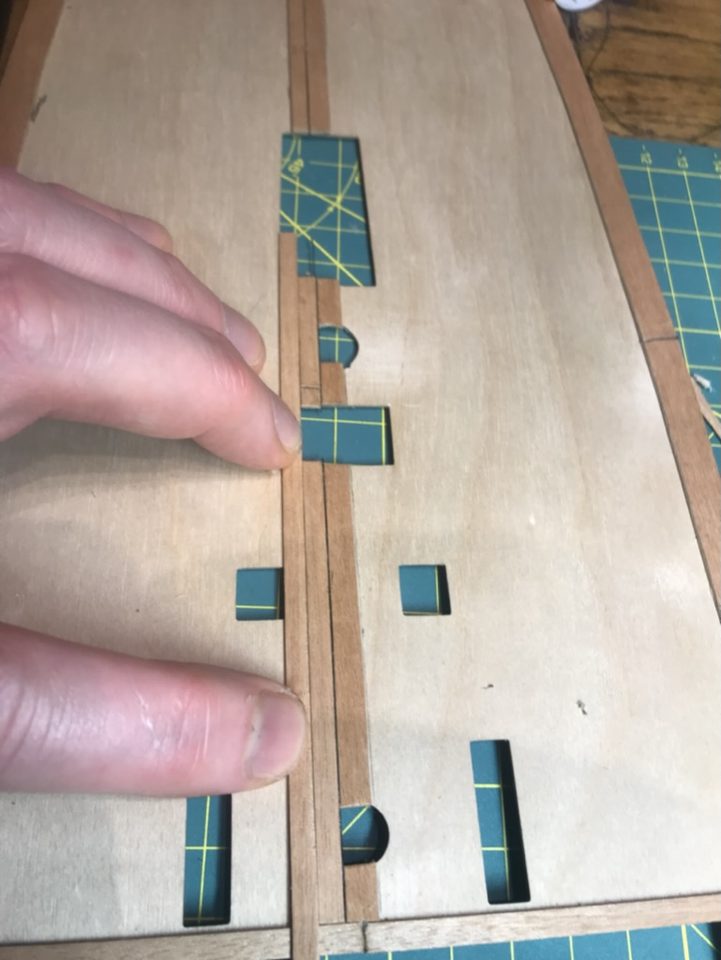
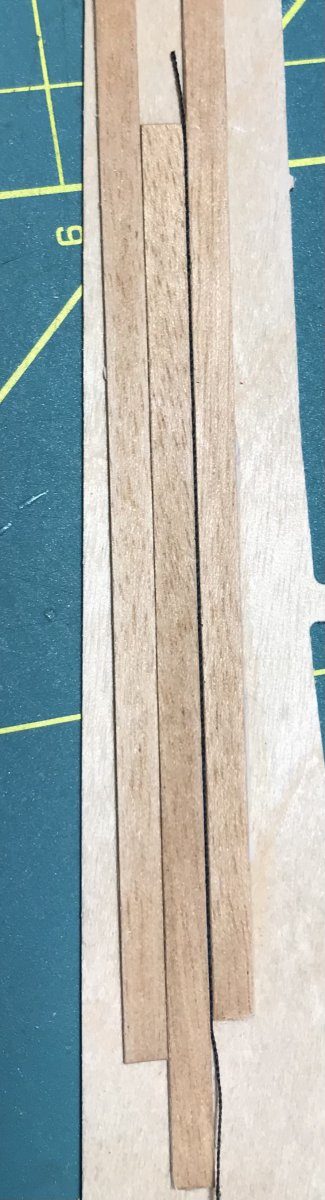
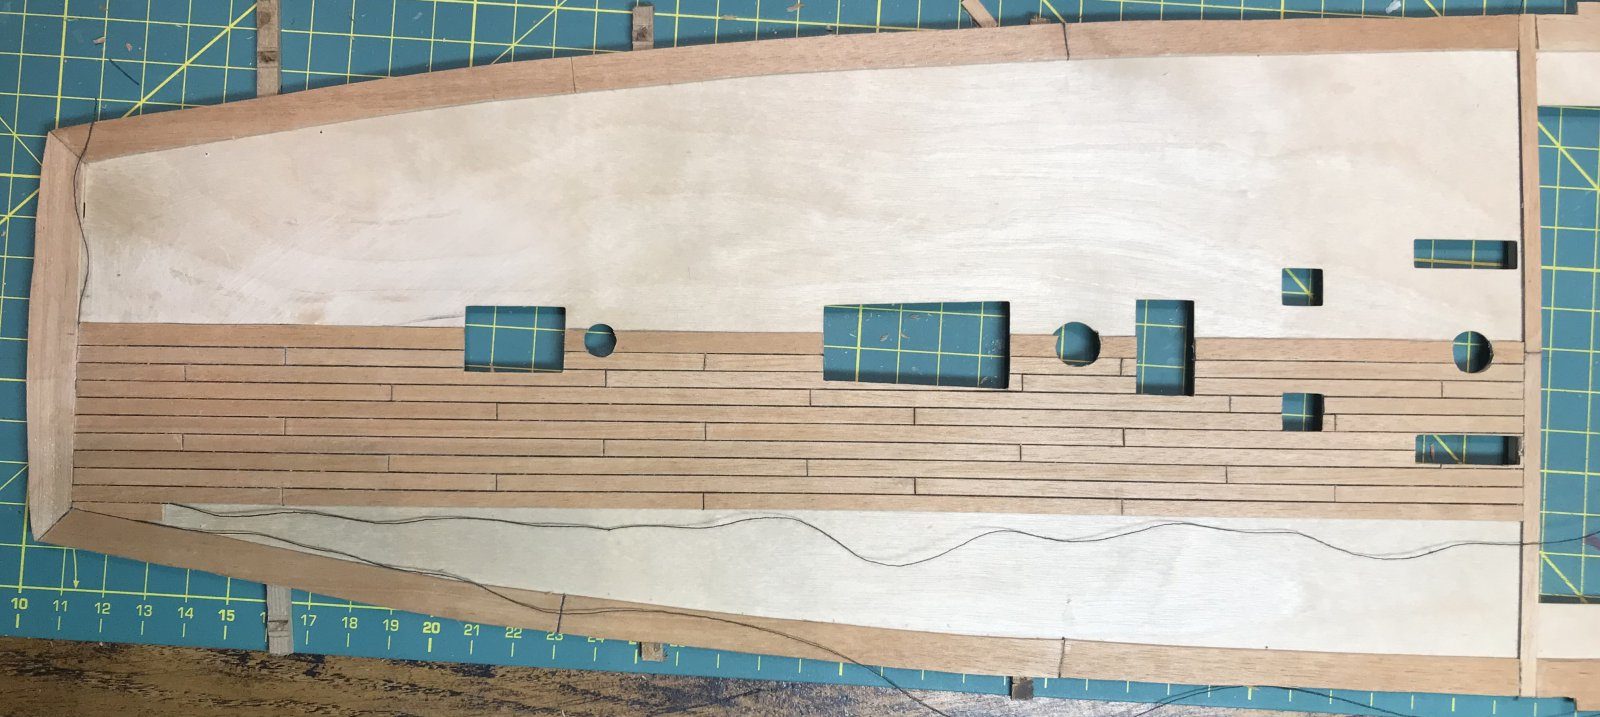
The first planks next to the king plank are pressed down; the thread lies in the seam. 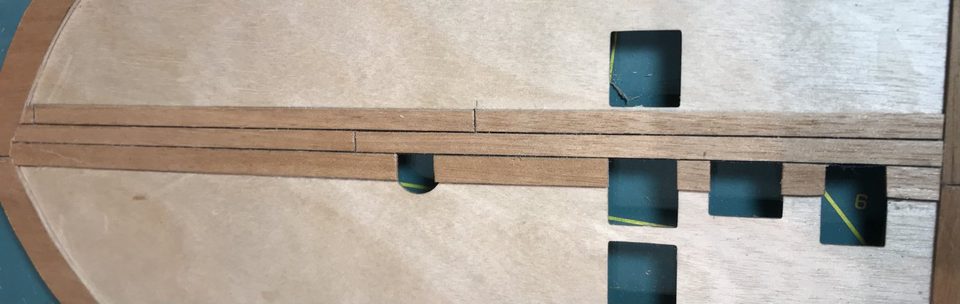
Detail of the caulking seams: the thread draws a thin dark line between the planks. Tip from Stephan Kertész: If the thread is loose, fix it from above with matt varnish before scraping. Then you scrape that layer away, the thread is fixed and no longer picks up dust.
Watch out: In hindsight the seams are just a little too wide, but they look good to the eye. Then make the other side as symmetrical as possible.
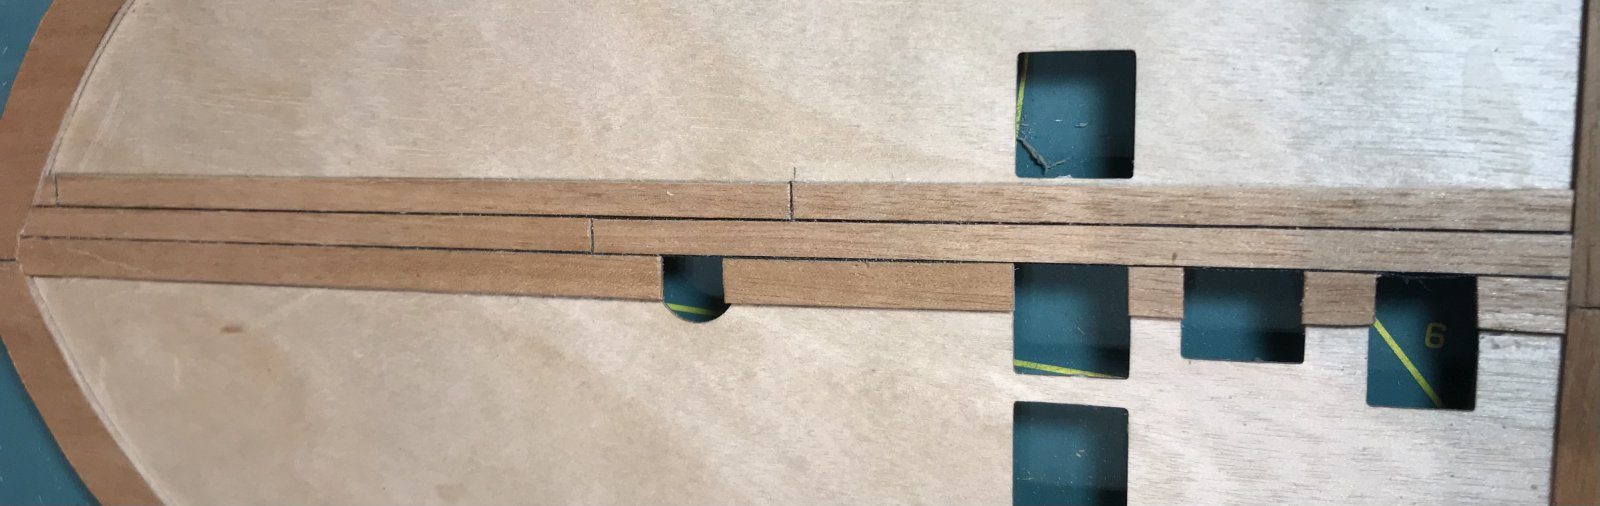
Let the planks into the margin plank at the bow (joggling). The planks vary in width between 3.8 and 4.2 mm, so measure and sort, so that the planks joggle in at the same height on both sides.
planks 3.8 to 4.2 mm
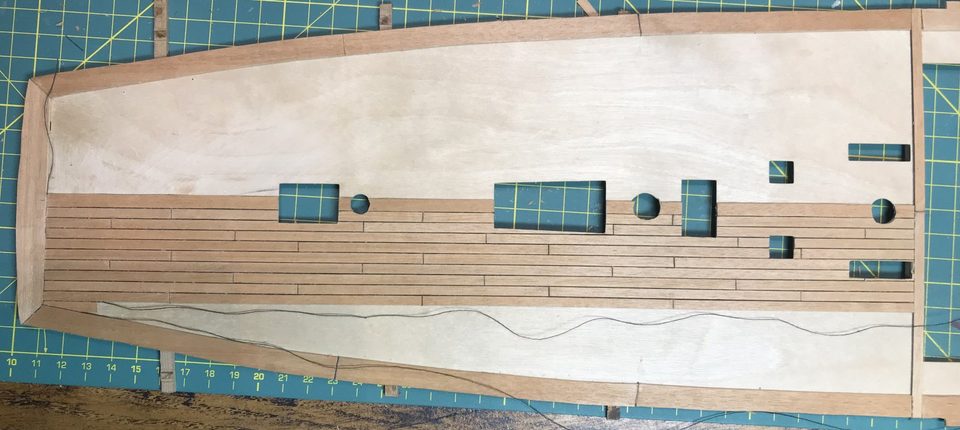
Overview of the half-planked deck: the waist on the left, on the right the planks joggled into the margin plank at the bow. Watch out: Because of the symmetrical joggling, the lines at waist and forecastle deck no longer come out exactly in line. That is the only drawback and I have accepted it.
After laying, scrape the whole deck with a cabinet scraper, and do it twice. Scraping removes glue residue and keeps the sheen of the wood, whereas sanding goes dull and leaves scratches across the grain. Work carefully and with the grain.
Tip from Stephan Kertész: The model-building books say you do not sand the deck with sandpaper but scrape it with a blade. The wood keeps its sheen and with a blade you have more control.
Watch out: Before you know it you scrape the threads out of the butt ends between the planks. Some caution is called for.
Before fitting, apply a thin coat of Rustins Danish oil and rub it off. First check that your oil is still good; old oil can go off.
Tip from pietsan: Apply a thin coat and rub it off.
Watch out: The oil left over from the gun deck turned out to be no good any more. Ordered new Rustins Danish oil.
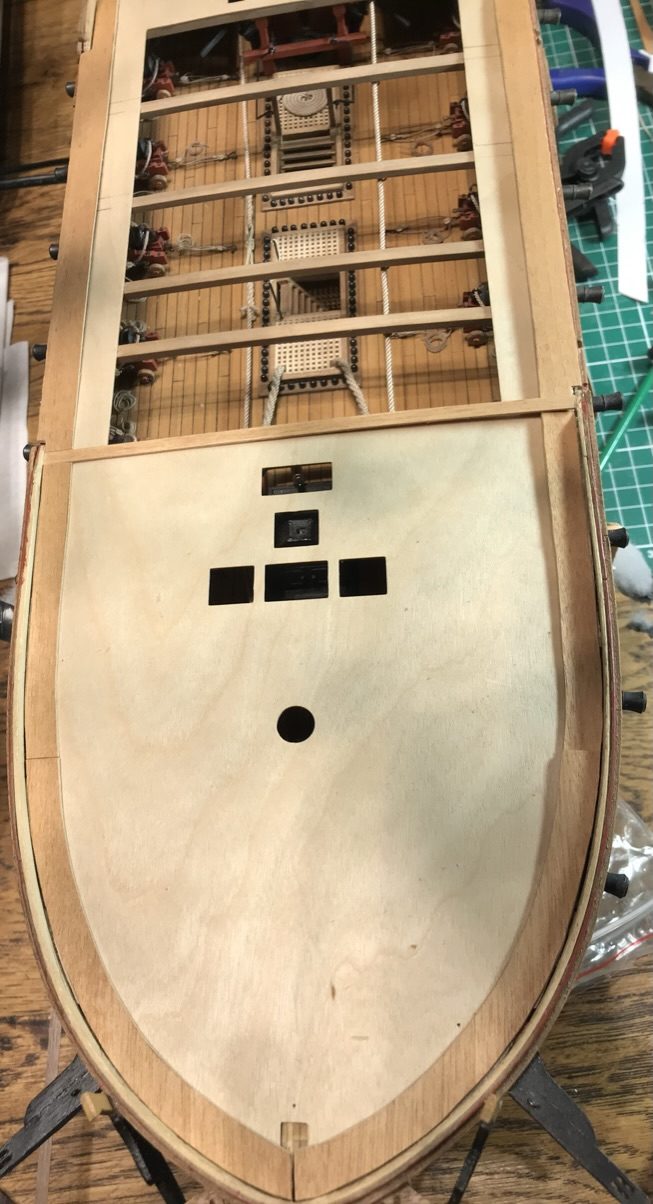
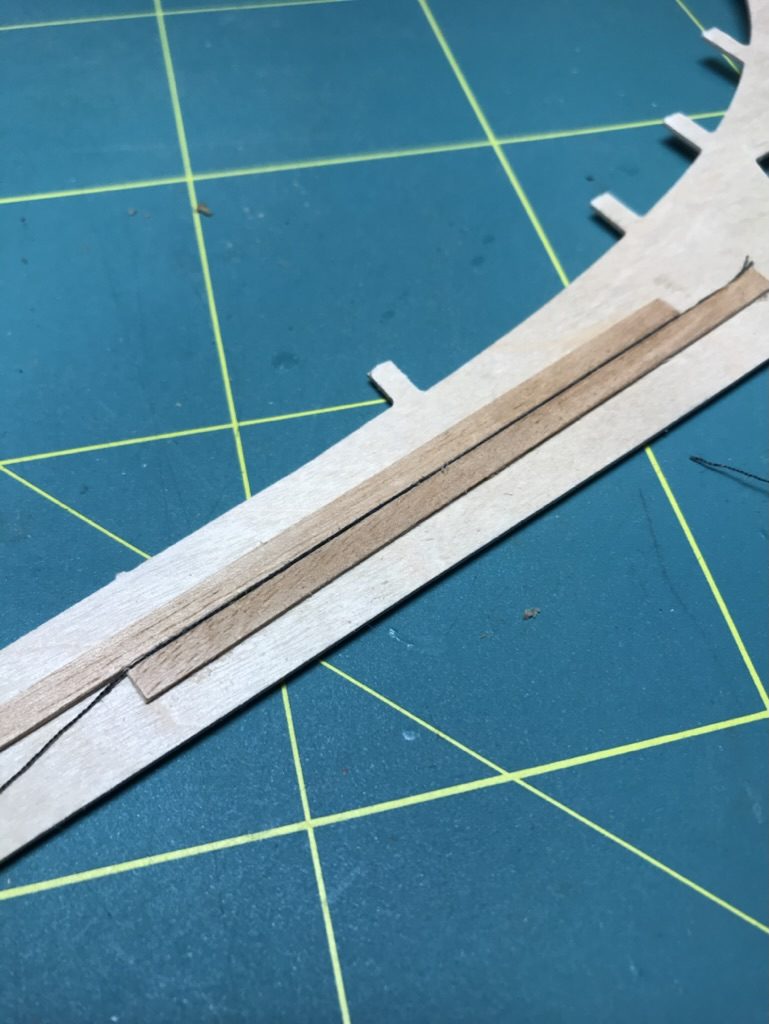
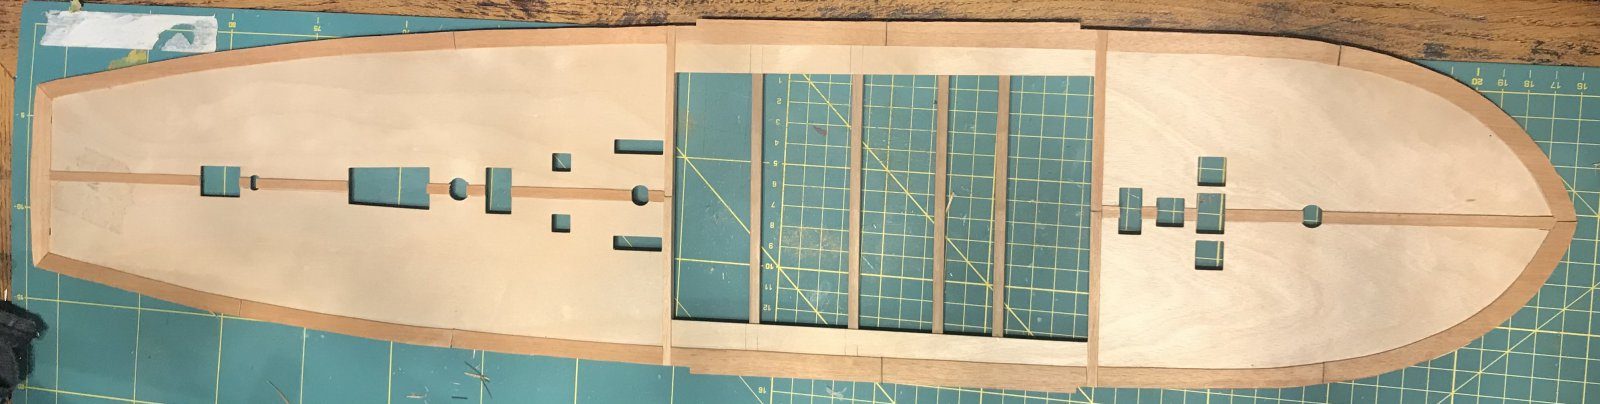
Result
The thread caulking seams please me very much, even though you rarely see it on the forum. Thanks to the temporary bulkheads the deck took the sheer; I would not have got that in so easily afterwards, as Stephan rightly remarked.
Problems met with this technique
The oil-based pencil for the caulking seams has run out and the shops are closed. 0.15 mm thread as caulking seam (real seams 7 to 9 mm). (Tips from Hans Groenenberg) to the register
Risk that the loose planked deck warps. Temporarily glued bulkheads with the correct camber under the deck. (Tips from pietsan, Herby63, Stephan Kertész) to the register
Because the planks were let in symmetrically, the lines at the waist and forecastle no longer line up. Accepted as the only drawback. to the register
In the same series: Decks
- Pre-sanding deck strips with 320 grit
- Making the margin plank and joggling the deck planks
- Deck planking with caulking seam and four-butt shift
- Deck planking plank by plank
- Planking the upper deck off the ship with thread as caulking seam
All how-tos · Deck planking: margin plank, joggling and caulking seams