Marking out the waterline for the coppering
Set the ship level, draw a horizontal line round the hull with a simple jig and mark it with masking tape, so the top row of copper plates finishes on a crisp line.
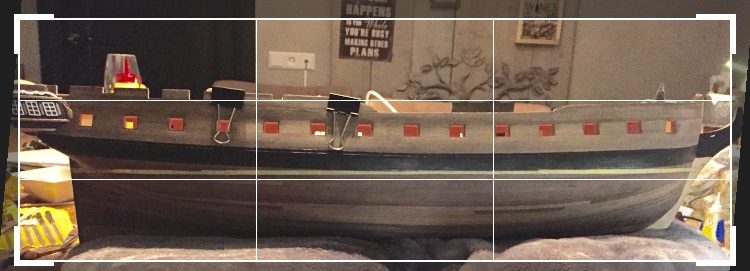
What you need
- plywood cradle to hold the ship level
- jig for drawing a horizontal line (block with a pencil at a fixed height)
- mechanical pencil
- level, flat surface (for us the induction hob)
- grid or photo with guide lines for checking
- masking tape, preferably yellow or another conspicuous colour
Dimensions
- exactly the same distance from the keel and from the wale on both sides
- Time
- several evenings
- Difficulty
- moderate
- When in the build
- Phase 5,
- From the log post
- Copper first then the mouldings · forum
Before you start
The hull is planked and sanded and the wale is on. Decide on the order of work: for us the coppering came before the mouldings, because the ship still has to go on her side and upside down for the copper and the mouldings would get damaged. So the mouldings and planksheer are not yet fitted.
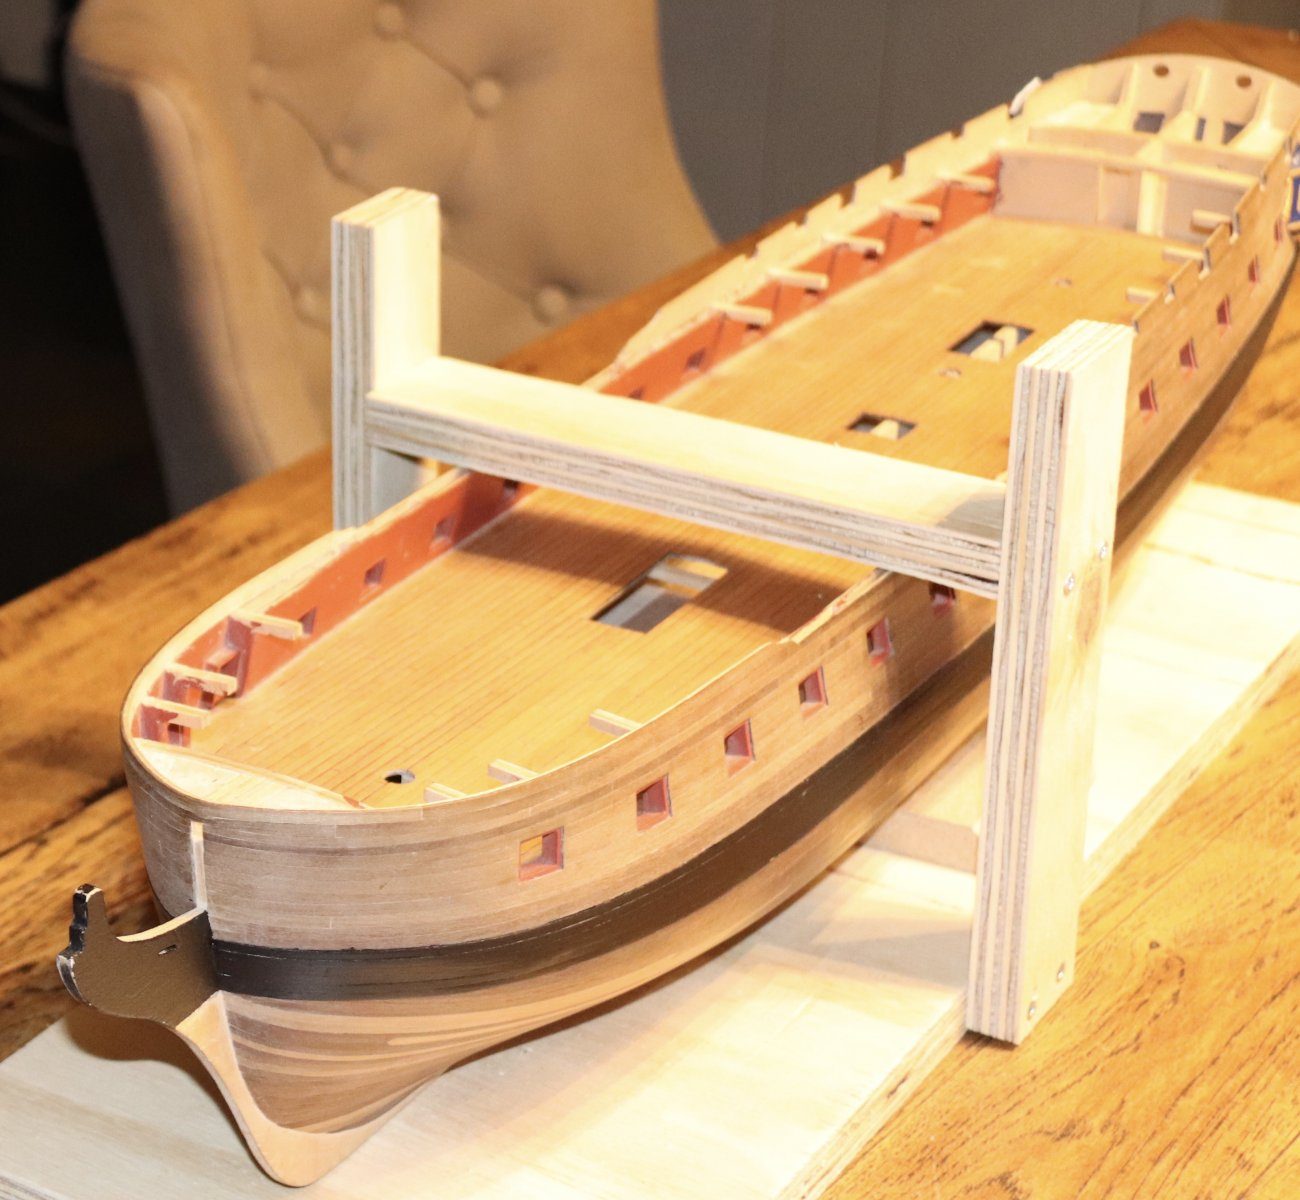
Build a simple plywood cradle in which the ship stands upright and level: a base board with an upright on each side and a cross beam over the deck. Put the cradle on a flat surface and check that the keel is at the same height along its whole length.
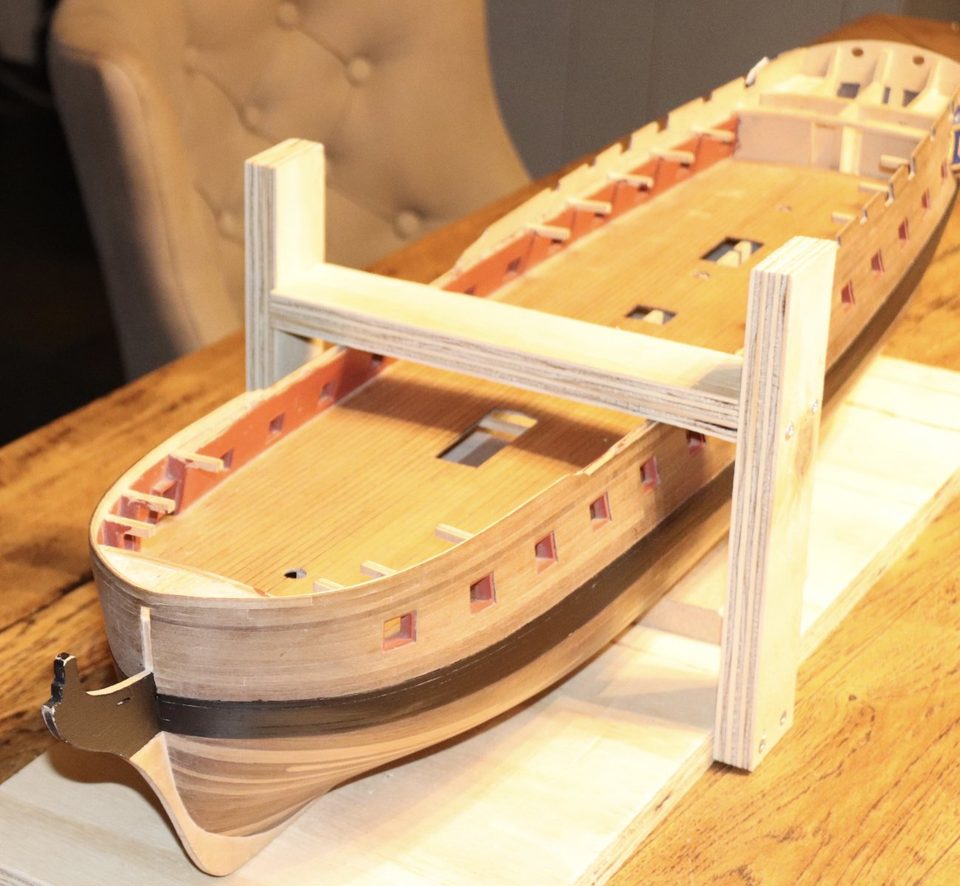
The cradle: a base board with two uprights and a cross beam over the deck keeps the ship upright and level. Tip from pietsan: Do not start the copper plates at the keel but at the waterline. If you do it the other way round you will most likely not come out right at the waterline; bits or half plates stand out far more there than at the keel.
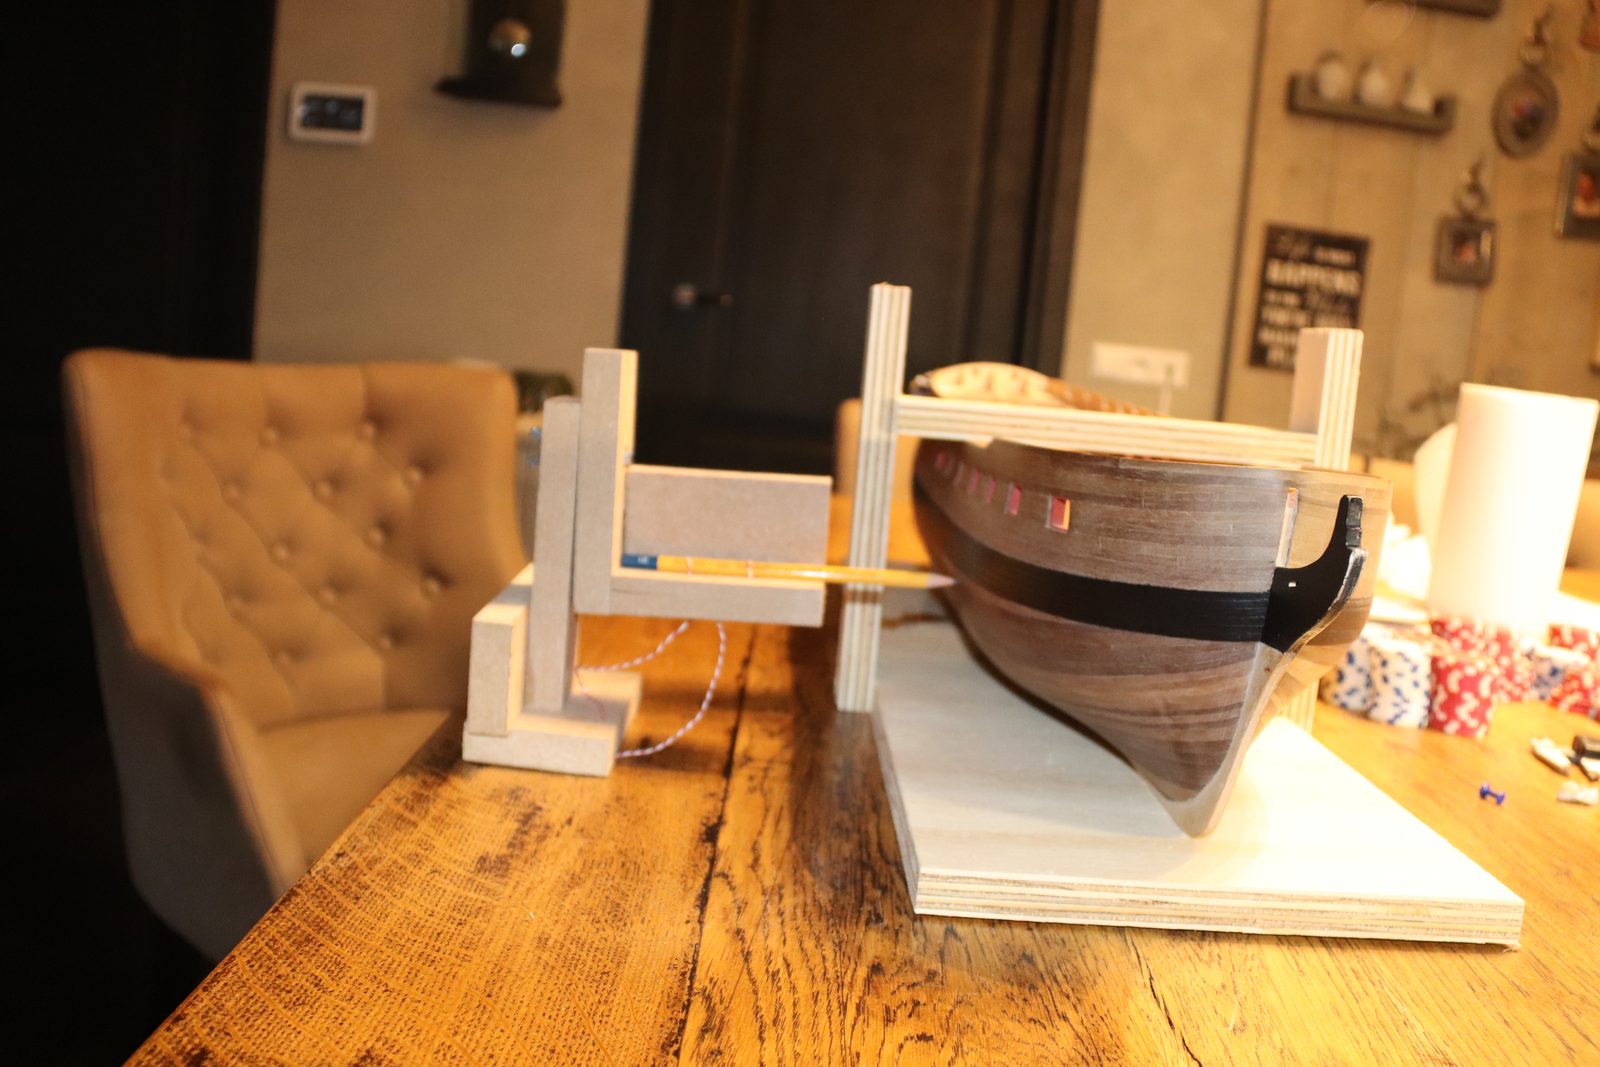
Make a block or stand that holds a pencil at a fixed height. Put it next to the hull on the same surface as the cradle and slide it along the ship, so the point travels over the hull at a constant height. Draw the line right round, from stem to sternpost and back along the other side.
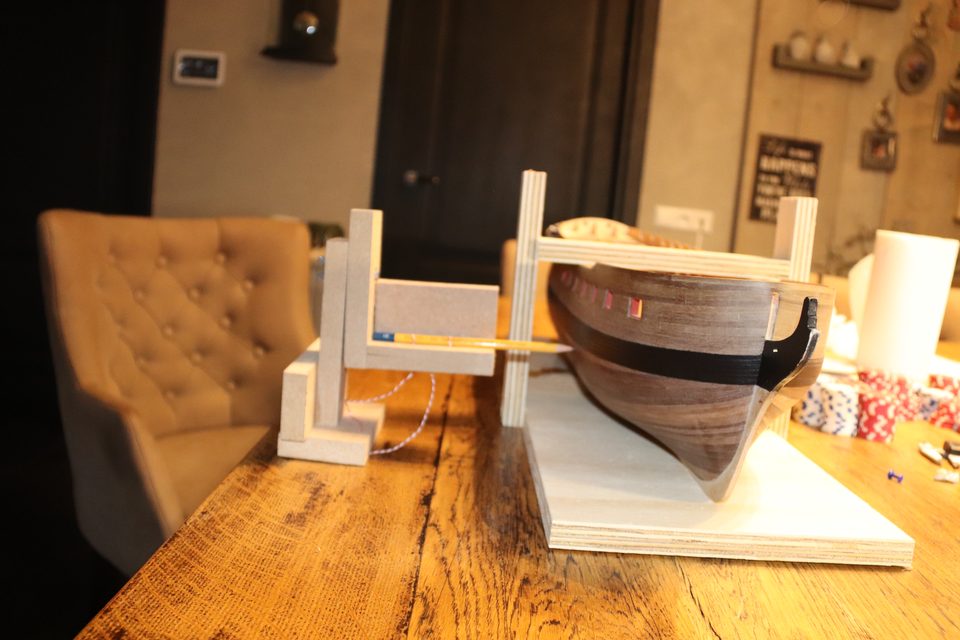
The jig next to the sternpost: a block holding the pencil at a fixed height, which you slide along the hull. Watch out: Our first jig was not stable enough. A block that wobbles or a pencil that gives produces a line that wanders up and down.
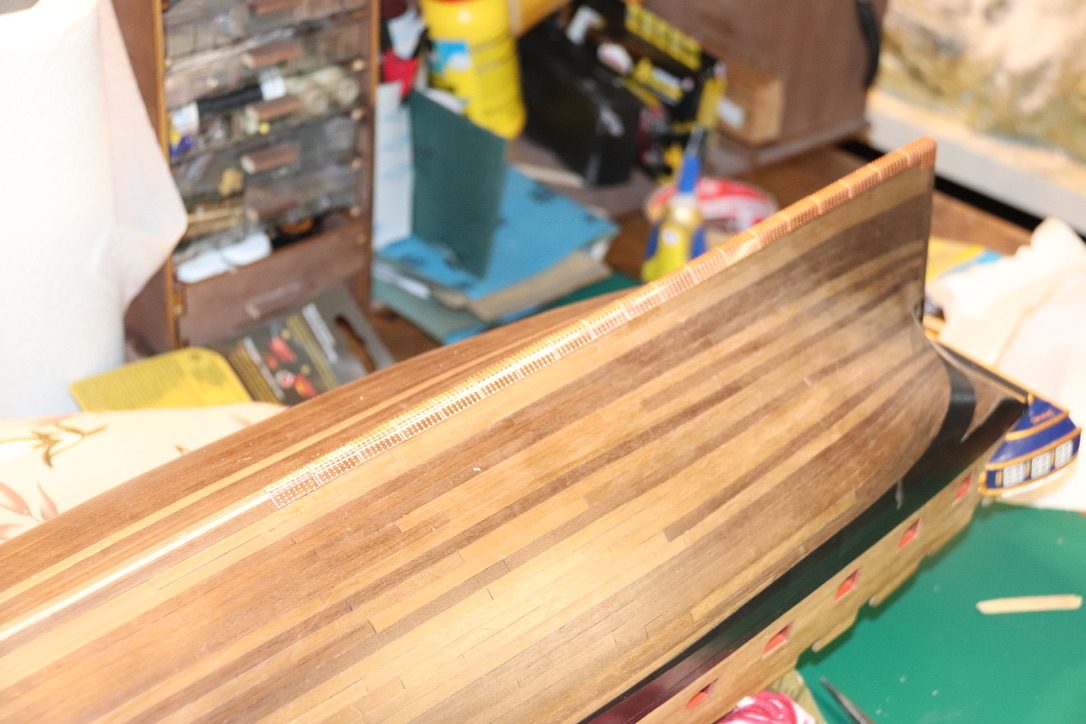
Apply masking tape with its bottom edge exactly on the drawn line, so the tape marks the boundary of the copper and the plates can butt up against it. Work in short lengths, especially round the curves at the bow and sternpost, and press the edge down well.
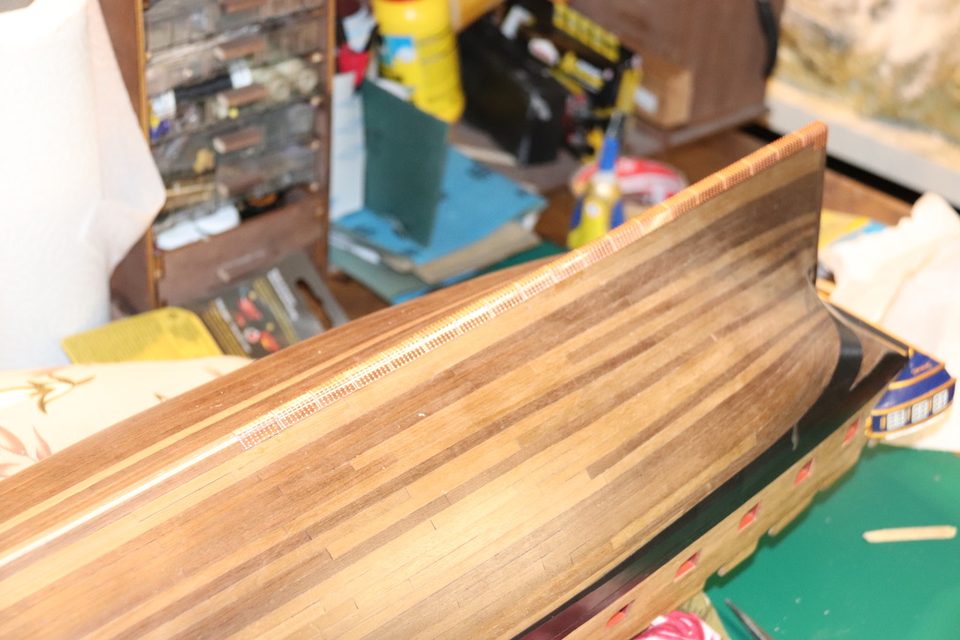
The hull upside down with the tape along the waterline: the bottom edge of the tape is the line the copper will meet. Stand the ship upright again, step back and take a photo square-on from the side. Check that the tape runs parallel to the keel everywhere. For us the tape seemed to run slightly downhill at the stern; we corrected that by eye.
Watch out: A line that looks fine close up can undulate from a distance. Our first plates along the waterline looked like a wave pool because of it and all had to come off again.
If the line is not straight, start again and first find a surface that is smooth, big enough and genuinely level. Table and floor were no good for us; the induction hob turned out to be smooth, large and level. Put both the cradle and the jig on that surface.
Draw the final line with a mechanical pencil, so the stroke stays thin and the same thickness everywhere. Measure on both sides that the line is exactly the same distance from the keel and from the wale. Allow an evening for the whole hull.
the same distance from keel and wale on both sides
Apply yellow masking tape with its bottom edge on the new line. Take another photo square-on from the side and lay a grid of straight lines over it; you will see at once whether the tape now runs straight. Only then start on the top row of plates.
Tip from pietsan: Measure out the waterline with pencil dots, or take it from the drawing which is 1:1, and then thin yellow masking tape from the DIY store along the dots. (modelbouwforum, 19 April 2016)
Watch out: The manual (15.3) has an emergency measure for a waterline that is not straight after coppering: tape above the line and touch up the gap with copper paint. With a tight line beforehand and a 1 x 1 mm strip along the copper that is not needed.
Result
The first line looked fine but turned out to be a wave pool as soon as the first plates lay along it; the second line, drawn on the induction hob and measured from keel and wale, runs straight. Next time we would find a level surface straight away and make the jig sturdier, which would save a few days.
Problems met with this technique
The first plates along the waterline looked like a 'wave pool'. Plates off, induction hob as a level base, line drawn crisply with a mechanical pencil at equal distance from keel and wale. to the register