Making the upper deck gratings lower with a camber
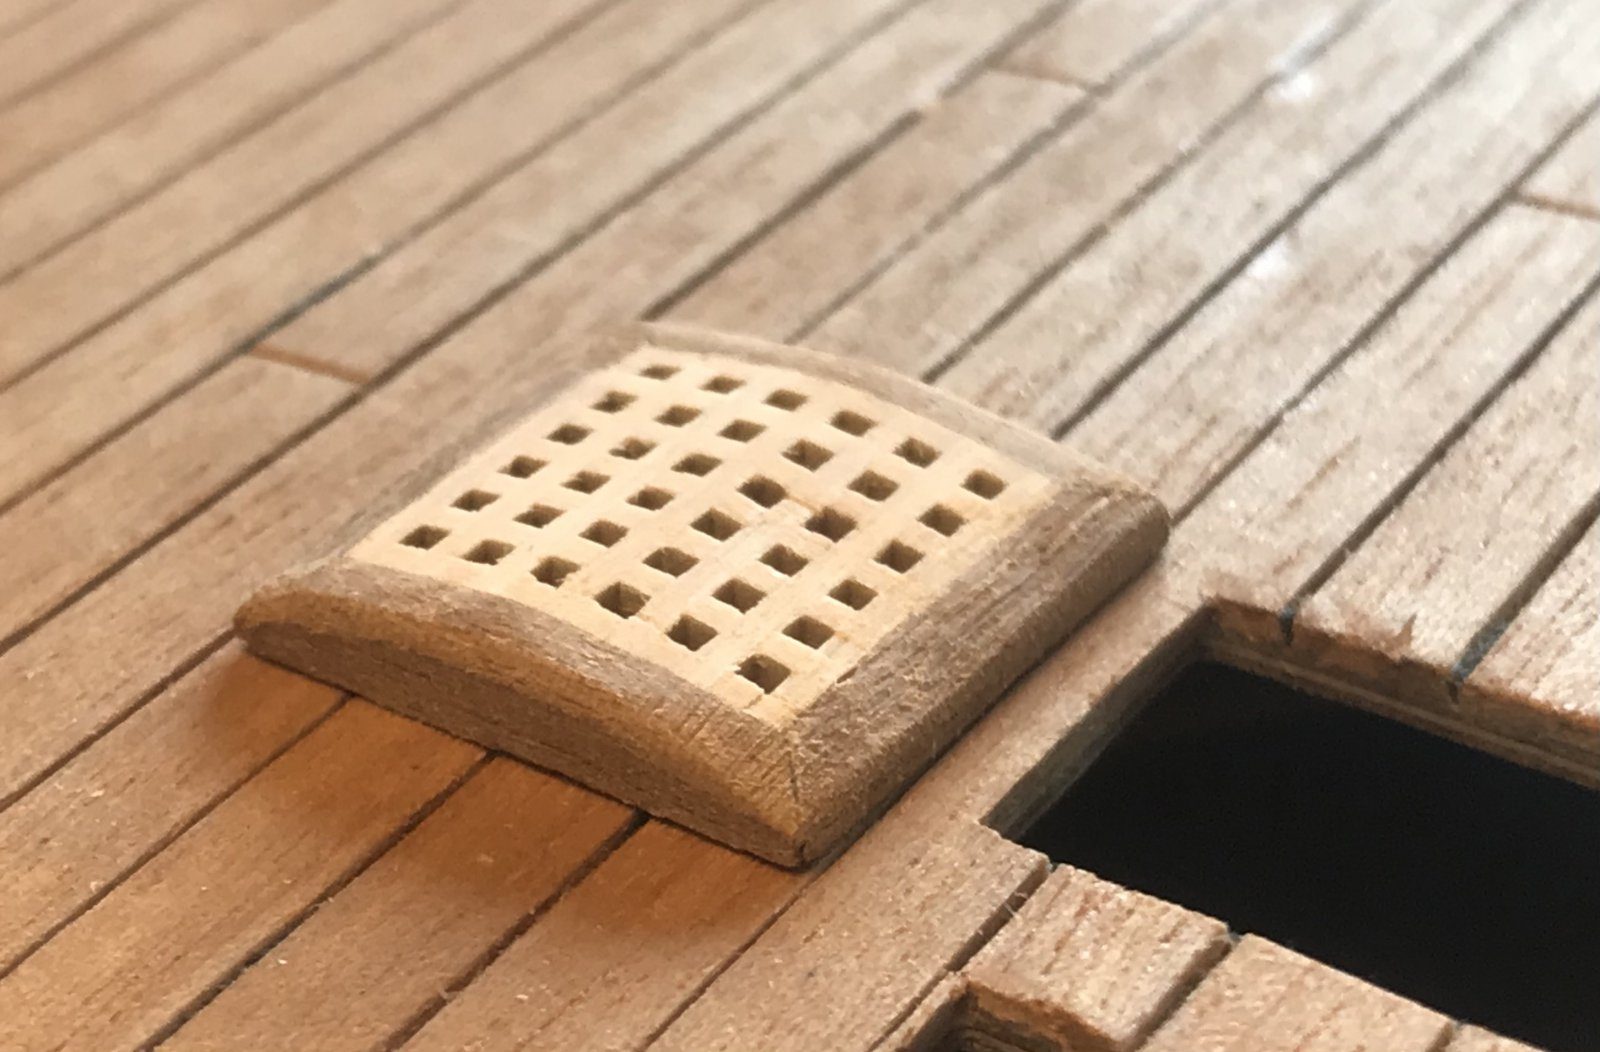
Do not make the upper deck gratings with the 2x2 mm coaming from the manual, but 1 to 2 mm high with a subtle camber along the length of the ship, as the sources indicate.
What you need
- hobby knife
- sandpaper
- brush
- gratings from the kit
- strip material for the coaming
- clear matt varnish
Dimensions
- grating 1 to 2 mm high (6 to 12 cm full size)
- manual: 2x2 mm coaming (a 12 cm coaming, higher still with the grating on top)
- only on the gun deck sometimes 12 inches, about 4 mm at this scale
- Time
- an evening
- Difficulty
- moderate
- When in the build
- Phase 9,
- From the log post
- Gratings on the upper deck · forum
Before you start
The upper deck is planked and the hatch openings are cut out. First read up on how high gratings on an upper deck really were, for instance in Lavery, before following the manual.
Make one grating according to the manual with a 2x2 mm coaming and one grating low, and put them side by side on the deck. Convert the height: multiply by 64 and judge whether that is realistic. A 2 mm coaming is already 12 cm at full size, and more with the grating on top.
2 mm at scale = 12 cm full size, 4 mm = 24 cm
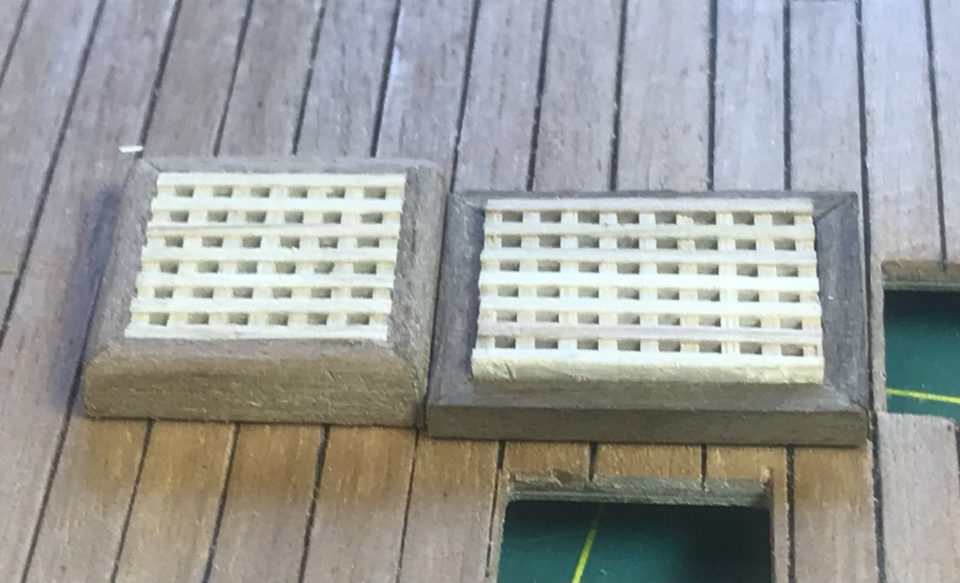
Left the low grating, right the grating with the 2x2 mm coaming from the manual. The difference in height is obvious. Tip from Stephan Kertész: Multiply the height by 64 and see what that is at full size. I do not think gratings stood more than ten centimetres or so above the deck.
Watch out: Oddly enough the manual prescribes 2x2 mm. Do not follow that blindly; in the photo the low grating immediately looks more natural.
For the upper deck keep to 1 to 2 mm, 6 to 12 cm at full size. Only on the gun deck were the hatches or gratings sometimes 12 inches high, because more water came in there through the gunports. On the upper deck they were lower.
1 to 2 mm high
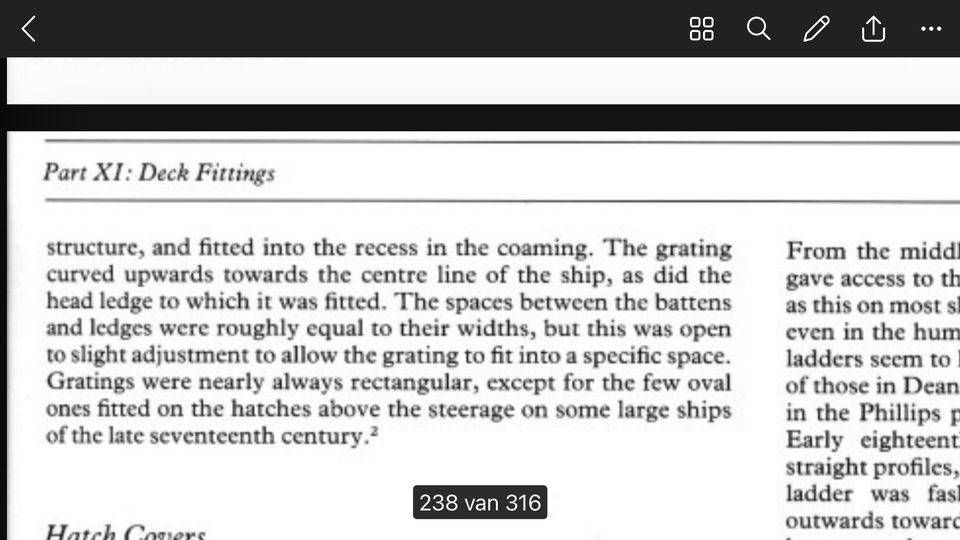
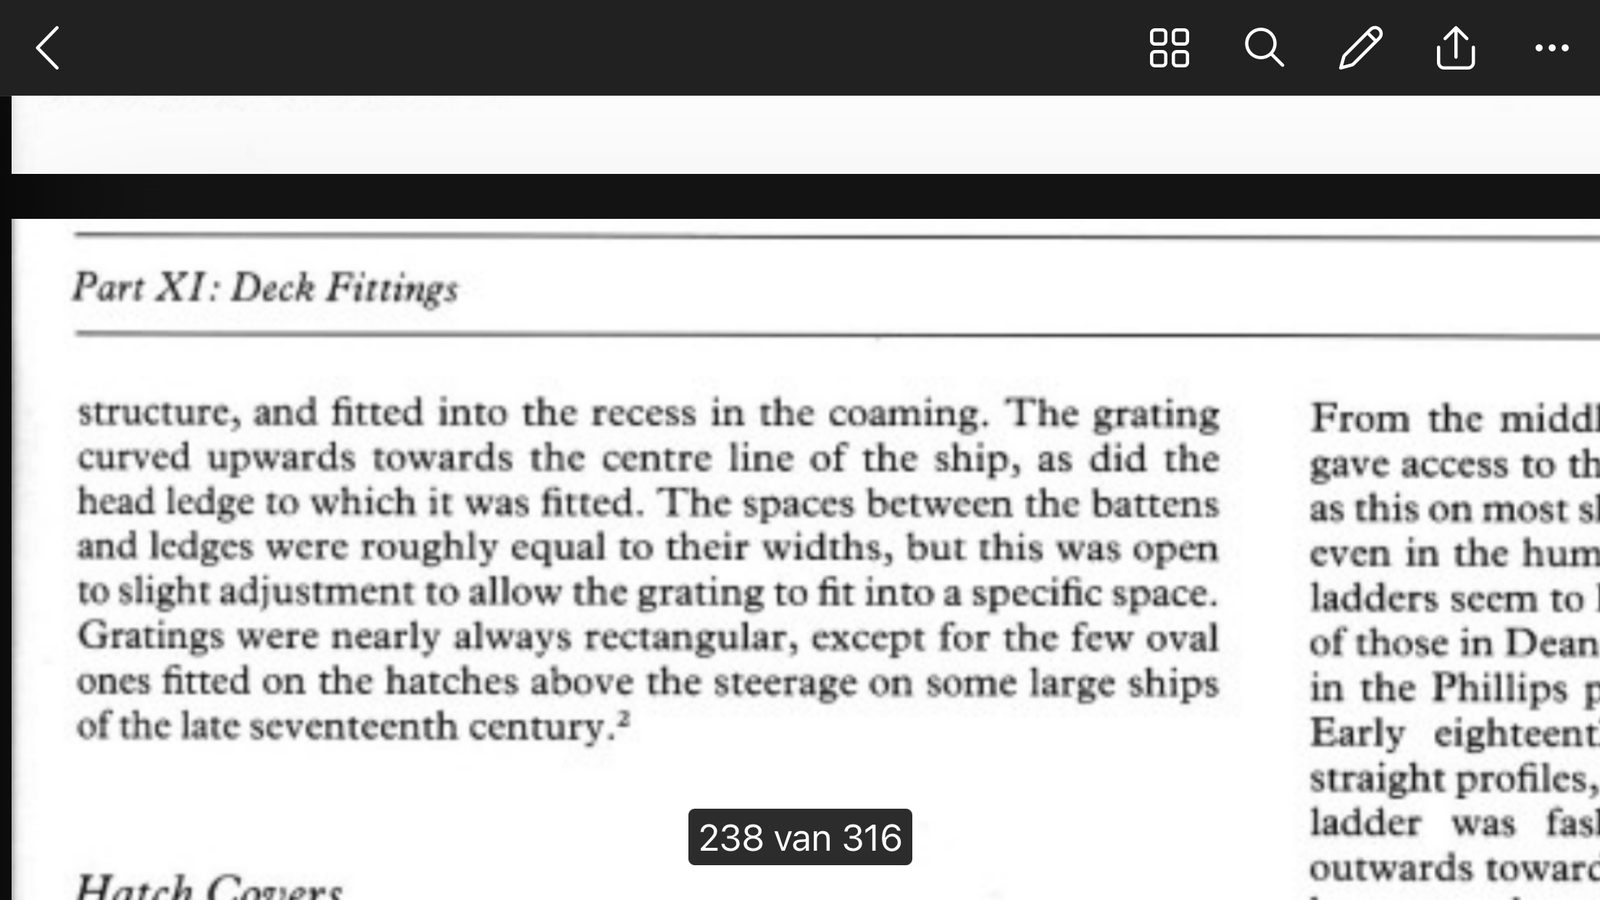
The text from Lavery on which the height and camber of the gratings are based. Reduce the coaming round the grating to the chosen height of 1 or 2 mm above the deck. Keep the coaming narrow and do not let the grating stand far proud of the coaming; there is no reason to assume that was the case.
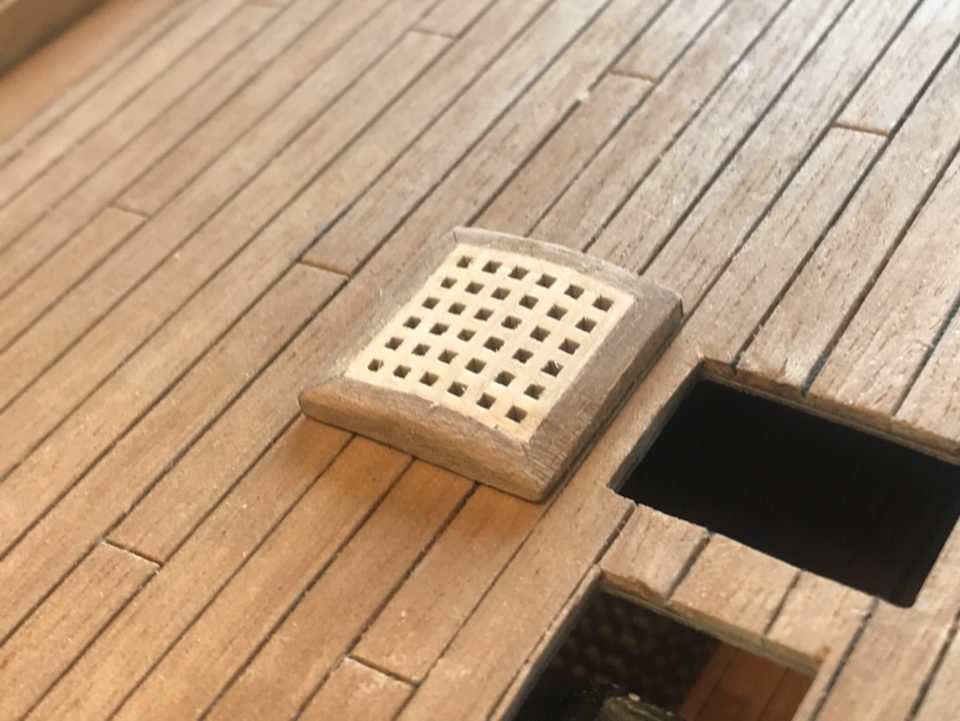
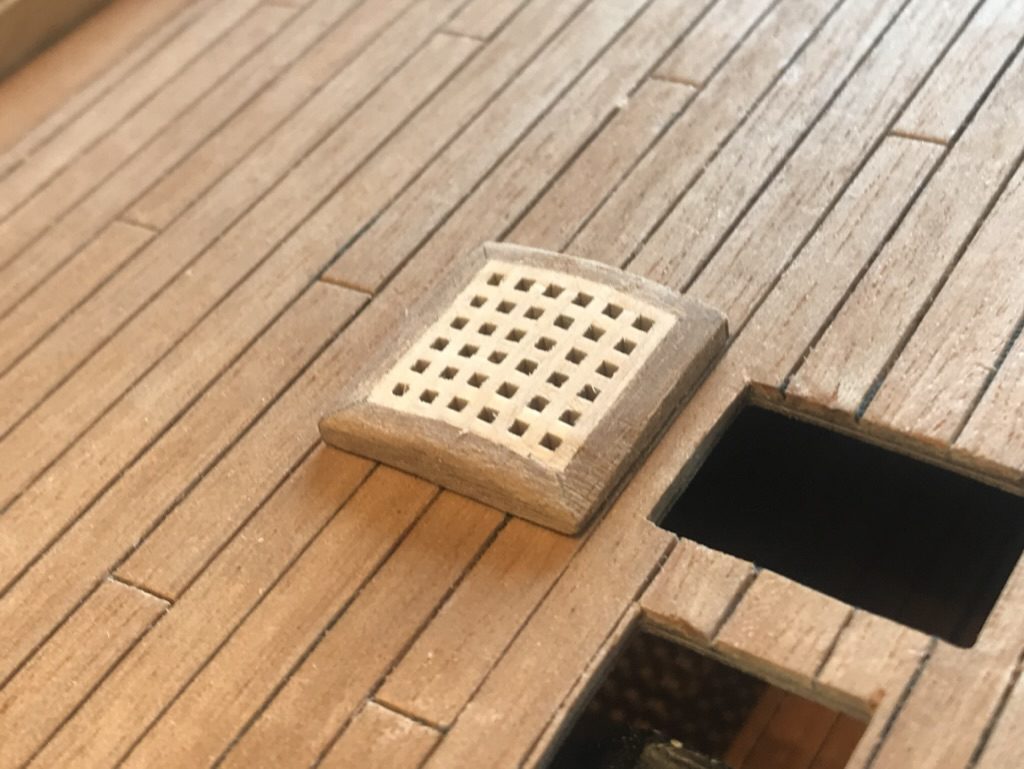
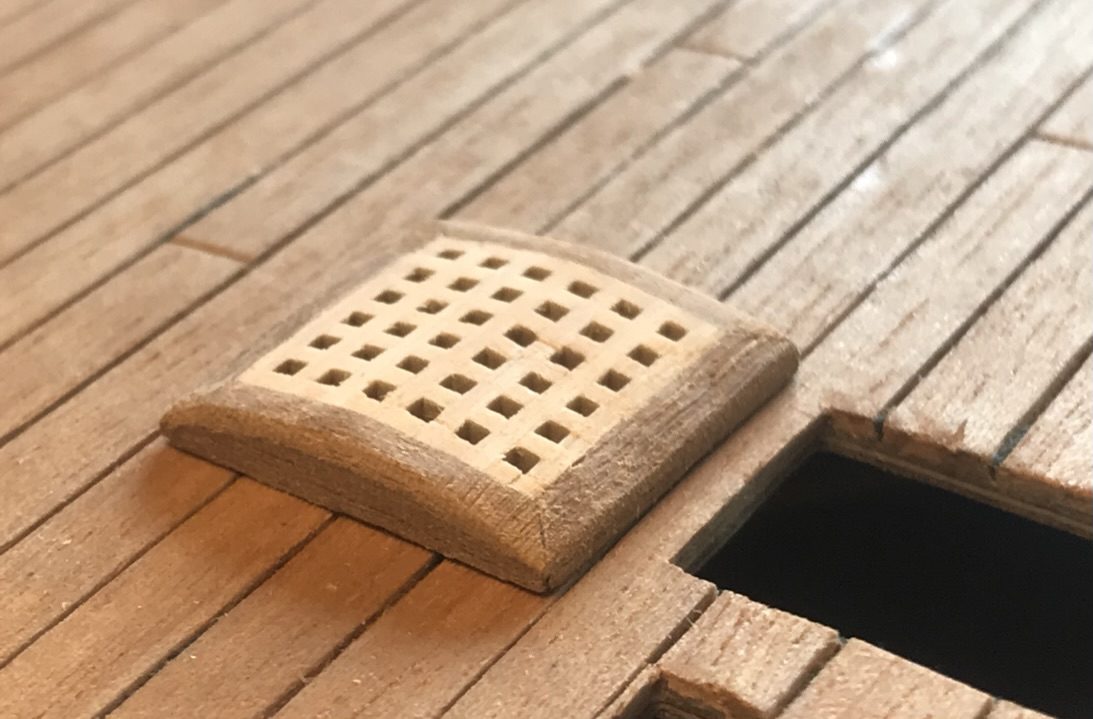
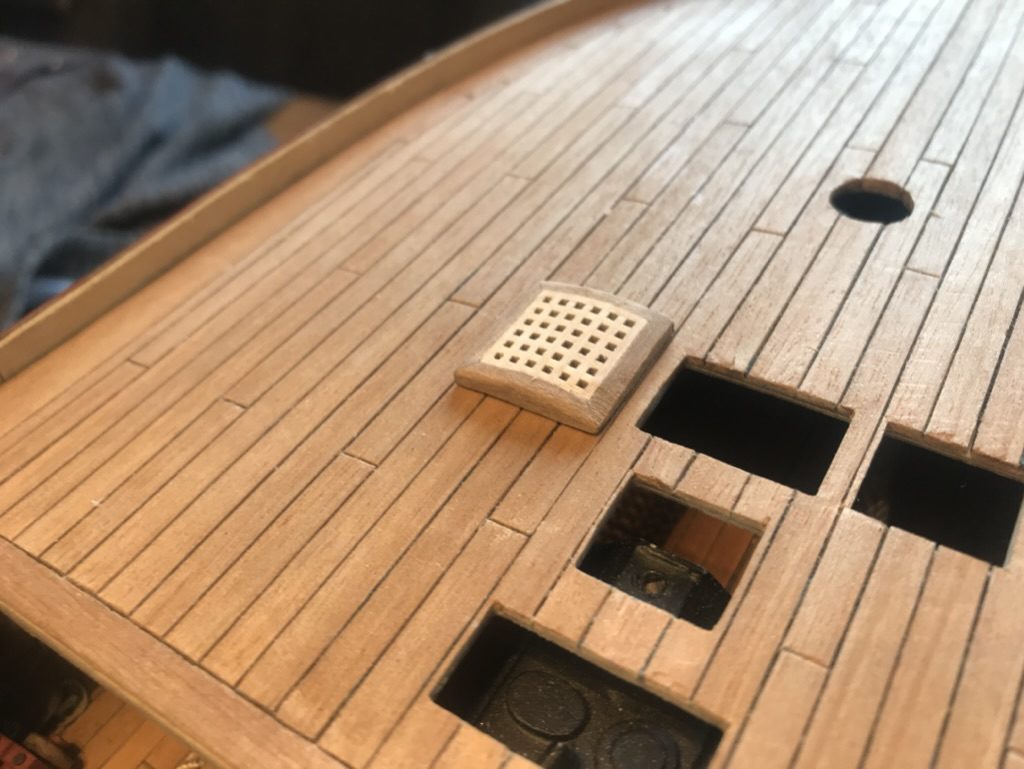
The lowered grating on the deck: the coaming stands only a millimetre or two proud, with the open hatch beside it. Give the grating a slight camber in the direction of the length of the ship, so it follows the camber of the deck. Work the camber in while lowering the grating, so the height at the sides is reduced at the same time. Keep the camber subtle.
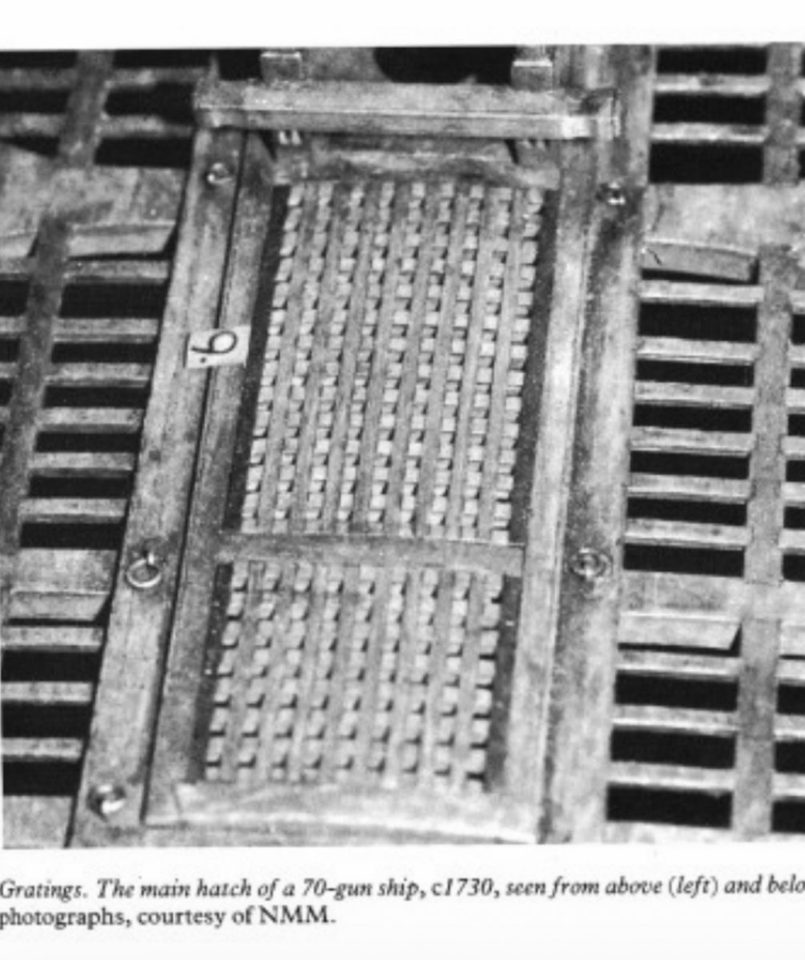
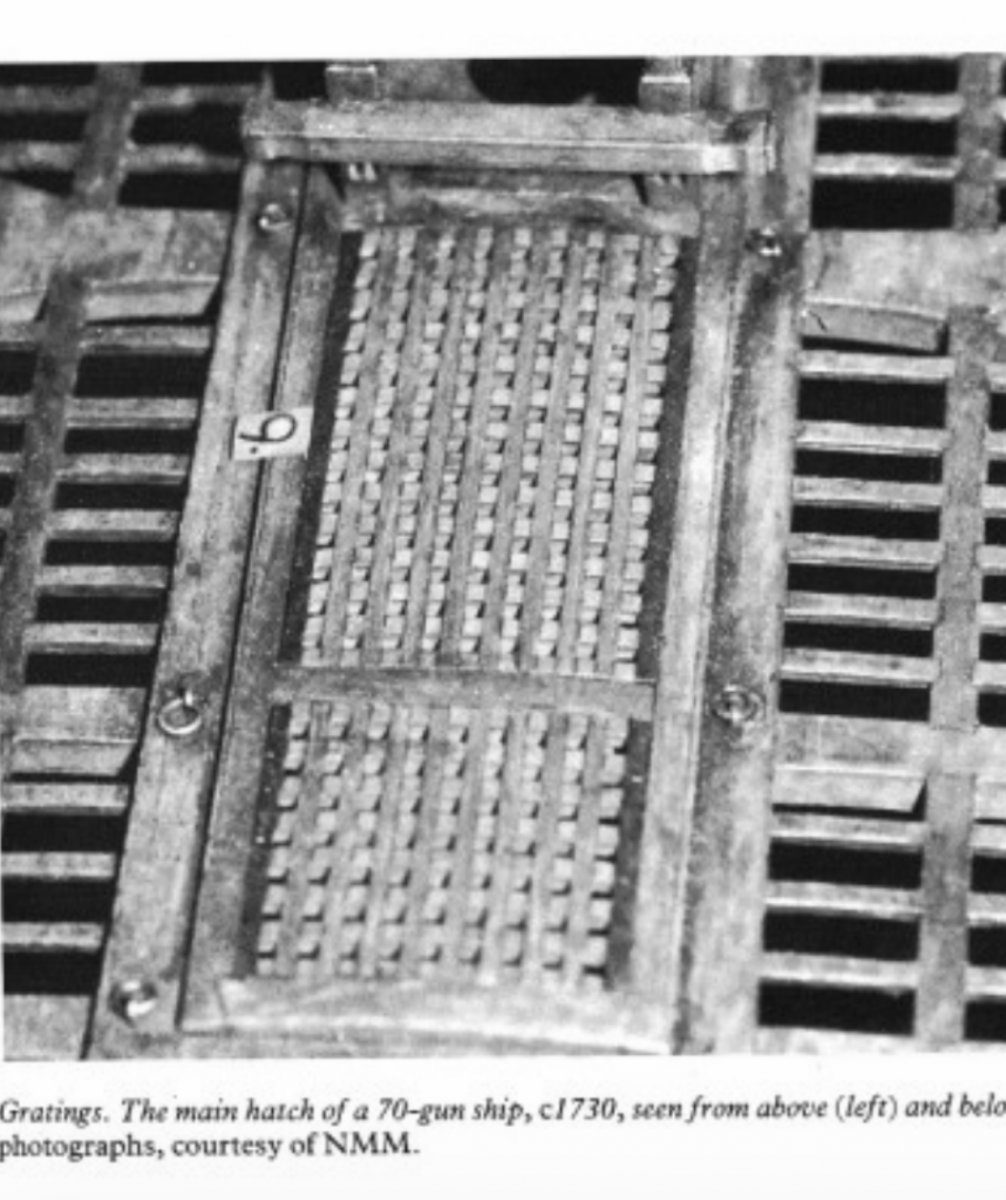
Example from the source: the main hatch of a 70-gun ship around 1730, with a clear camber in the grating. 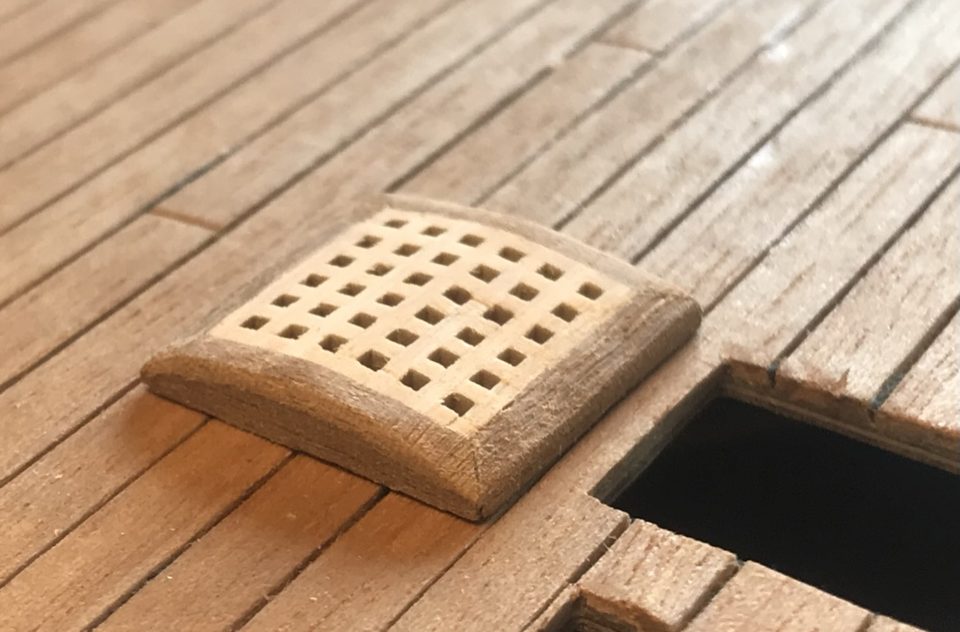
The first grating with the camber; the coaming runs out lower at the sides than in the middle. Tip from Herby63: My feeling is that the camber of the gratings matches the camber of the deck they sit on.
Watch out: The camber of the first grating is a little stronger than the camber of the deck. Herby is right that it could be more subtle; a bit less on the next gratings, then.
Varnish the grating with clear matt varnish, so the light grating and the dark coaming get the same finish as the deck. Then make the remaining gratings the same way.
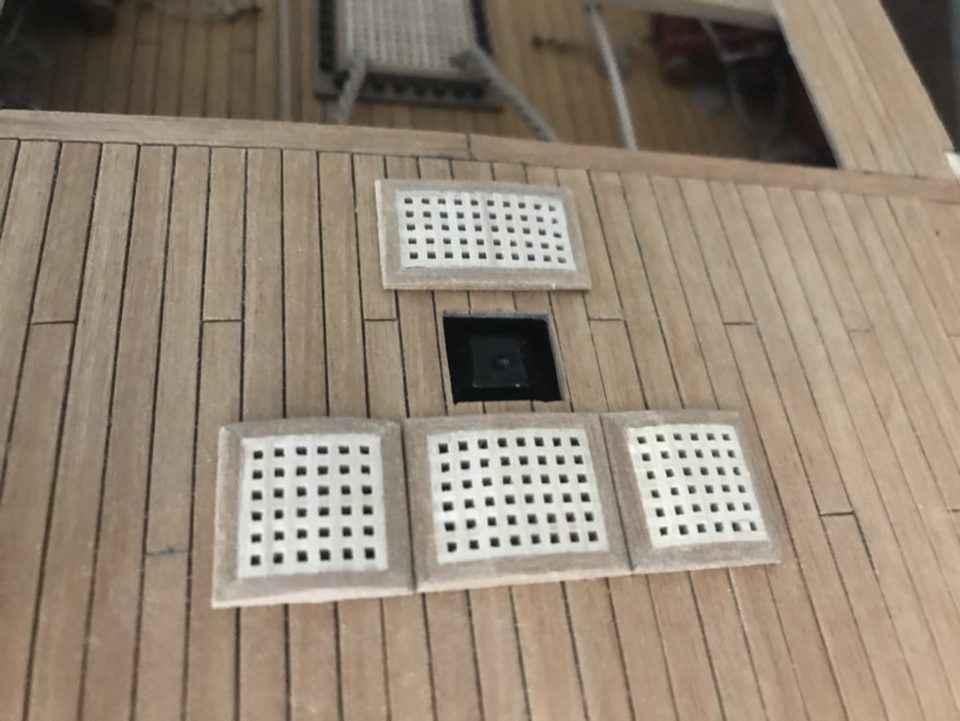
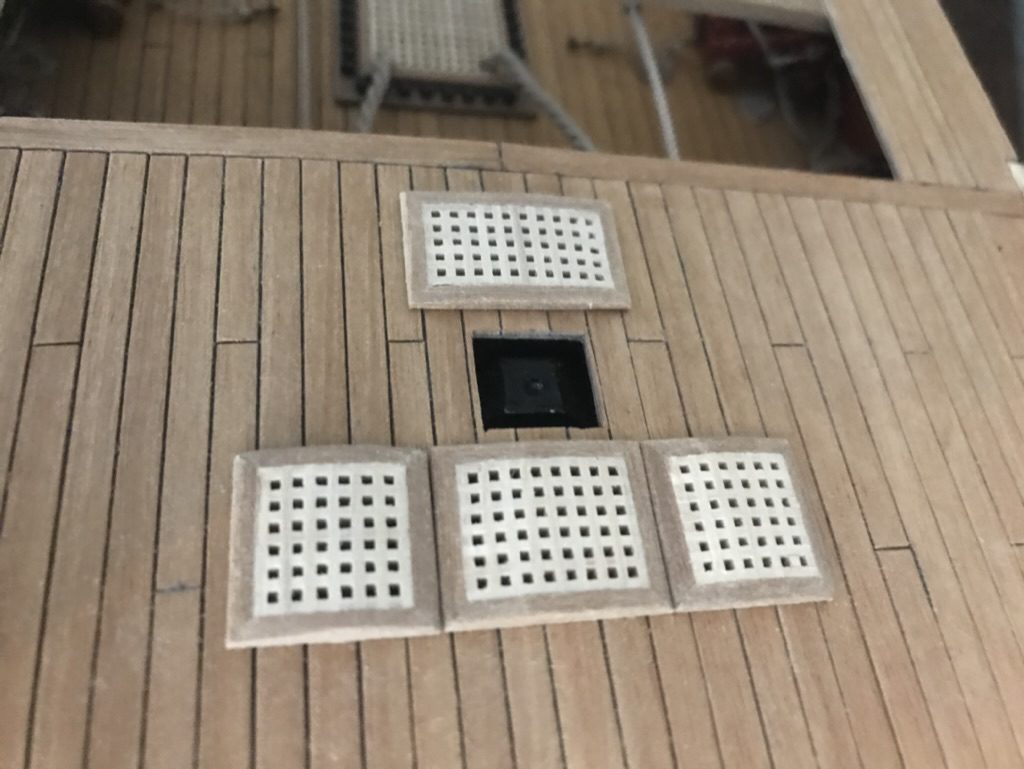
The other gratings finished the same way: low, with a narrow coaming, in the same tone as the deck.
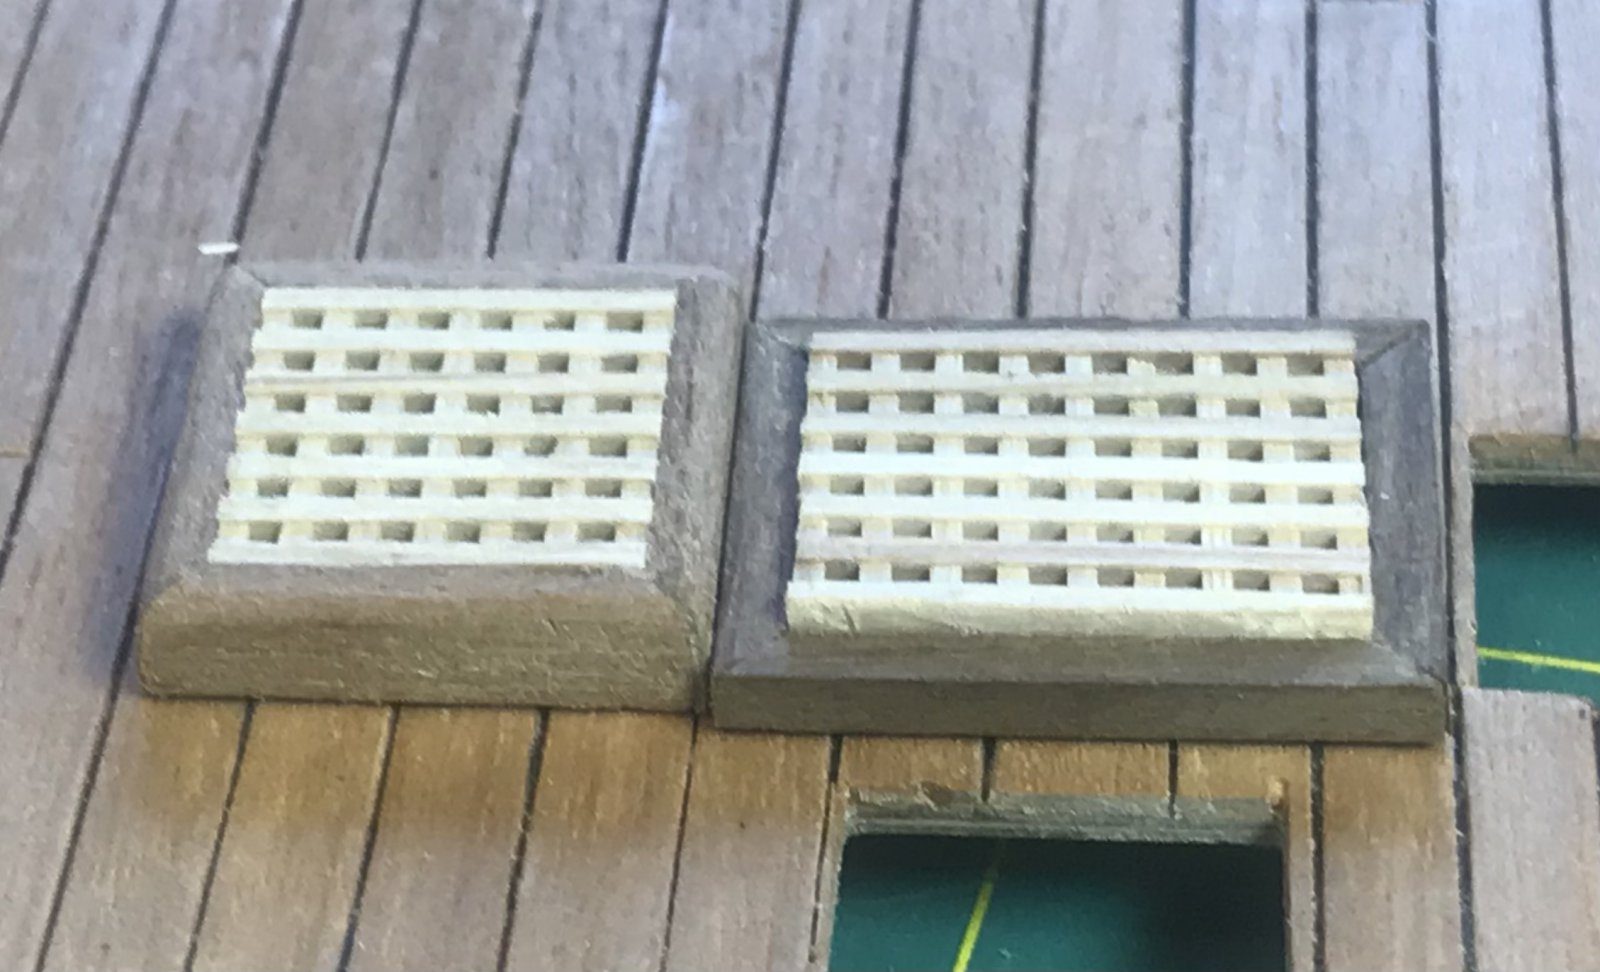
Result
The low grating with camber looks far more natural than the 2x2 mm coaming from the manual. I keep the direction of the camber, along the length of the ship; the camber itself I make a bit more subtle on the next gratings.
Problems met with this technique
The manual prescribes a 2x2 mm coaming, which makes the gratings unnaturally high. Gratings 1 to 2 mm high with a subtle camber. (Tips from Stephan Kertész, Herby63) to the register
Kit errata
Manual: 2x2 mm coaming. Made the gratings lower with a subtle camber. to the register
In the same series: Deck fittings
- Shot garlands with every shot equally spaced, using a small template
- Making the upper deck gratings lower with a camber
- Bending a strip for the planksheer in a PVC pipe of water
- Building up a drumhead from seven layers of walnut
- Turning and fitting rail stanchions for the ladderway
- A mast coat from dyed lining fabric, after the masts of the Victory
- A ship's wheel rim from ten walnut segments, turned round on a faceplate
- Turning spokes for the ship's wheel with a pre-shaped blade
All how-tos · Deck fittings: capstan, ship's wheel, gratings and bitts