Making the seats of ease for the head grating
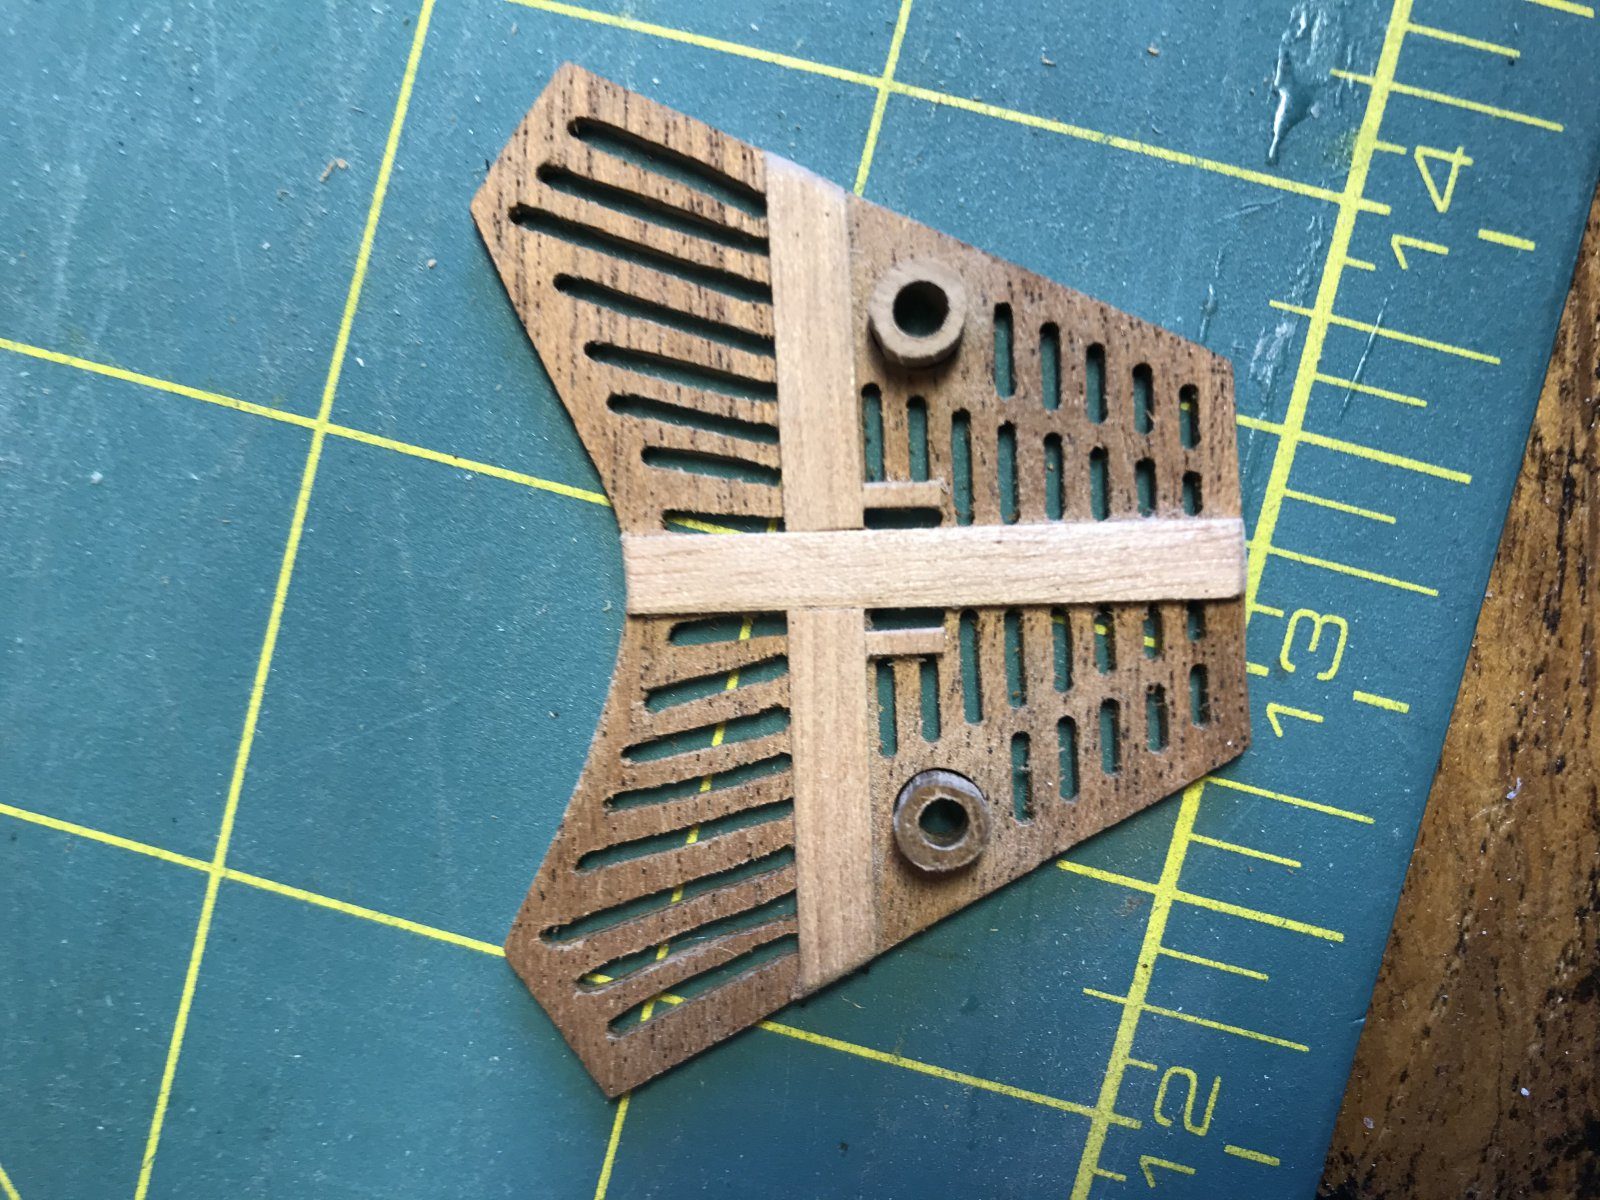
Saw the seats of ease (toilet bowls) for the head grating yourself from 5 mm walnut, because the 4 mm dowel in the manual drops through the hole in the grating, and watch their position relative to the bumkins.
What you need
- fretsaw
- 2.8 mm drill
- callipers
- sandpaper
- walnut 5 mm thick (instead of the 4 mm birch dowel 292 from the manual, 13.7)
- seats 79 (the 'seat') from 1.5 mm walnut, from the kit
- PVA glue
Dimensions
- the kit specifies 4 mm birch dowel (292), two pieces of 5 mm, but the hole in the grating is a good 5 mm
- discs of a little over 5 mm diameter
- 2.8 mm hole
- Time
- an hour
- Difficulty
- easy
- When in the build
- Phase 6,
- From the log post
- Catheads secured toilet bowls and the bumkins · forum
Before you start
The head grating is made and the holes for the seats of ease are in it. Before you start, look at how the bumkins will run: on the drawing they run across the seats of ease, on the box photo and on Piet's model they pass in front of them.
Measure the diameter of the holes in the grating with callipers before reaching for the dowel specified. The manual says 4 mm dowel, but on ours the hole is a good 5 mm: you would drop straight through. Work from the measured size, not from the manual.
hole a good 5 mm, specified dowel 4 mm
With the fretsaw, saw discs of a little over 5 mm diameter from 5 mm thick walnut, so they sit on the rim of the hole. Sand them round and try them on the grating.
discs a little over 5 mm, from 5 mm thick wood
Drill a 2.8 mm hole in the centre of each disc. Clamp the disc or hold it on a piece of scrap wood, because a disc this small easily spins with the drill.
2.8 mm hole
Glue the kit 'seat' (part 79 from 1.5 mm walnut) onto the disc and set the pot in the hole of the grating. That completes the seat of ease. According to the manual the head gratings (59, 60) rest on strips of 1.5 x 1.5 mm (285) behind the second and fourth head timber.
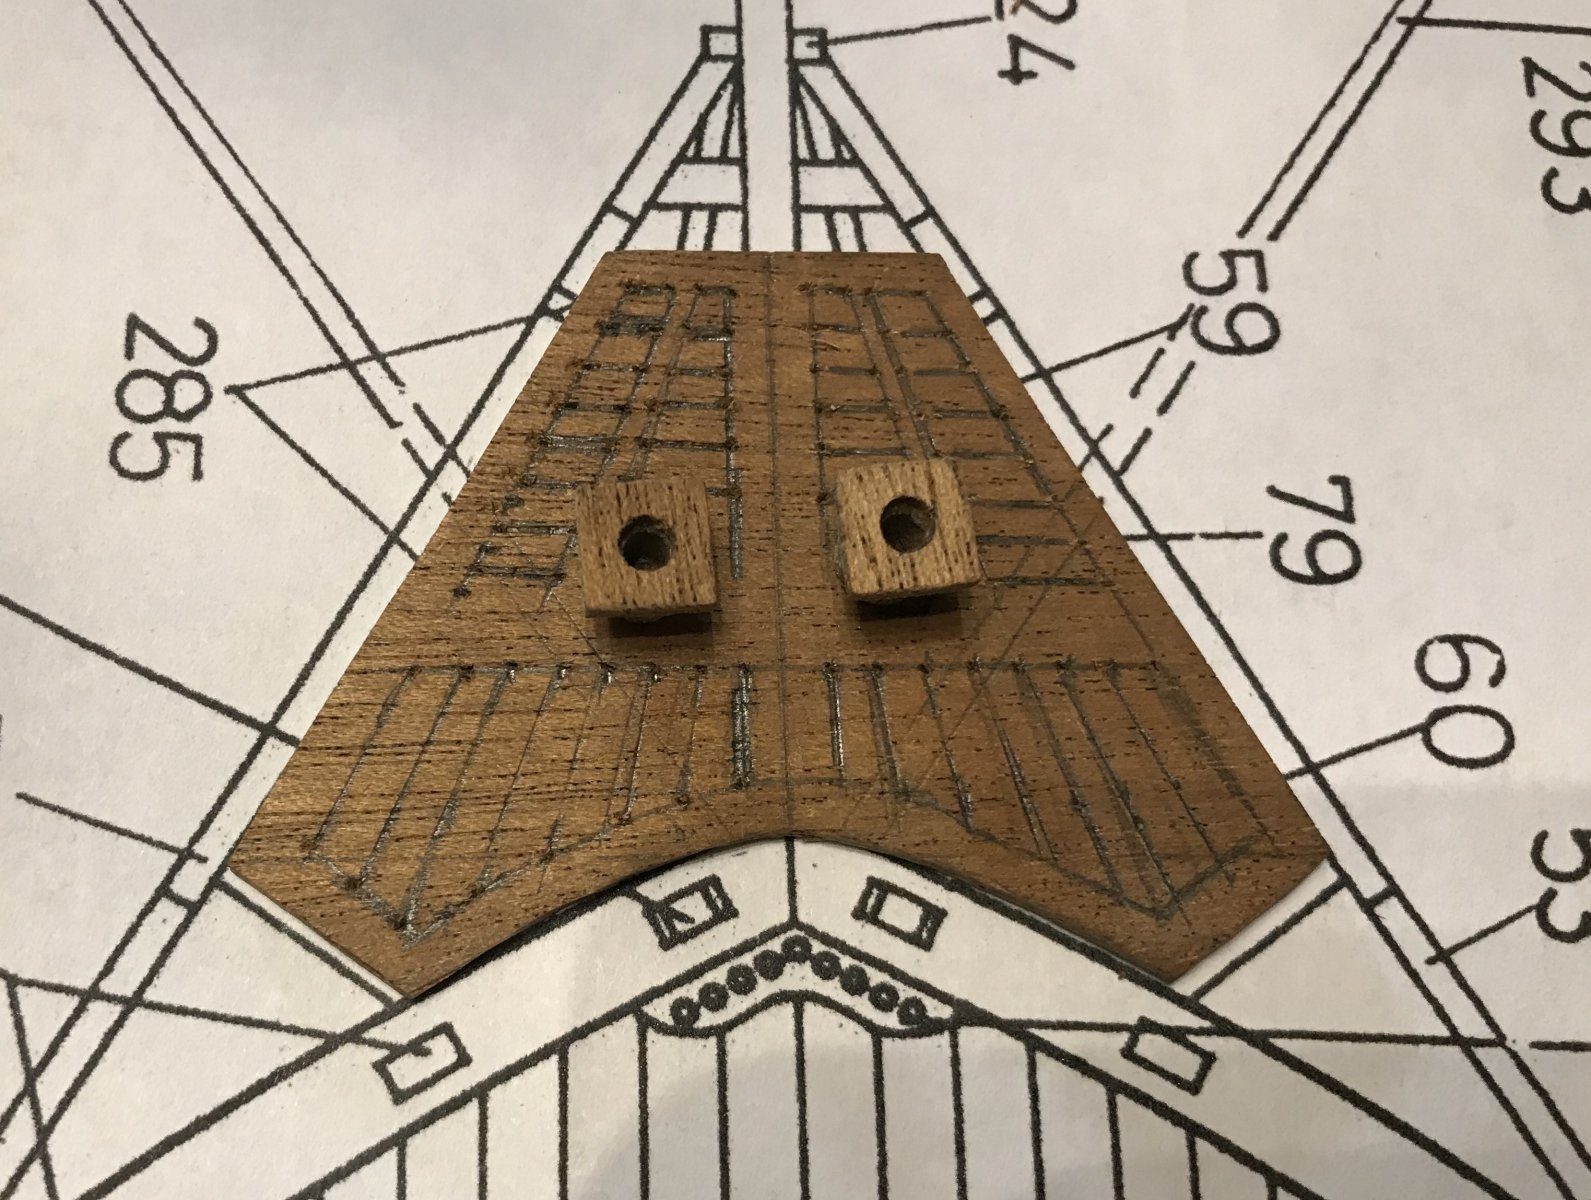
Lay the grating on the drawing and look at how the bumkins run. We copied the grating exactly from the drawing, on which the bumkins run across the seats of ease; on Piet's model and on the box photo they pass in front of them. If necessary move the holes for the seats a little towards the centre, so the bumkins pass on the outside. For that we made the grating a third time.
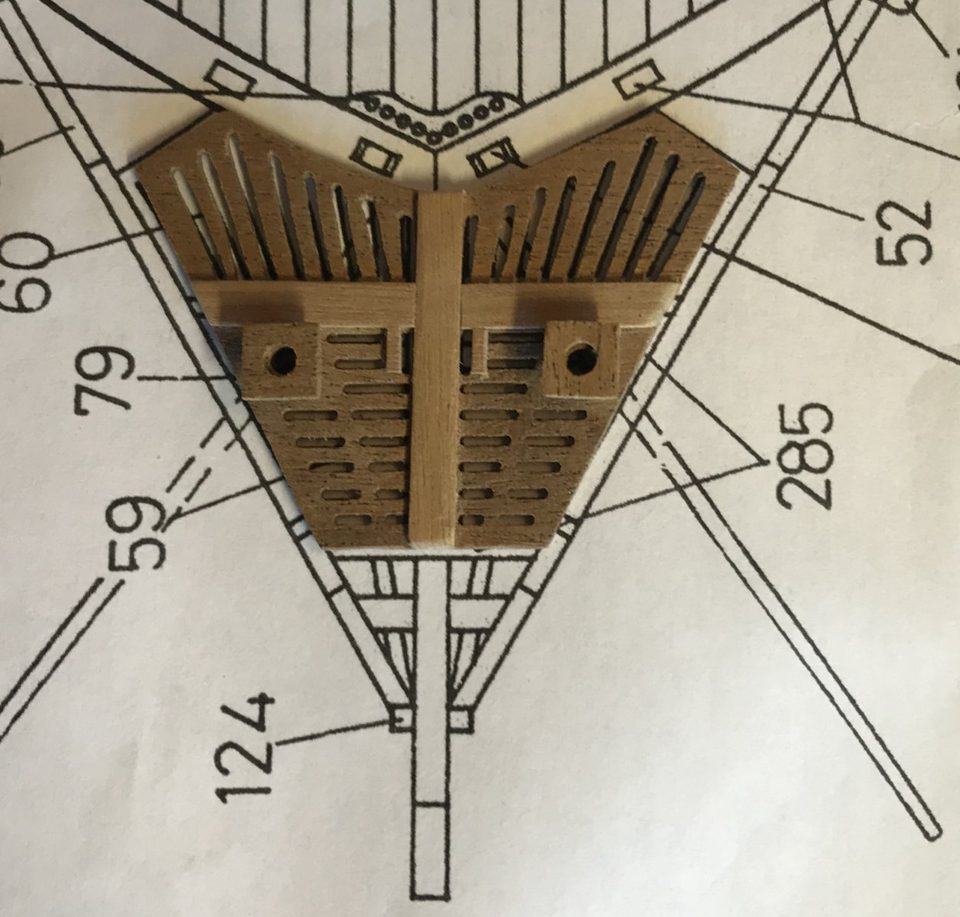
The grating on the drawing: here the lines of the bumkins run across the holes for the seats of ease. 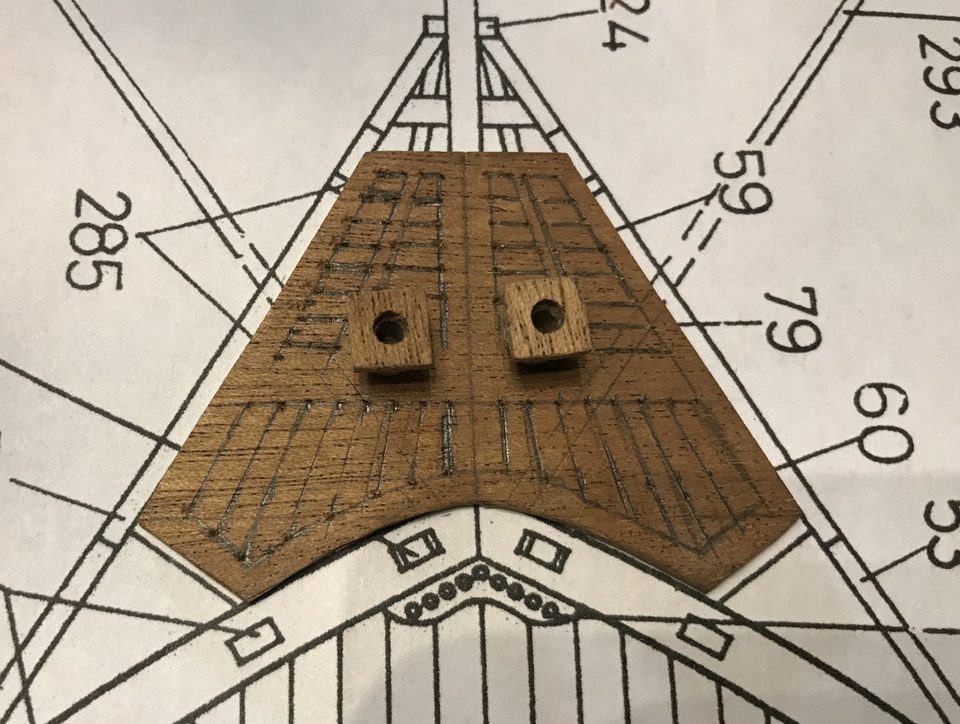
The new grating on the drawing, with the holes for the seats of ease moved a little towards the centre. Tip from pietsan and Herby63: Fit the bumkins only when the whole hull is finished; they stick out and snap off as soon as you turn the hull over once more. Pietsan finished his head in April and fitted the bumkins in September. (modelbouwforum, 22 April 2015) Herby63 added in our own topic (10 November 2019): do not set the bumkins too far inboard, or you pull the clew of the sail inwards; remake the grating with the holes for the seats a little nearer the centre and wider aft, so it meets the upper rail of the head.
Watch out: Copying the grating exactly from the drawing produced bumkins running across the seats of ease. Look at photos of the real ship or of other builders first. There is a third variant: on contemporary models the bumkins pass behind the seats of ease, as iutar showed with photographs; HMSFly could not manage that because of the construction of the kit head, and neither did the builder of the box model (Ships of Scale, 17 January 2025, forum post and forum post). Choose one and keep port and starboard the same.
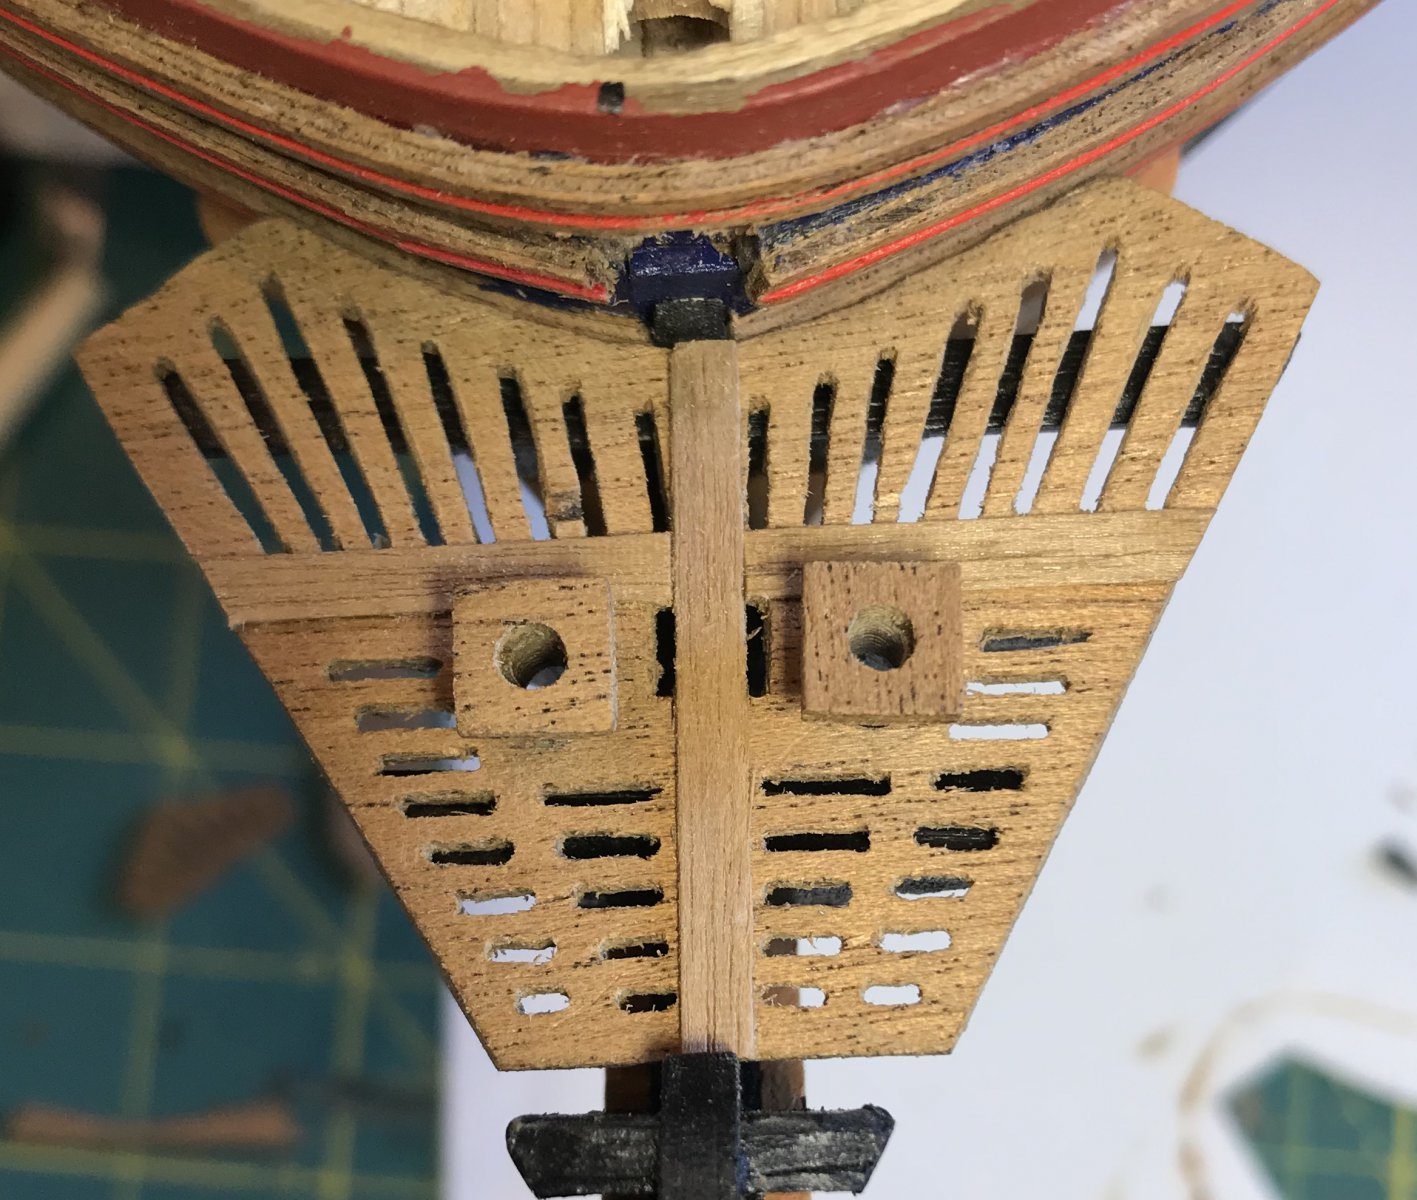
Result
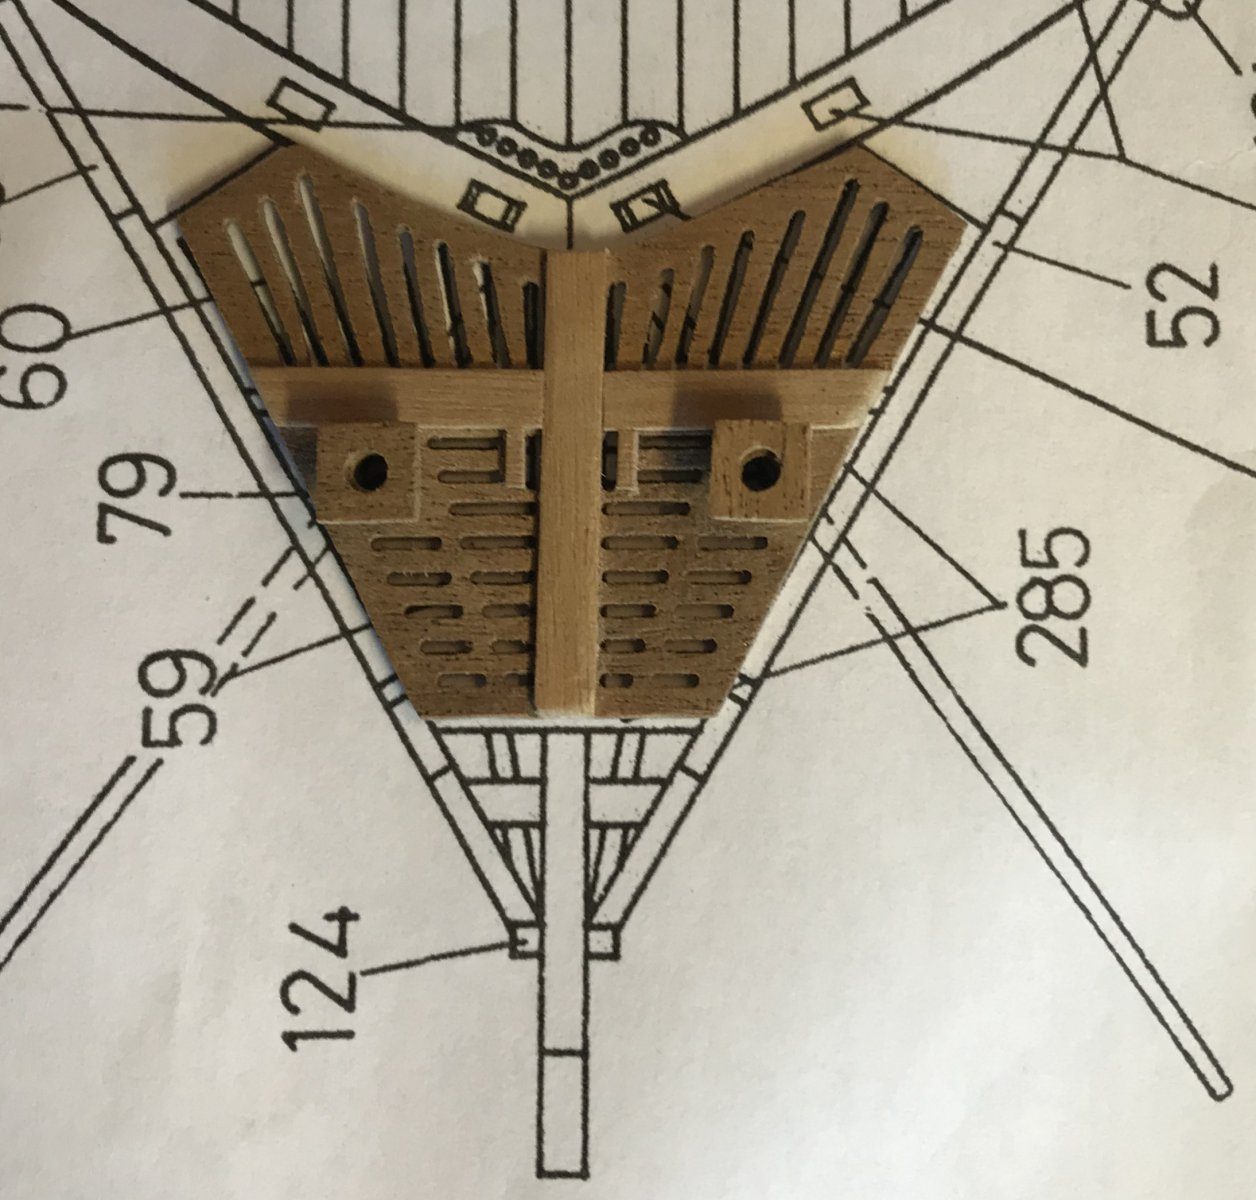
The bowls from 5 mm walnut fit the grating exactly; the dowel from the manual would simply have dropped through. The position of the seats turned out to matter more than the bowls themselves: for that the grating was eventually made a third time, with the holes towards the centre.
Problems met with this technique
The kit specifies 4 mm dowel for the seats of ease, but the hole in the grating is well over 5 mm. Sawed discs of just over 5 mm from 5 mm walnut, drilled a 2.8 mm hole. to the register
Kit errata
Manual: 4 mm dowel. Sawed discs of over 5 mm from 5 mm walnut, hole 2.8 mm. to the register