Hammock netting from the kitchen fly screen and hammocks from tea-dyed cloth
Make the netting between the hammock cranes from a kitchen fly screen and fill it with rolled hammocks of 4 by 3 cm, coloured in rooibos tea and bound with seven whippings on a strip with pins.
What you need
- scissors
- strip of wood with seven holes and seven pins
- drill bit for the pin holes
- needle
- tweezers
- cup for the tea
- netting from a kitchen fly screen (fine mesh)
- thin light cloth (cotton or lining fabric)
- very strong rooibos tea
- thin thread for the whippings and the horizontal rope (kit: black thread 0.5 mm, 382)
Dimensions
- rolls of 4 by 3 cm cloth
- seven whippings per hammock
- pieces of cloth about 20 seconds in the tea
- about two hundred hammocks for the whole ship
- Time
- several evenings
- Difficulty
- moderate
- When in the build
- Phase 13,
- From the log post
- Cranes on netting from the kitchen fly screen · forum
Before you start
The home-made hammock cranes stand on the bulwark and a horizontal rope runs through their eyes. The kit contains no netting, only rope, so find a fine-meshed net yourself: a kitchen fly screen with the right mesh size works. Try a few rolls first before starting on the two hundred. The manual (20.20) only gives black thread 0.5 mm (382; the text says 282, but that is a strip). Pietsan did the netting as the very last job and had to free the fore sheets and braces for it, which he had seen coming: those lines were not yet made fast (modelbouwforum, 19 May 2016, forum post). We did the netting before the shrouds, so that does not arise.
What is said
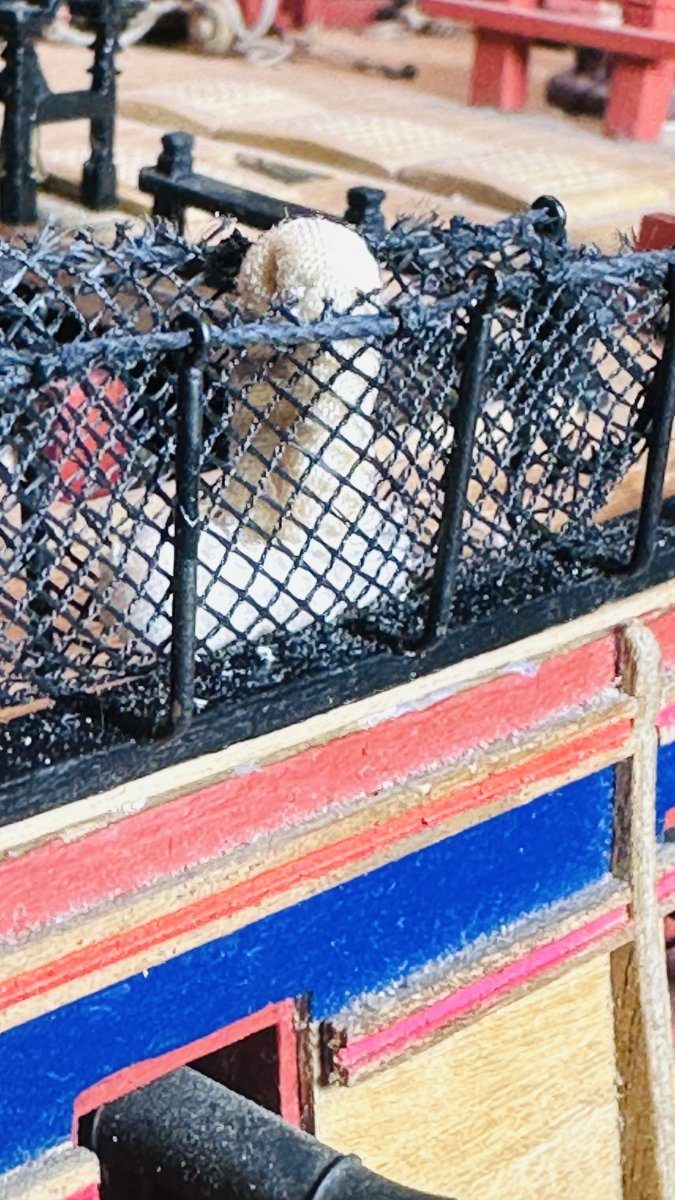
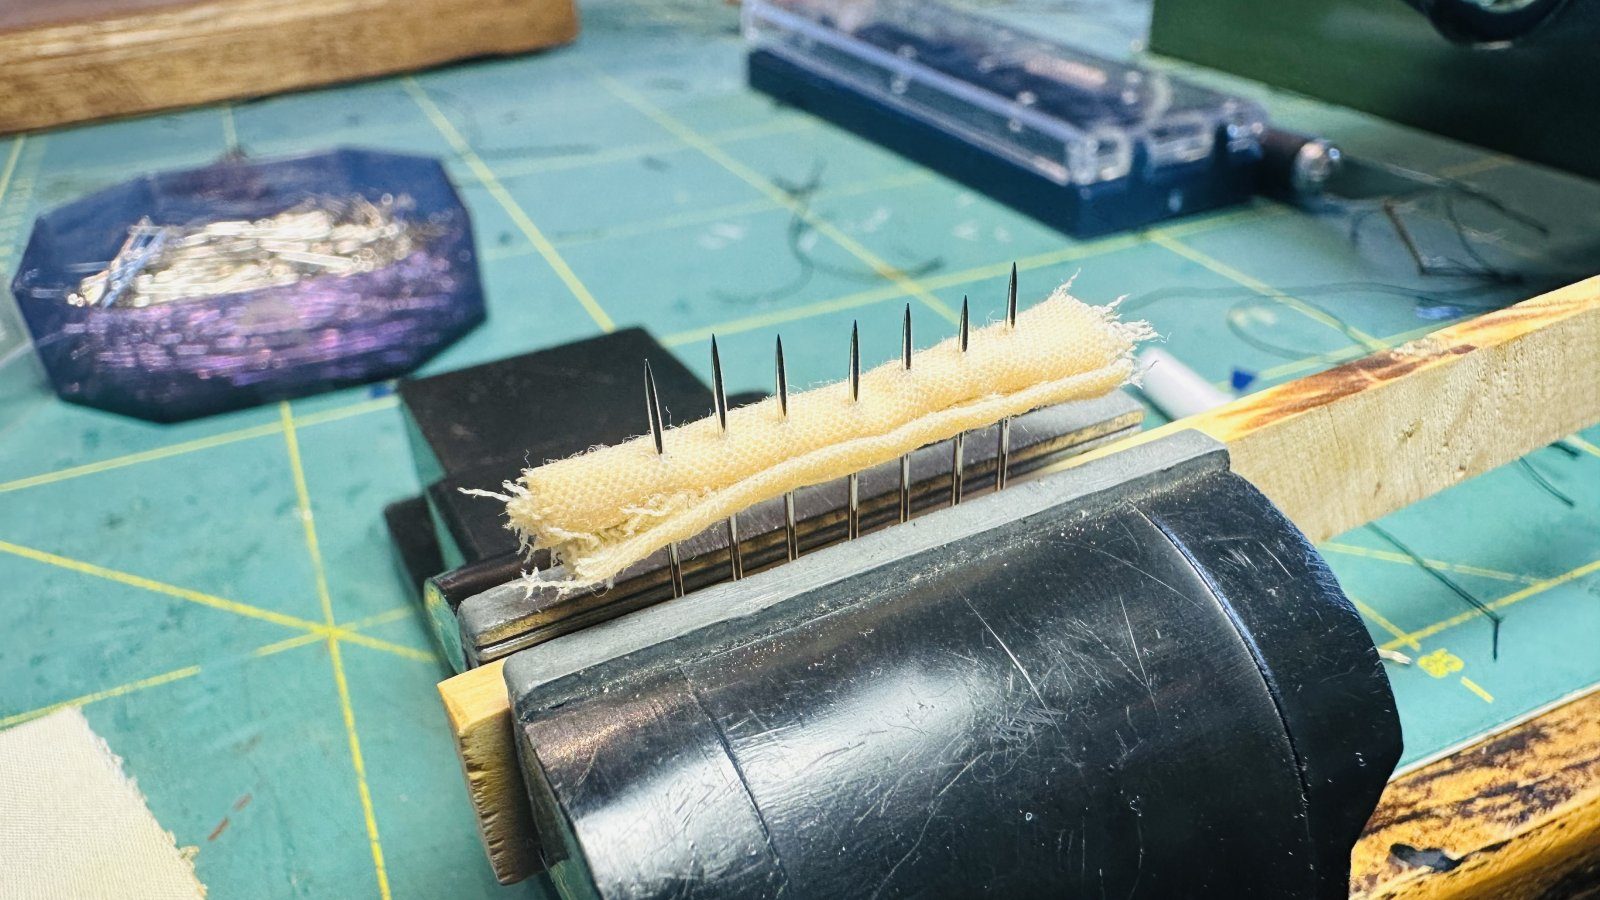
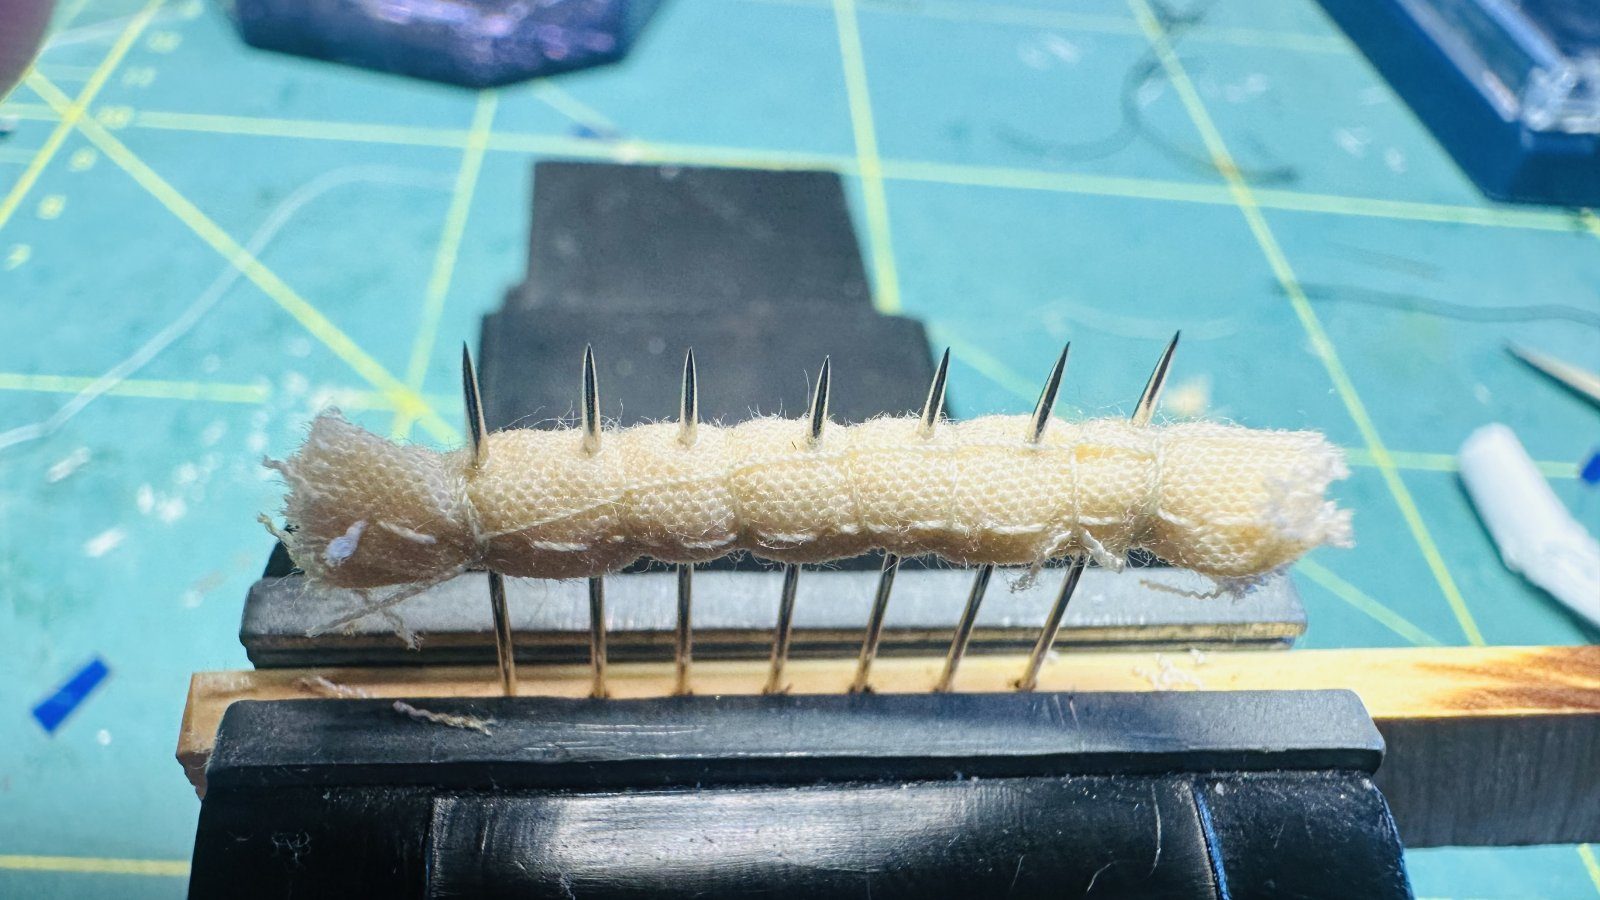
The Diana carries two hundred hammocks, rolled up in the nettings along the bulwark. This is one of them. I start with a strip of cloth, four by three centimetres. One edge of the strip was hemmed beforehand. That edge goes on the outside, so no frayed edge shows on the ship. I roll the cloth as tightly as I can, into a roll about as thick as a match. The batten in the vice has seven pins. I press the roll onto them, so it cannot move and the pins mark where the thread goes. Then the lashing, with fine thread. I start with two turns round the roll and pass the thread through them, so it forms a small knot that cannot slip. Then one turn between each pair of pins, pulling tight every time. Seven turns in all. On a real hammock that was the rule, one for each of the seven seas, or so the story goes. At the end, two turns again with the thread passed through. Then I take the roll off the pins and pass the needle under four of the turns, so it holds without a bulky knot. I cut the thread on both sides, and trim the ends once more, so it is neatly finished. A drop of superglue in the middle, so I can fold the hammock double without it springing open. And that is one. One hundred and ninety-nine to go.
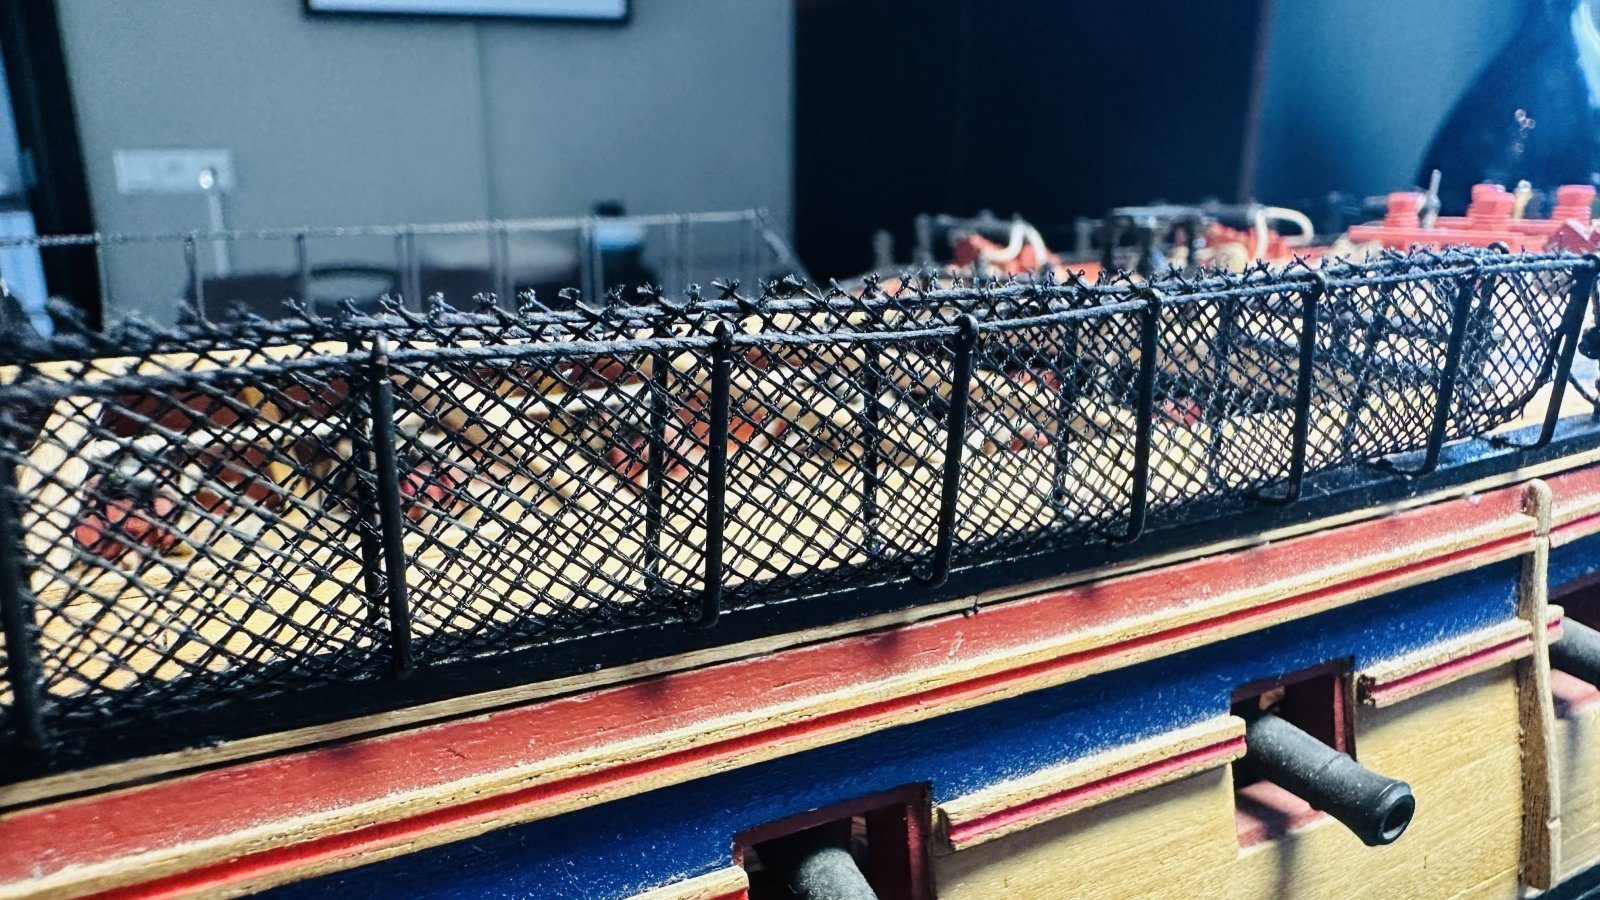
Take the mesh off a fly screen and cut strips from it to the height of the cranes and the length of the bay between them. Mind the mesh size: at 1:64 it has to read as knotted netting. Cut along the meshes, then the edge does not fray.
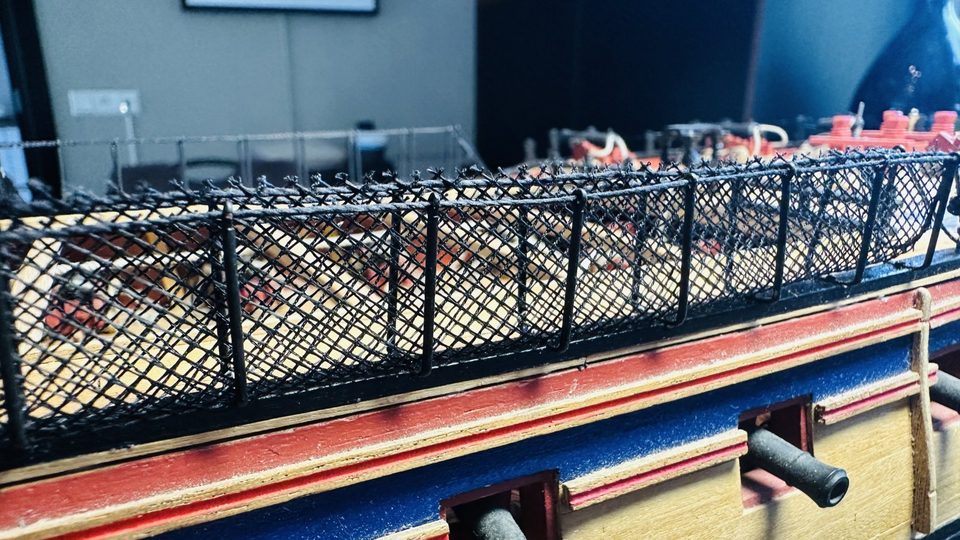
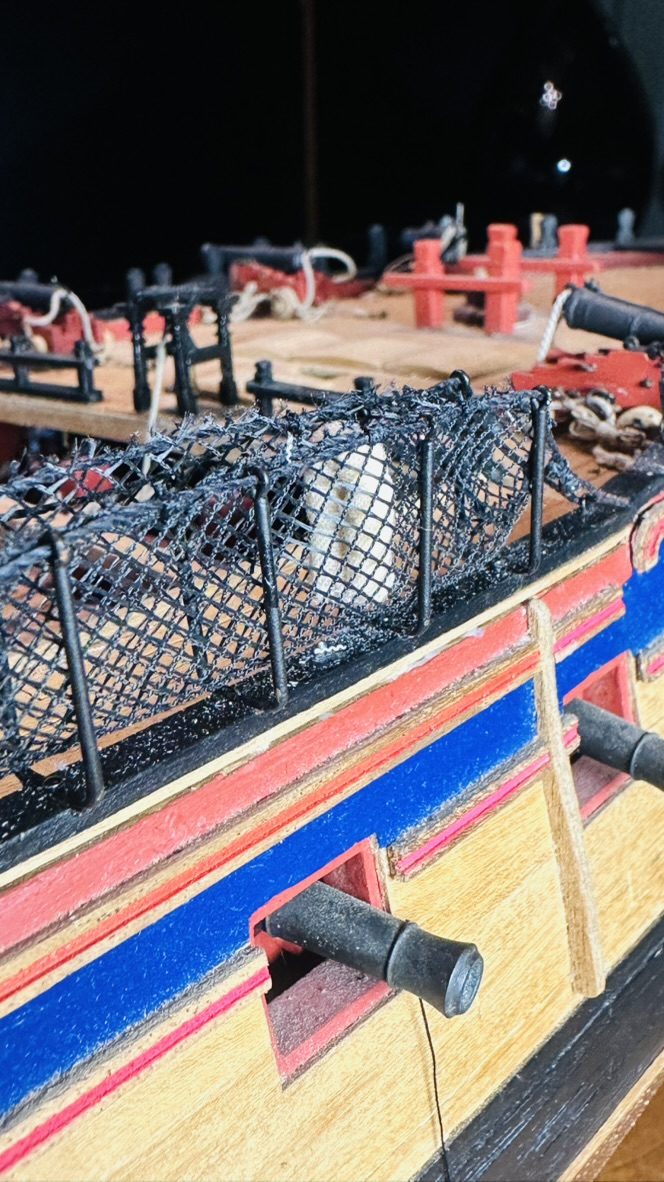
The nettings from the kitchen fly screen between the home-made cranes on the bulwark. Watch out: The kit contains no netting at all, only rope. It was the same with Scheepshoorn's Victory.
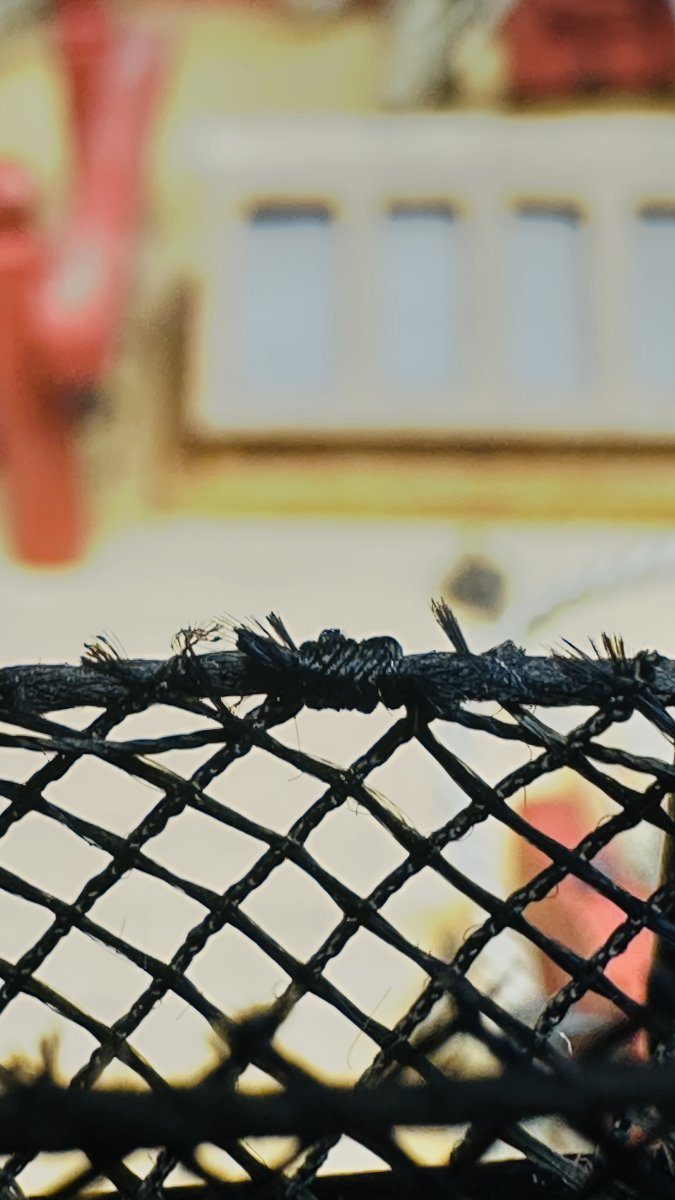
Fasten the top edge of the netting to the horizontal rope through the eyes of the cranes. Put a small whipping round rope and netting and pull the thread through it with a loop, so that it holds. Repeat every few meshes.
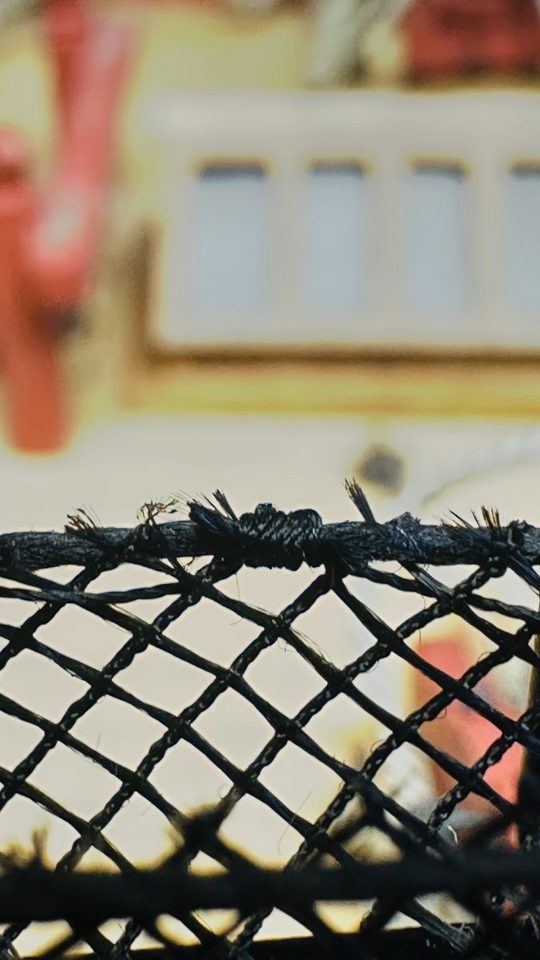
The netting fastened to the horizontal rope with small whippings. Tip from pietsan: Cut the netting to size and then sew it to the cranes with needle and thread. His starboard net turned out just too small and there was no spare; so he knotted something himself, not quite by the book but it looks fine. (modelbouwforum, 20 May 2016)
Watch out: It took some effort to find a method that holds; a whipping with a loop through the thread worked in the end.
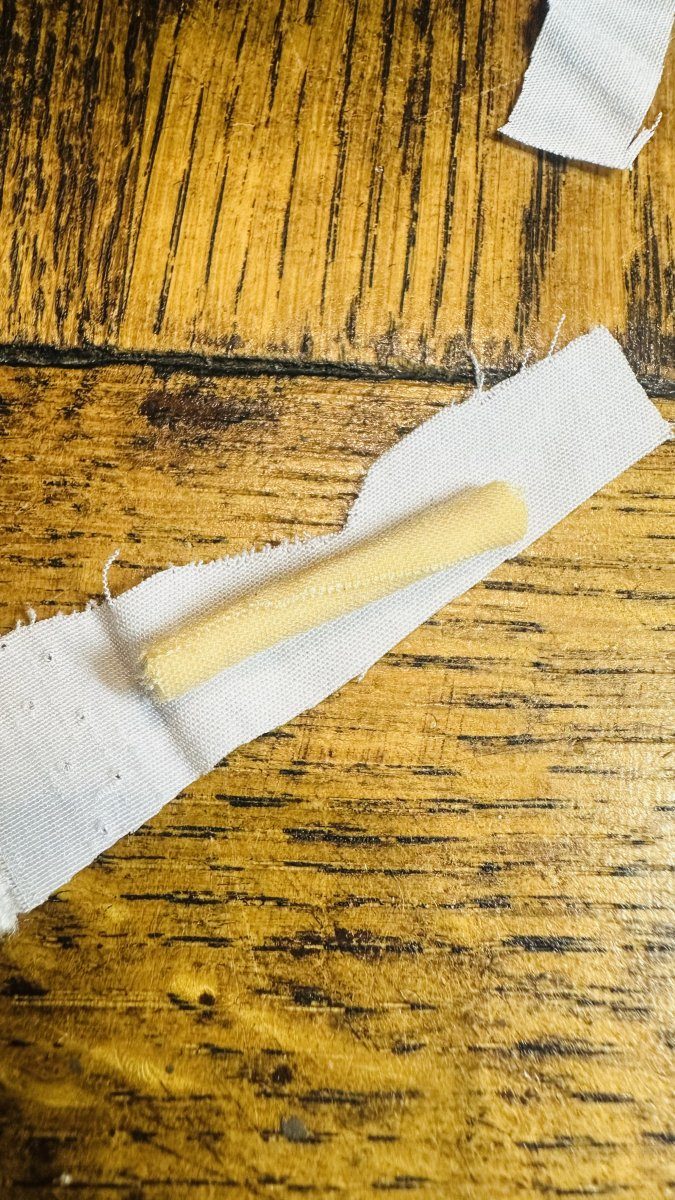
Brew very strong rooibos tea and dip the pieces of cloth in it for about 20 seconds. The cloth takes on the used, yellowish tint of a canvas hammock. Let the pieces dry before rolling.
about 20 seconds
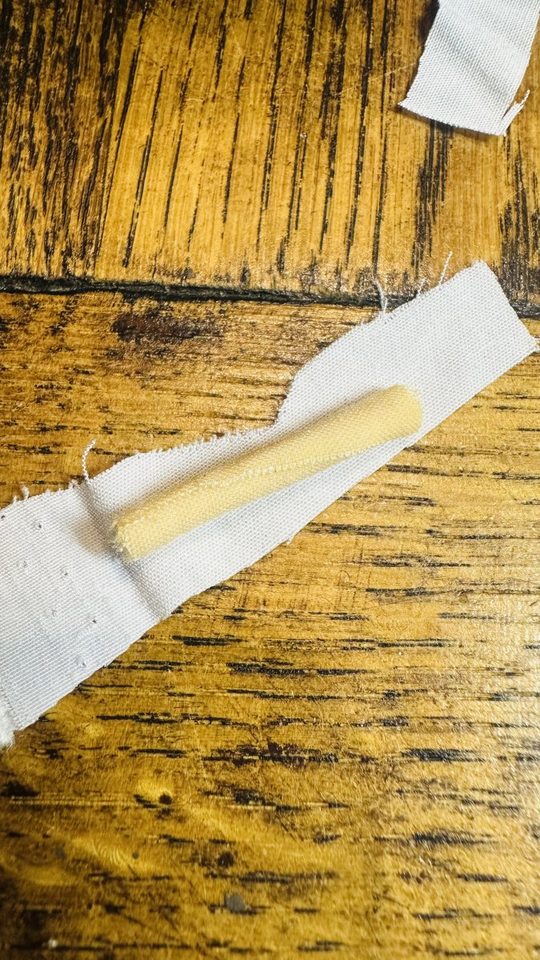
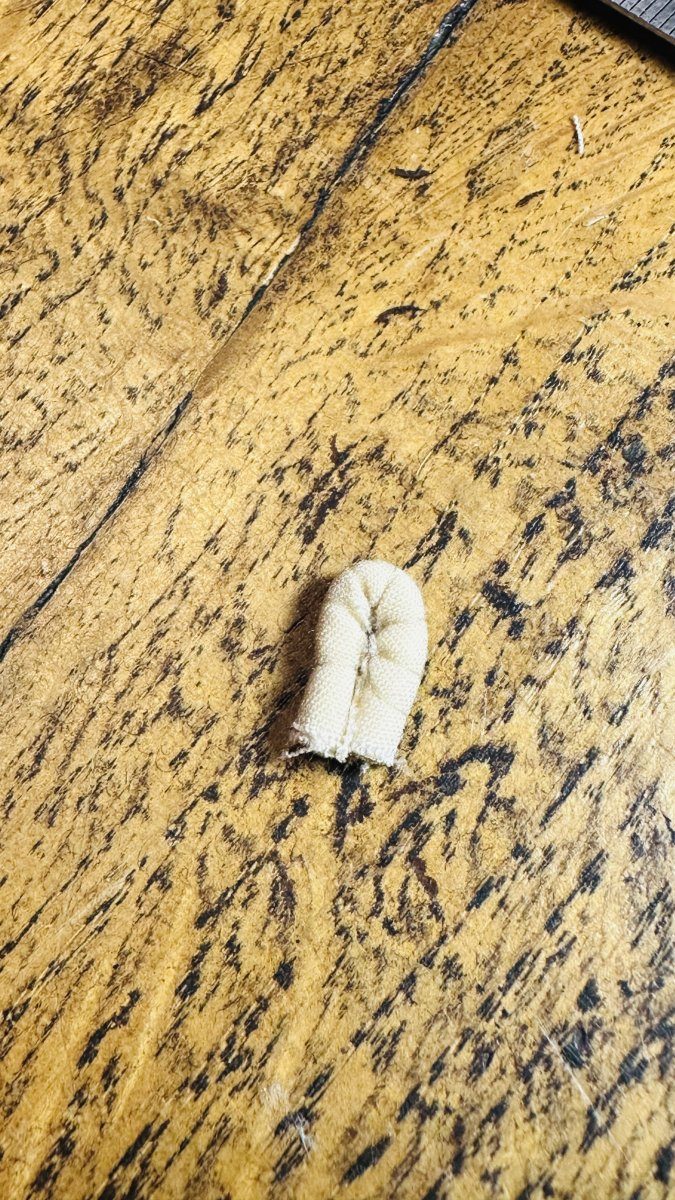
The difference in colour after the rooibos tea, next to the original white cloth. Cut pieces of 4 by 3 cm and roll them tightly into a roll 3 cm long. That seems a lot of cloth for one hammock, but the crew rolled their belongings up in it, so the rolls were thicker than the canvas alone. After a few trials this size turns out to fit well between the cranes.
4 x 3 cm
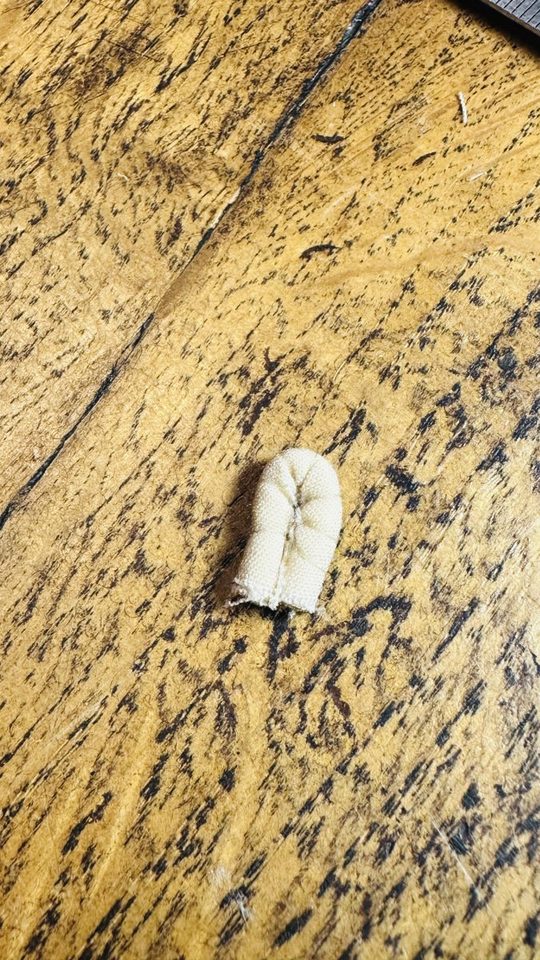
The first successful roll, still without whippings. Drill seven equally spaced holes in a strip of wood and push seven pins through them. Press the roll onto the pins so that it stays put, and pass the thread round the hammock between the pins. That way every hammock gets seven whippings in the same place, supposedly for the seven seas.
seven whippings
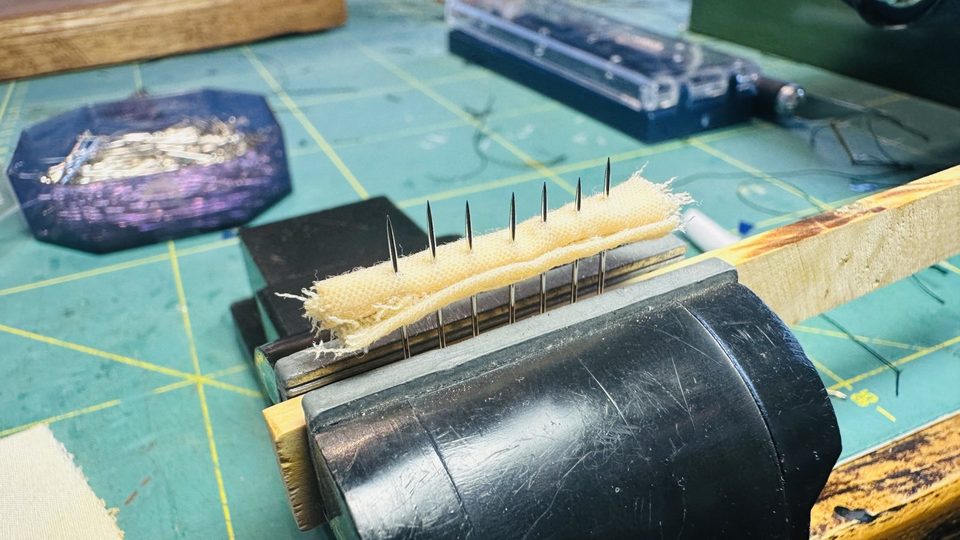
The roll on the seven pins in the strip, ready to be bound. 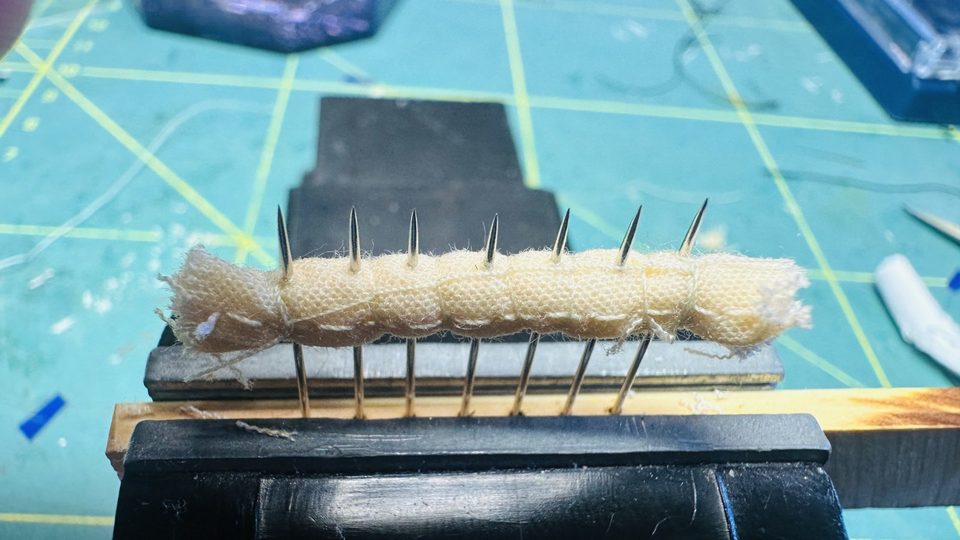
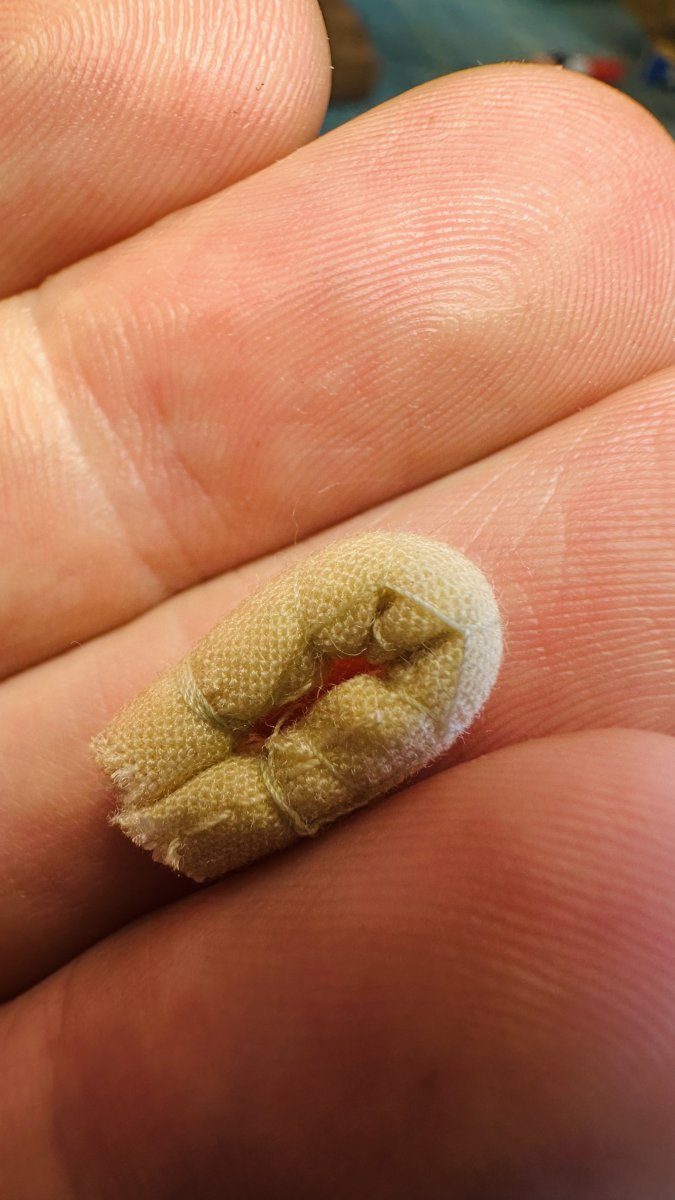
The thread passed round the hammock, between the pins. Take the hammock off the pins and fold it to the size that fits in the netting. First lay a layer of hammocks horizontally at the bottom, otherwise they disappear right down into it. On top of that lay the visible row, with the whippings facing outwards.
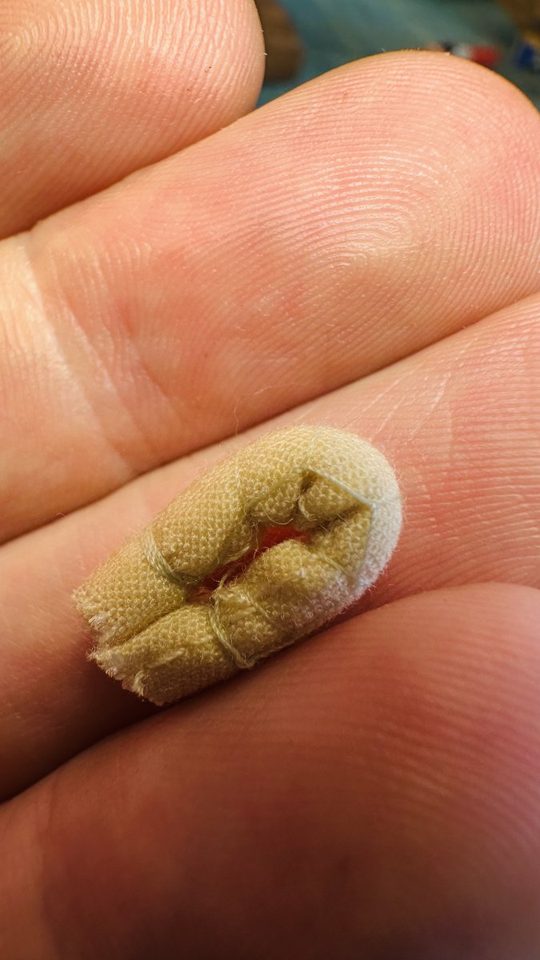
The folded hammock, ready to be laid in the netting. Watch out: Without the bottom layer the rolls sink to the bottom of the netting and you see nothing of them.
Result
The netting from the fly screen has exactly the right mesh size and the rolls of 4 by 3 cm fill the netting as on the Victory. For two hundred hammocks the strip with pins is indispensable; with it every hammock is the same and the pace picks up.
Problems met with this technique
There is no netting in the kit for the hammock cranes, only rope. Used mesh from a kitchen fly screen; 'I am not that happy with the kit anyway. Most of it I make myself.' Pietsan sewed his netting to the cranes with needle and thread and knotted one himself when his starboard net turned out too small (modelbouwforum, 20 May 2016, forum post). (Tips from Scheepshoorn, pietsan) to the register
No method for attaching the nettings to the horizontal rope. Used a small whipping and pulled the thread through with a loop. to the register
Kit errata
Rope only, no netting. Used mesh from a kitchen fly screen. Pietsan still had netting in 2016 that turned out just too small on the starboard side; older boxes apparently did include some. to the register