Five trials for the transom windows
Try five ways side by side to make the transom windows opaque but still shiny, and fit the winner (a grey haze on clear plastic) in the transom.
What you need
- hobby knife
- brush
- fine sandpaper
- board with a hole as a holder for the paint pot (hole saw)
- clear hard plastic (e.g. the lid of a salad tub)
- thin paper
- plastic from black flock
- aluminium foil
- black and white paint
- the brass window frames from the kit
- Time
- an evening
- Difficulty
- easy
- When in the build
- Phase 4,
- From the log post
- Five trials for the windows · forum
Before you start
The transom is painted and the window openings are open. Through the openings you look onto the stern frames, so the windows cannot stay truly transparent. The deck still goes on later, which will take away some of the see-through effect anyway. Ask the forum for ideas before you choose.
Look through the open transom: the stern frames behind it are visible, so the windows have to become opaque. At the same time you want to keep the shine of glass and be able to control the tint. Those are the three requirements you judge the trials on.
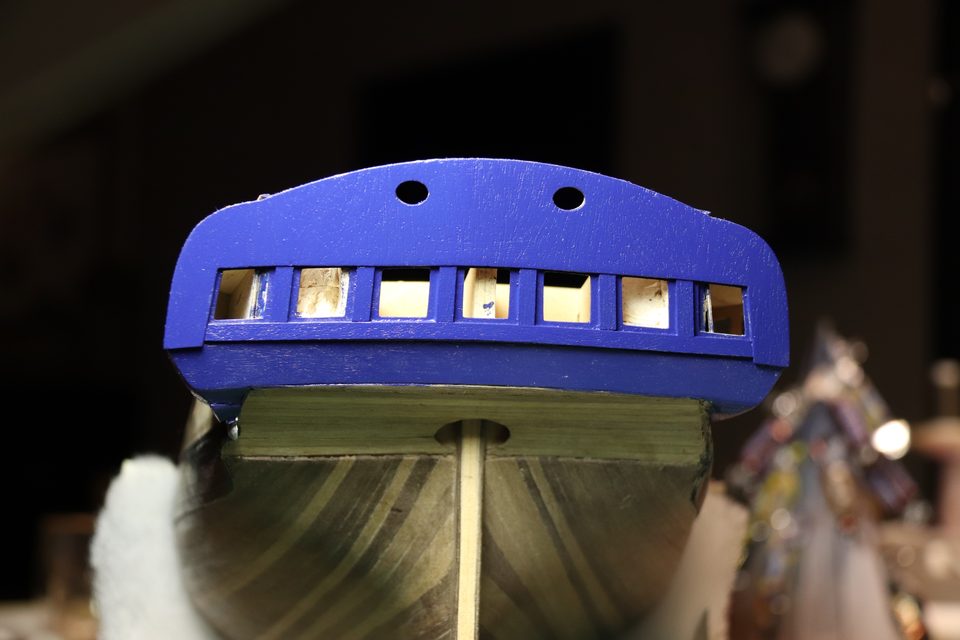
The transom with open window holes: through each hole you see the structure behind. Tip from Jaques: A piece of film onto which you apply a haze of thinned grey paint, as on the Batavia in Danny's log (without the leaded-glass lines).
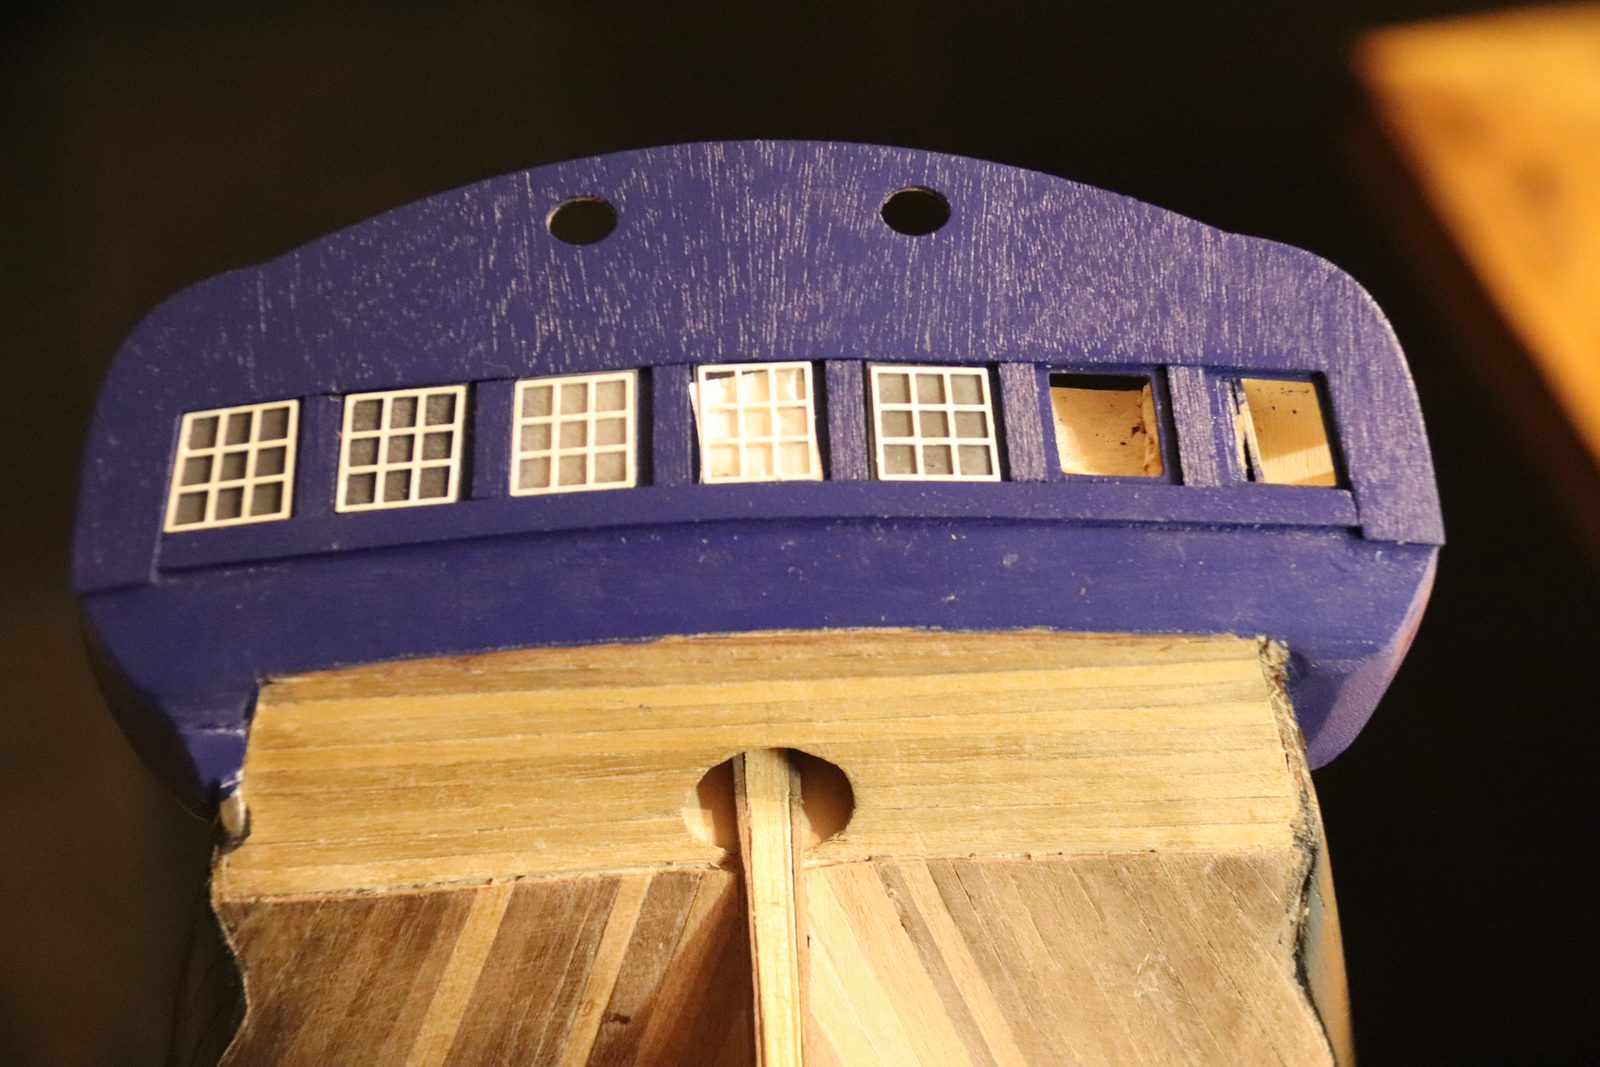
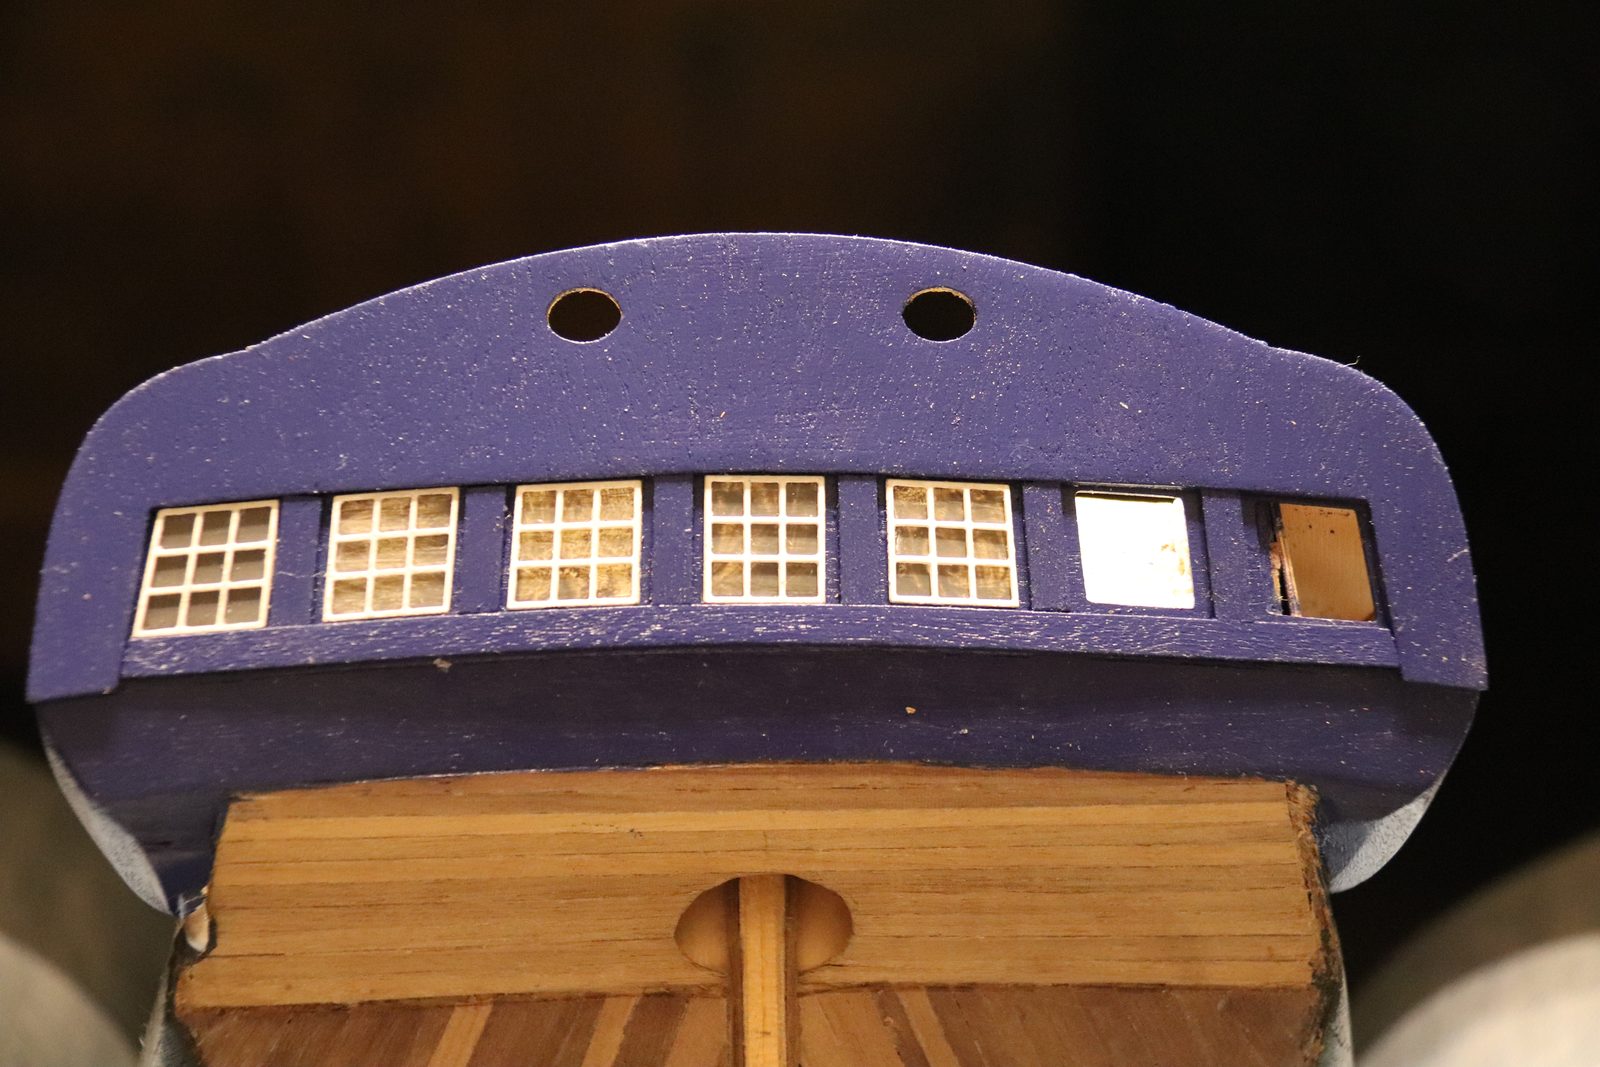
Cut five pieces to window size: (1) thin paper, greyed a little; (2) plastic from black flock; (3) clear plastic, lightly roughened; (4) aluminium foil behind clear plastic; (5) clear plastic with a grey haze of black and white paint. Slide each piece into its own window opening.
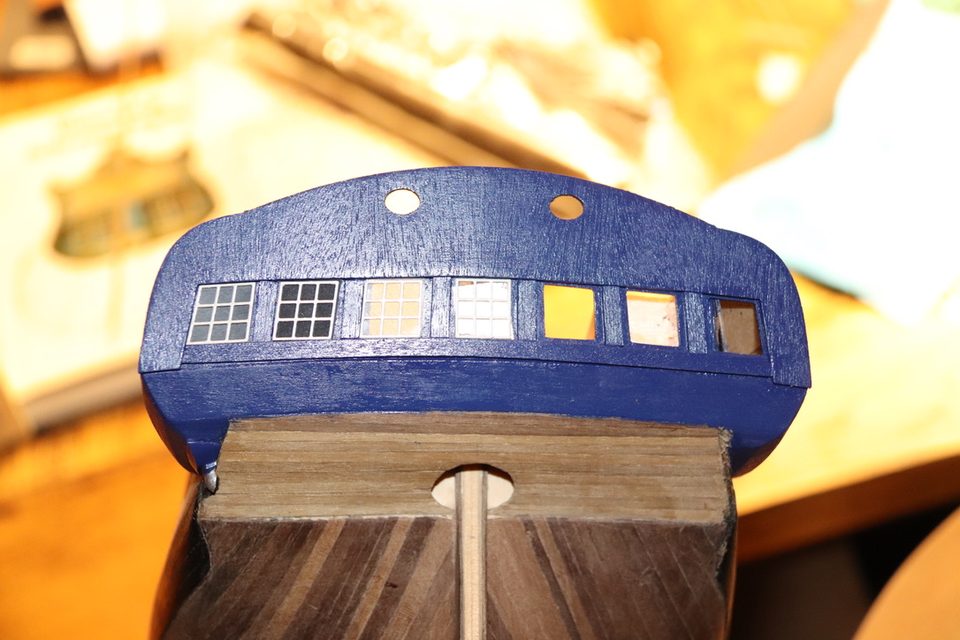
The test pieces in different window openings of the transom, each with a different tint and shine. Tip from Hans Groenenberg: Try a hard plastic, for instance the lid of the egg salad tub from the butcher, and sand it a little duller.
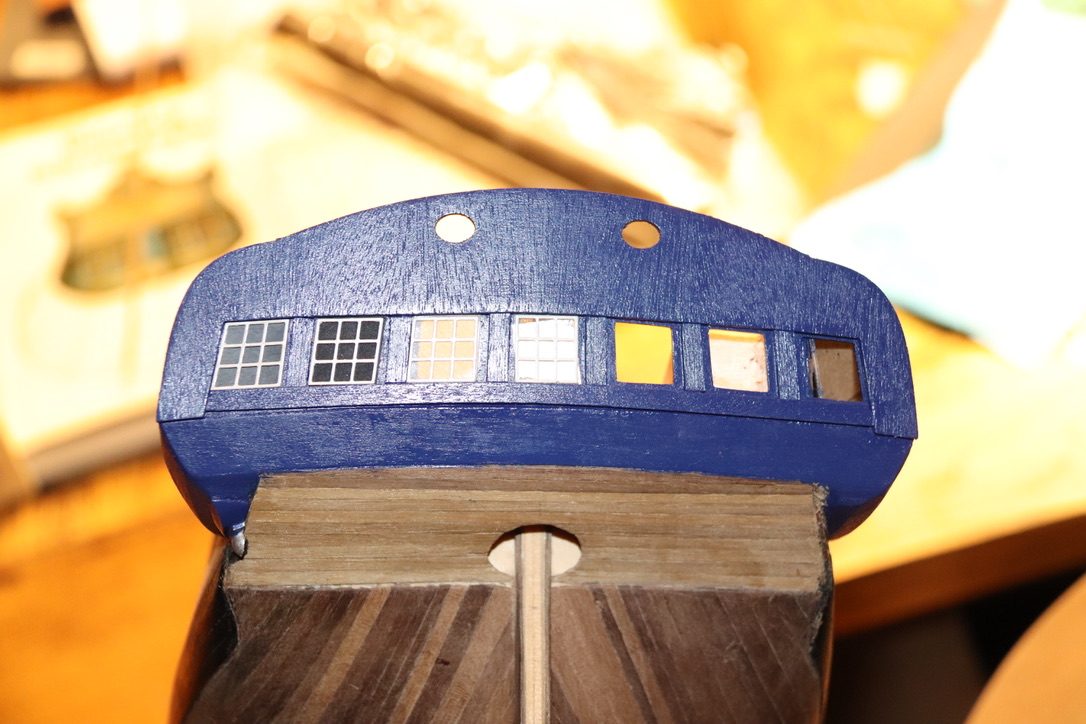
Put the five trials in a row in the transom and look at them under the same light. Paper and flock (1 and 2) lose the shine; roughened plastic (3) does not let you control the tint; foil (4) is just a little too blingy. The grey haze (5) keeps the shine and the darkness can be adjusted.
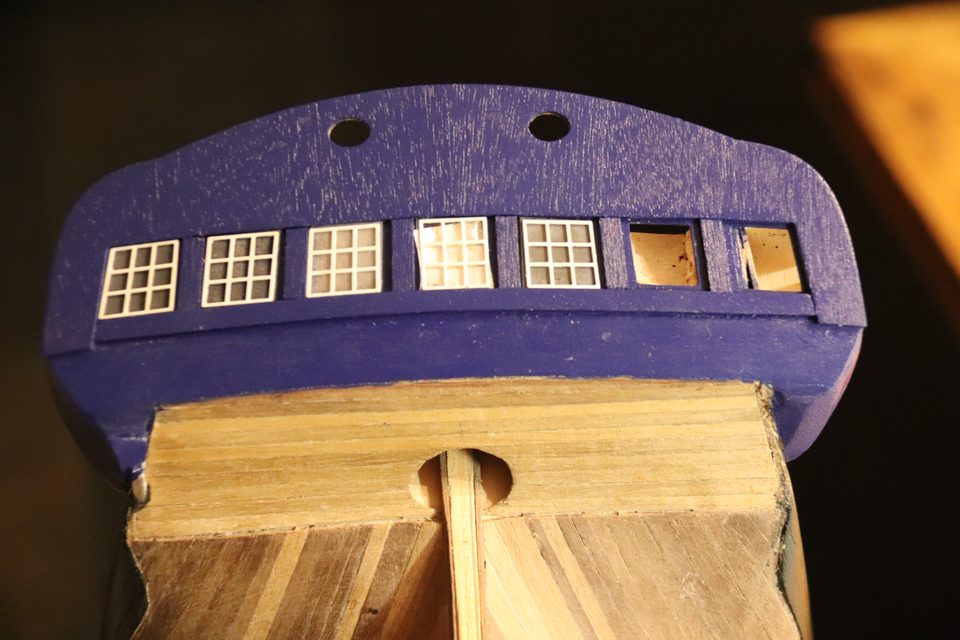
From left to right: grey paper, black flock, roughened plastic, aluminium foil behind plastic, and the grey haze. Tip from Building Mouse: You can also put aluminium foil behind a piece of clear plastic.
Mix black and white paint to a grey and use it to put a thin, uneven haze on the back of the clear plastic. Work thinly: the less paint, the more the pane keeps shining. Make the tint darker until you no longer see the stern frames.
Tip from acura: Use a hole saw to cut a hole the size of the paint pot in a bit of board; that gives it a solid base.
Watch out: Knocked over the pot of black paint while mixing. I had no large clamps to hold the pot down; a board with a hole from the hole saw solves that.
For each window cut a piece of plastic to size, stick it behind the brass frame and set it in the opening. Work window by window and keep the glue to a minimum, because every drop that runs stays visible on the plastic. It is fiddly work and stays that way.
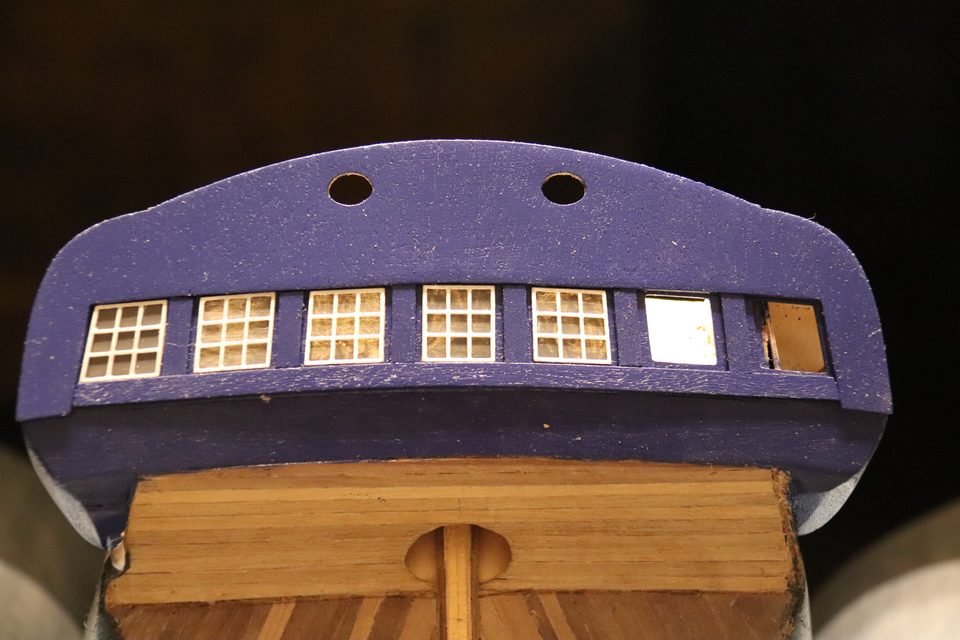
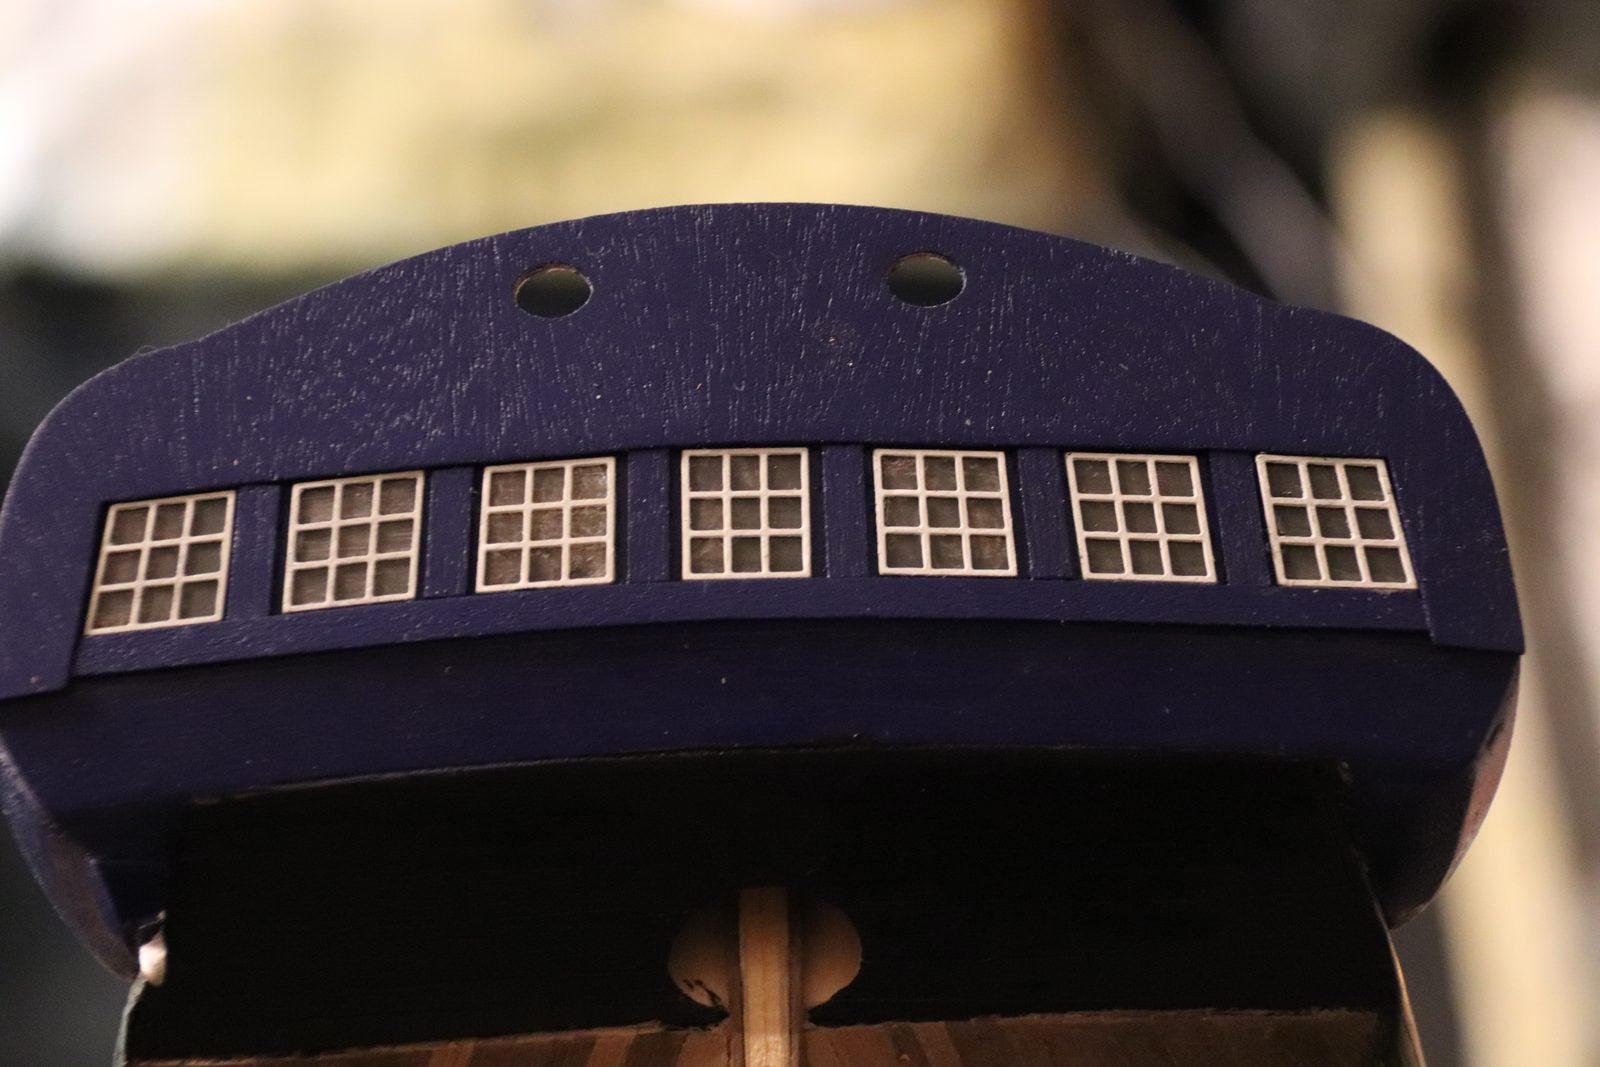
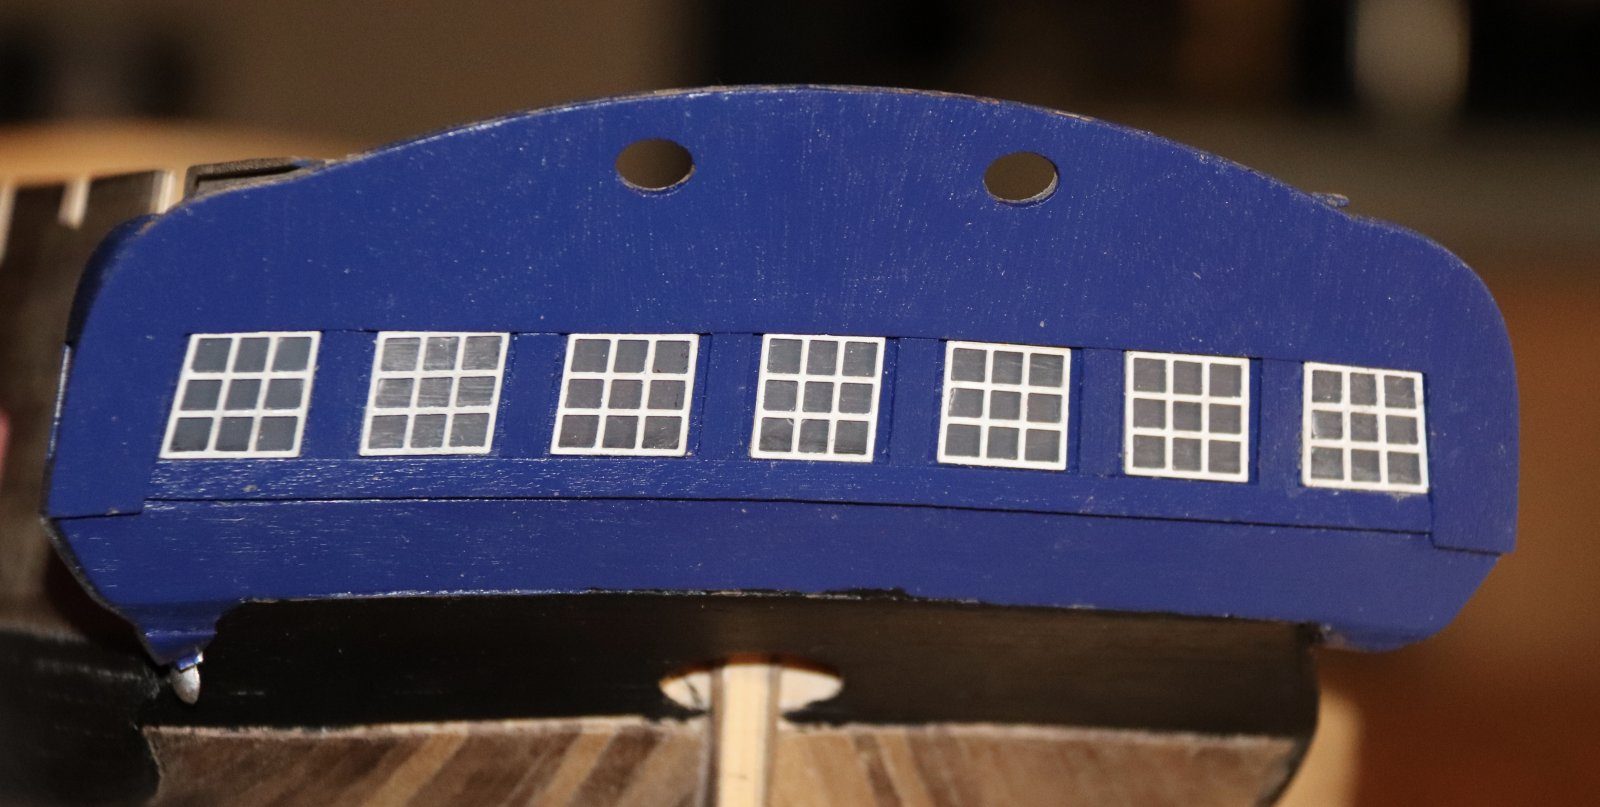
Halfway: the left-hand windows are already in the transom with their grey panes, on the right the openings are still empty. Take a photo with flash. It shows every nasty detail, such as glue that ran a little in a few places. What you see with flash you do not see in ordinary light; so judge in normal light and only fix what really bothers you.
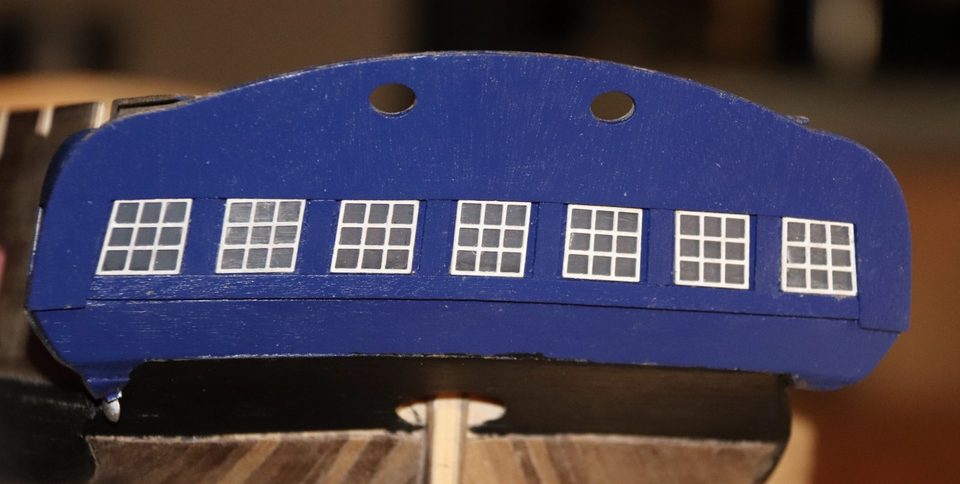
With flash: the glue marks behind a few panes become visible. Tip from Hans Groenenberg: Glass was only used in wooden glazing bars from the seventeenth century, in small pieces. It was cast on tables and polished with ever finer sand: reasonably transparent, but nowhere near as clear as float glass.
Watch out: Best not to look at the boat under bright light too much. Or, as my wife said: just say it is an old ship and windows were not as nice back then.
Result
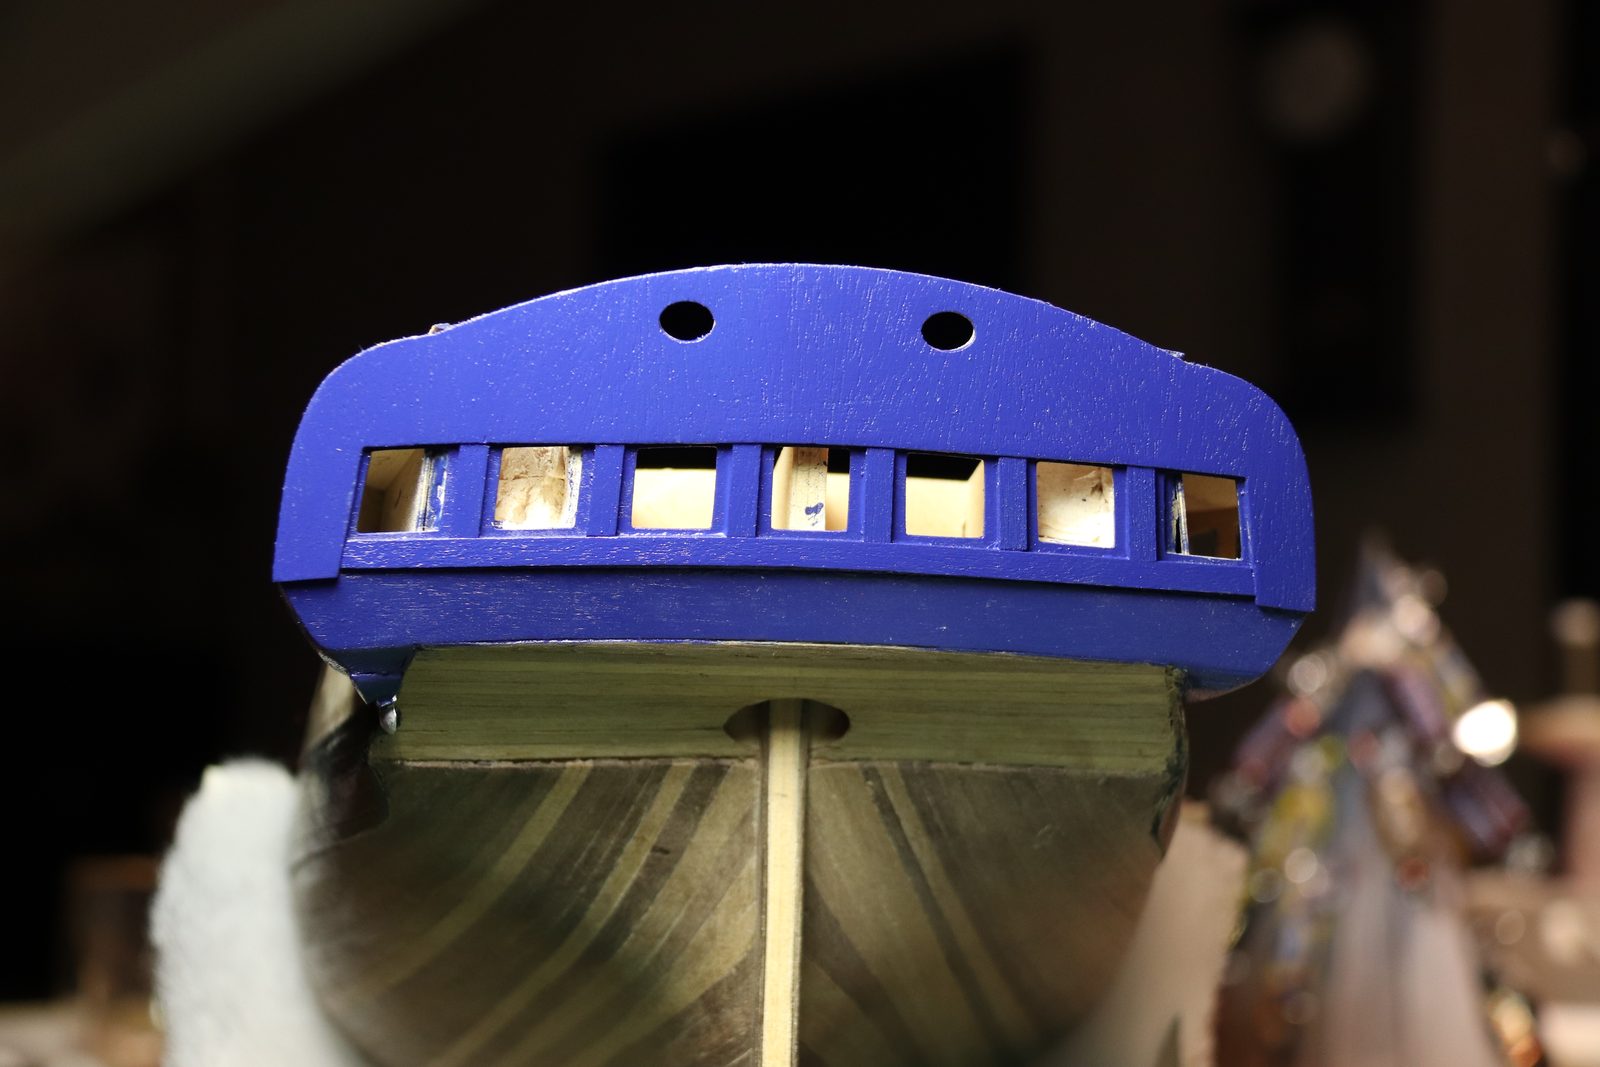
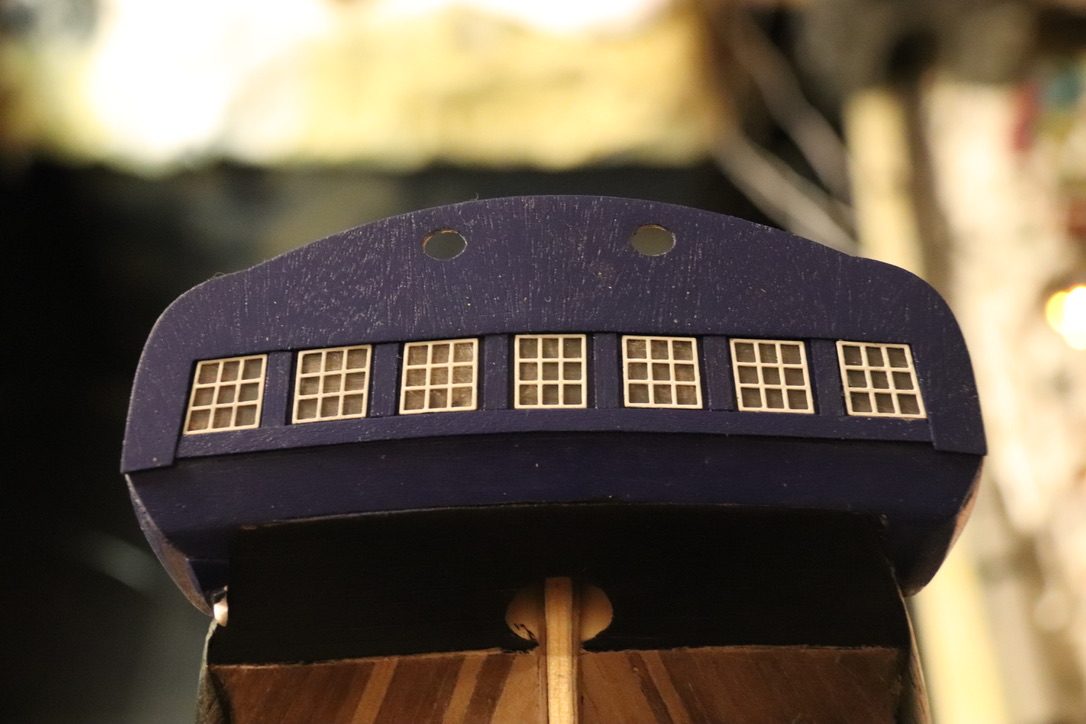
The windows shine, are not transparent and the tint could be controlled. Hans Groenenberg thought we had made the right choice; by accident there is a bit of authenticity in it too, as old glass was never as clear as today's.
Problems met with this technique
The windows cannot stay transparent because the stern frames behind them would be visible. Tested five methods; chose a grey haze on clear plastic. (Tips from Jaques, Hans Groenenberg, Building Mouse) to the register
Knocked over the pot of black paint while painting. Use a hole saw to cut a hole the size of the pot in a board as a sturdy base. (Tips from acura) to the register
In the same series: Stern and ornaments
- Five trials for the transom windows
- Fitting the quarter gallery windows with a small frame as a jig
- Repairing a white metal figure with solder
- Painting gold-coloured carvings
- Applying the red line in the profile of the mouldings
- Mouldings at the right height first, channels after
- Bending a one-piece moulding round the bow
- Making the stern port lids with a template