Extending the rudder to the keel line and setting the pintles into the copper
Glue on a small triangle so the bottom of the rudder runs level with the keel and a whole copper plate fits on it, and glue the pintles to the wood through holes cut in the copper.
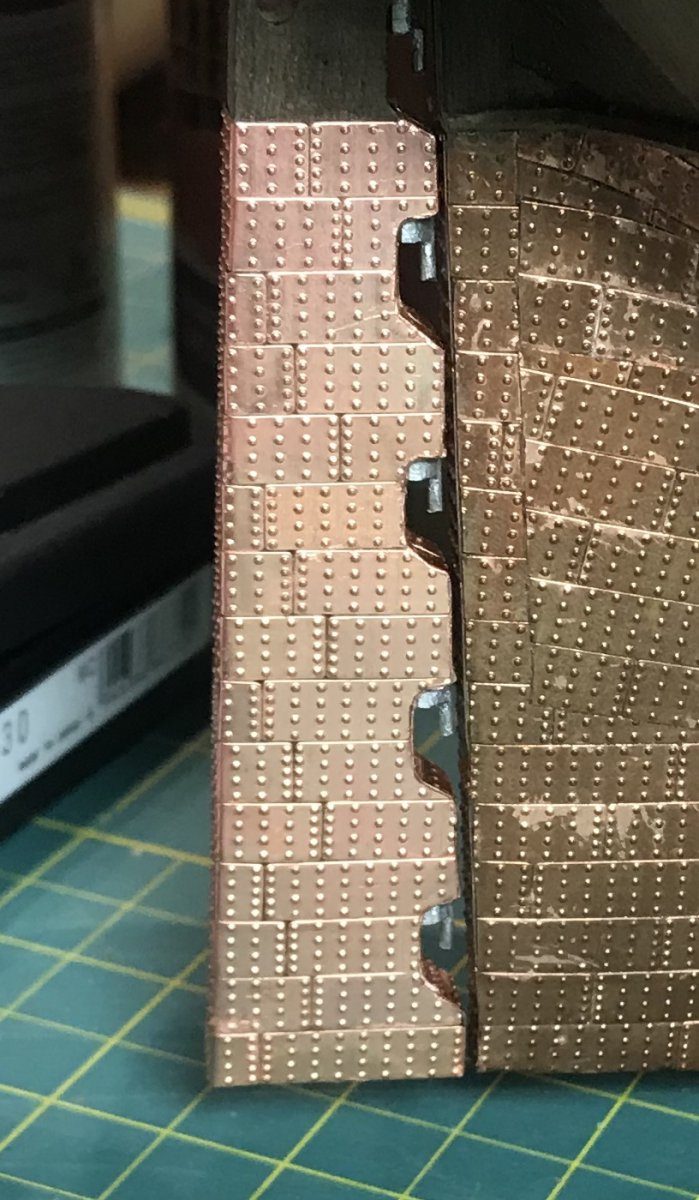
What you need
- fine saw
- hobby knife
- PVA glue
- CA glue
- The Anatomy of the Ship for checking
- offcut of wood the same thickness as the rudder
- copper plates
- pintles (364) and gudgeons (365) from the kit
Dimensions
- triangle from wood the same thickness as the rudder
- holes in the copper exactly the size of the pintles
- rudder tapered to 3 mm at keel level (16.1); HMSFly did so, iutar confirms the proportion
- Time
- an evening
- Difficulty
- moderate
- When in the build
- Phase 6,
- From the log post
- The rudder coppered and extended · forum
Before you start
The rudder has been cut out and (mostly) coppered; the hull is coppered. Preferably check the shape of the bottom before laying the lowest row of copper plates; we only discovered it while coppering.
Hold the rudder against the sternpost and look at the bottom. According to the kit drawing it slopes upwards, and that matches the drawing, but in The Anatomy of the Ship the rudder runs straight on in line with the keel. That looks better, and with a sloping bottom you cannot finish the coppering with a whole plate either.
the manual (16.1) tapers the rudder to 3 mm at keel level; iutar: from 12 to 7 inches is normal (Ships of Scale, 27 October 2024, forum post)
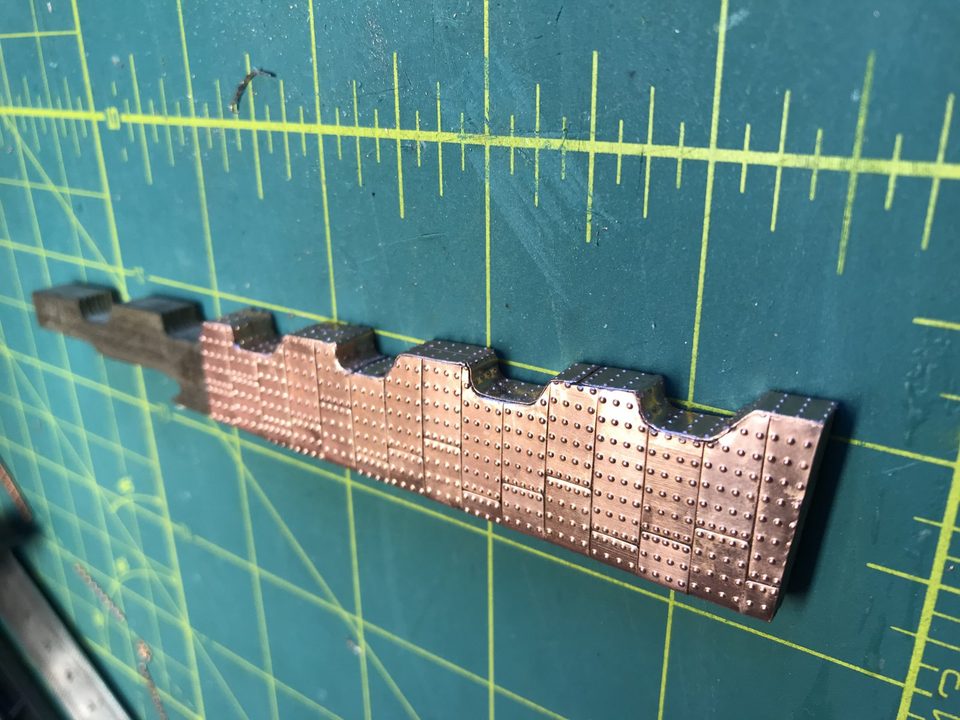
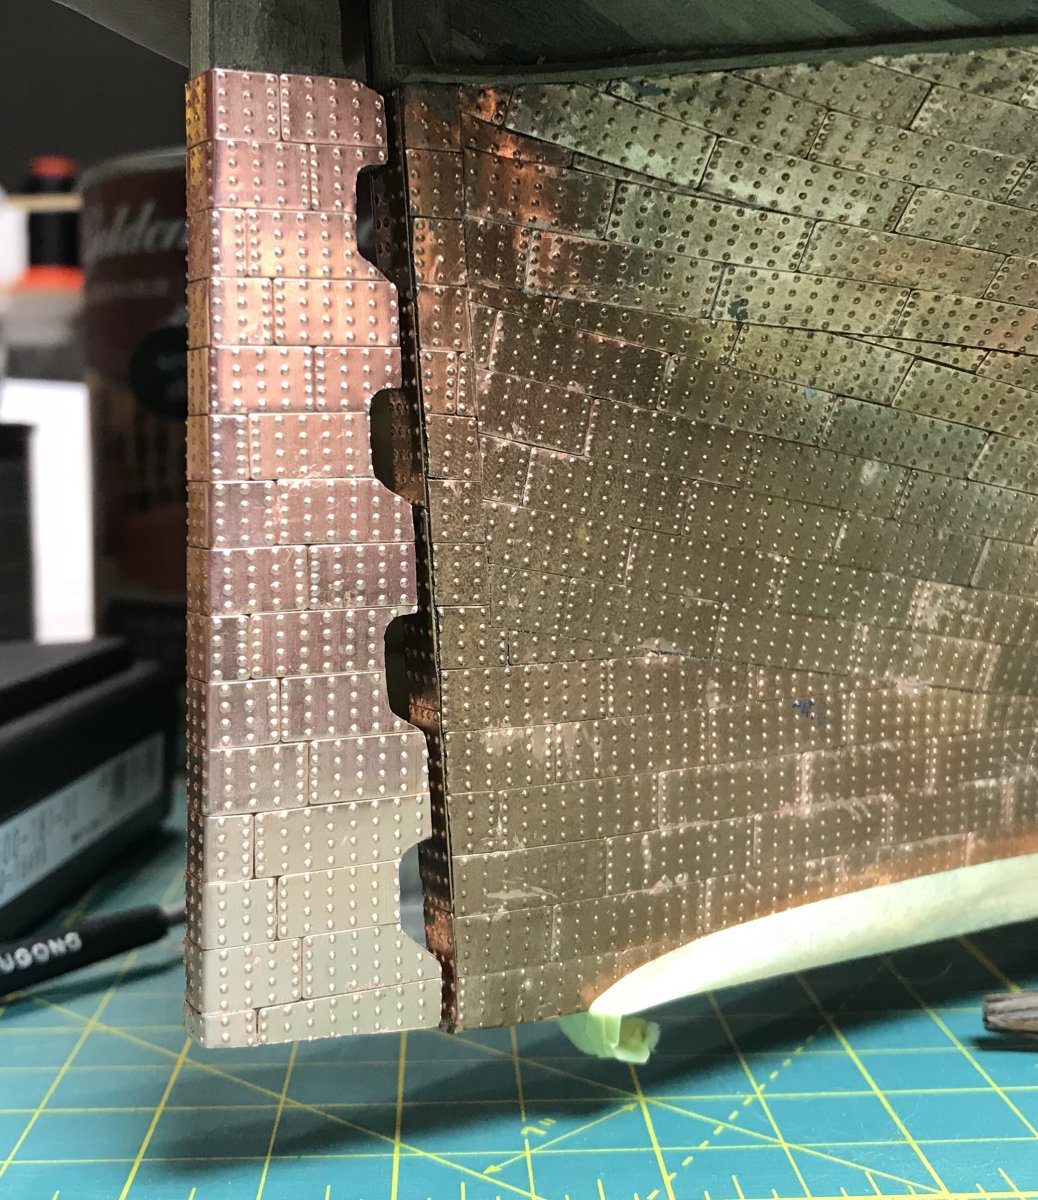
The coppered rudder on the mat: at the bottom right the lower edge still slopes upwards. Watch out: We only noticed the slope when the last row of copper plates would not come out right. So look in Anatomy of the Ship before coppering rather than during.
From an offcut of wood the same thickness as the rudder, saw a small triangle that fills the sloping bottom out to a straight line. Fit it to the bottom and sand until the lower edge runs level with the keel.
same thickness as the rudder
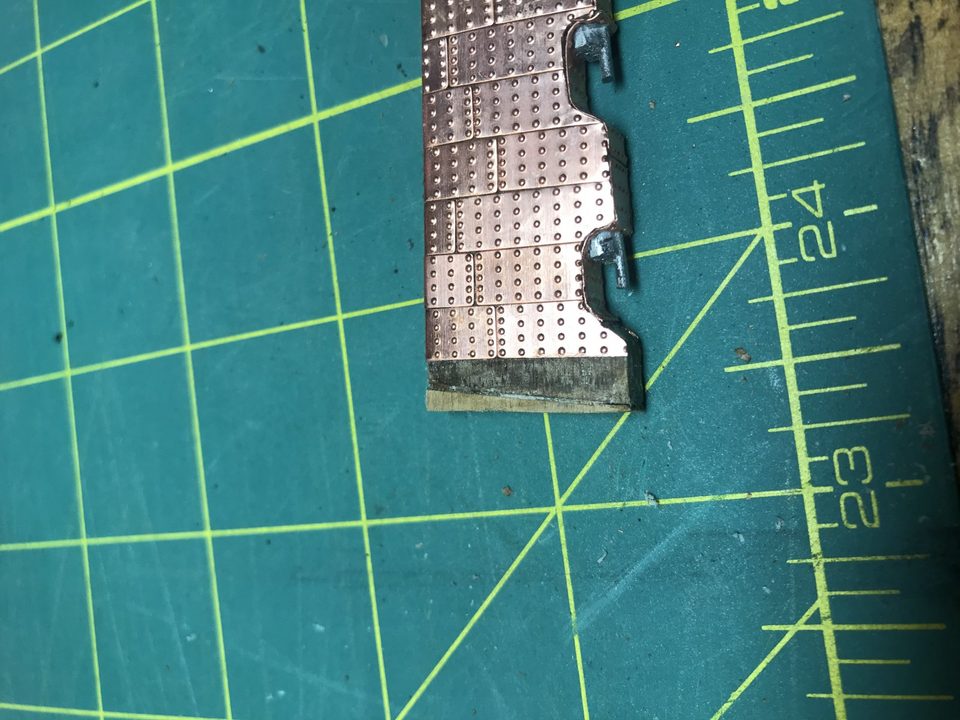
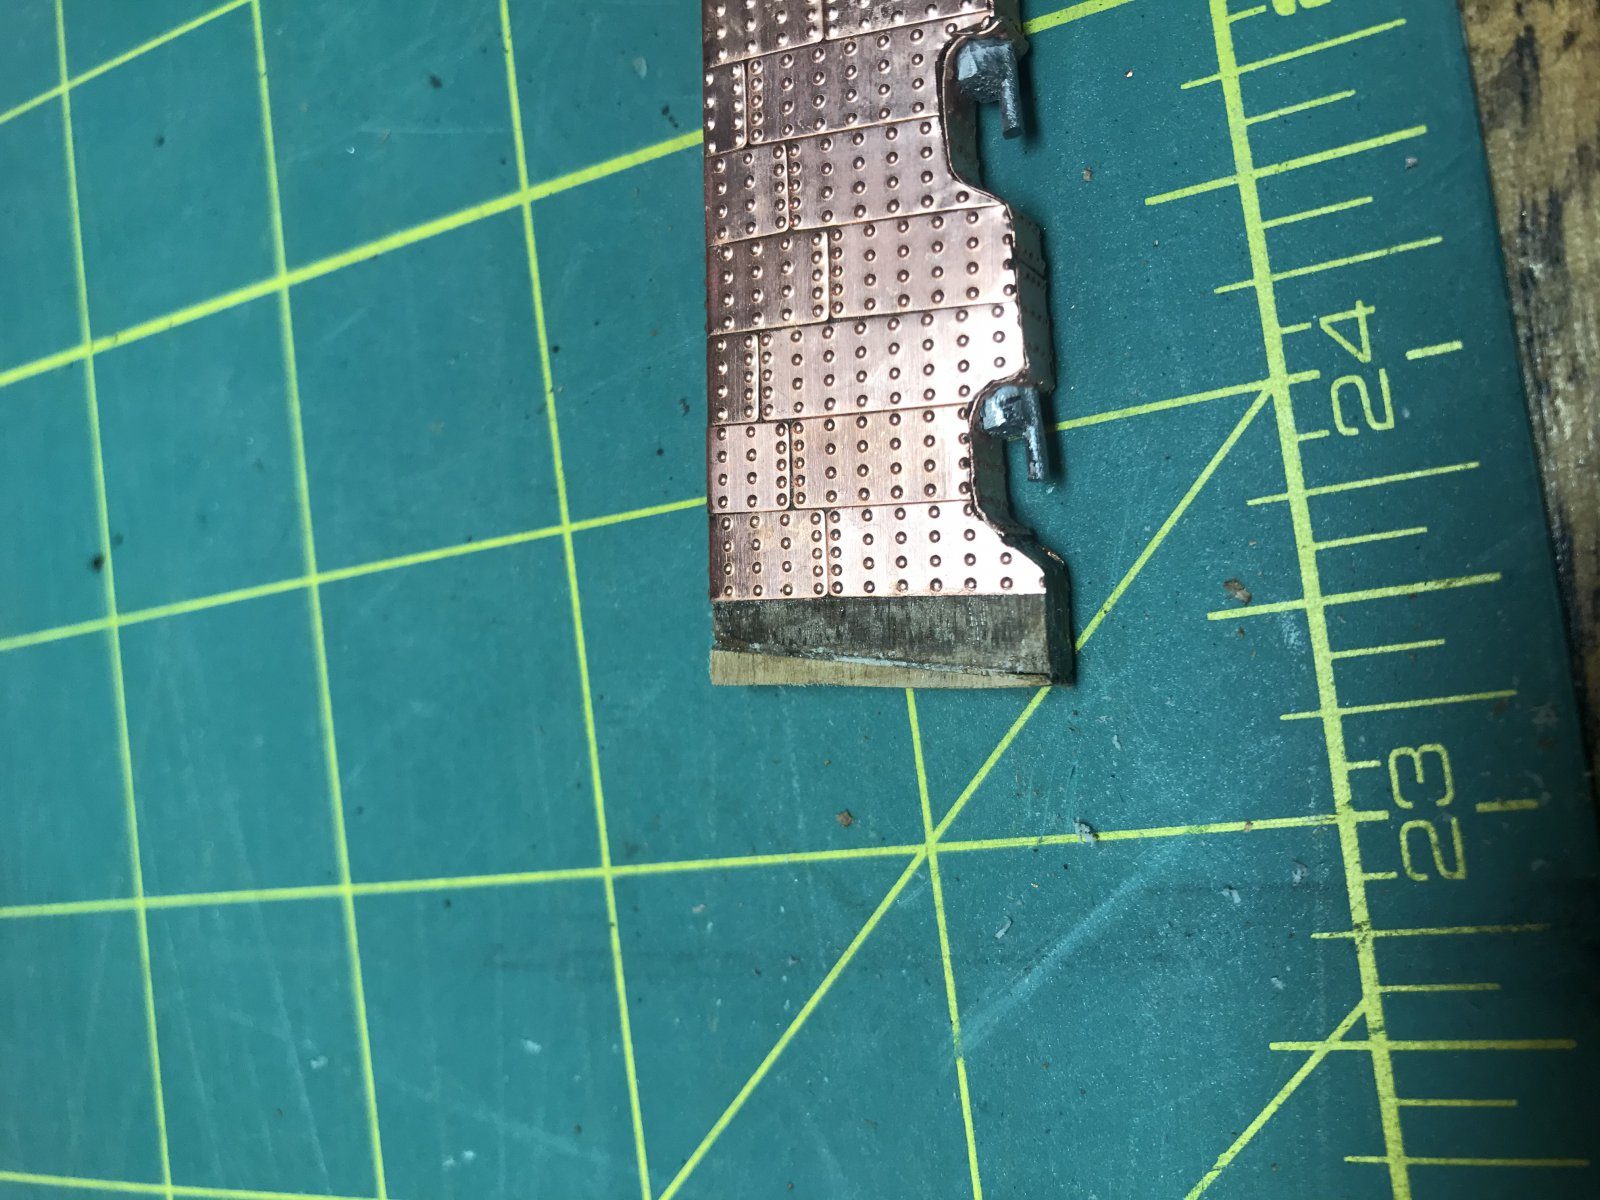
The small triangle against the bottom of the rudder, the same thickness as the rudder itself. Glue the triangle to the bottom of the rudder with PVA and let it dry. A whole copper plate then fits on, so the bottom row finishes neatly and the lower edge of the rudder runs level with the keel.
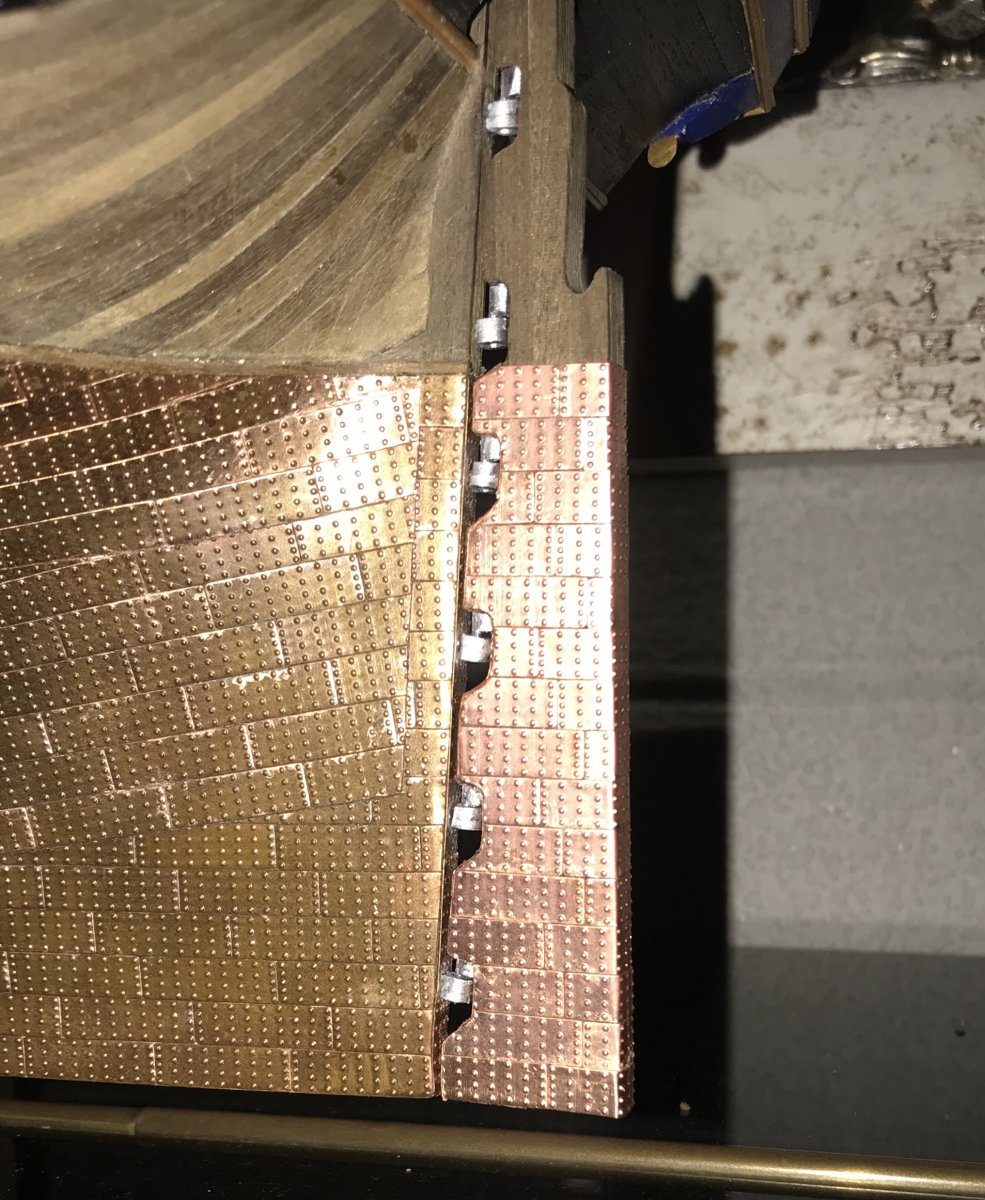
At the position of each pintle, cut a hole in the copper exactly the size of the pintle so it is glued straight onto the wood. Gluing onto the copper is no success and also leaves too little room to slide the pintles into the gudgeons later. The top two pintles sit directly on the wood and are easy.
hole the size of the pintle
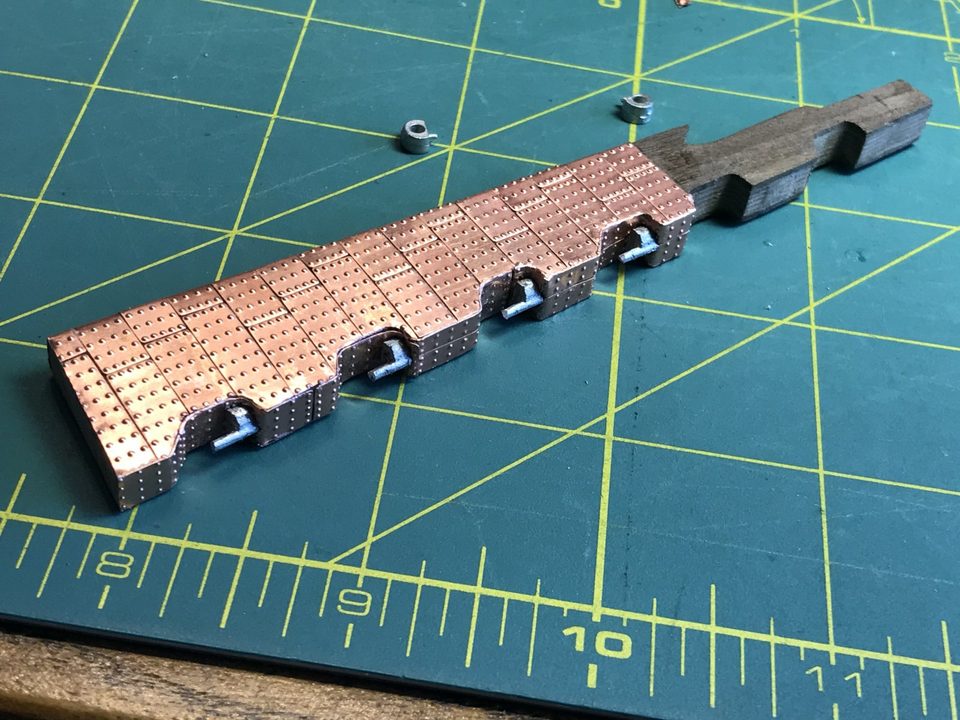
The pintles on the rudder, each in a hole cut in the copper so they sit on the wood. Watch out: A pintle glued onto the copper comes loose and stands too proud to fit into the gudgeon.
Slide the pintles into the gudgeons and hang the rudder on the sternpost. Do not glue anything yet: that way you can take the rudder off again and fix the gudgeons to the hull without the rudder in the way.
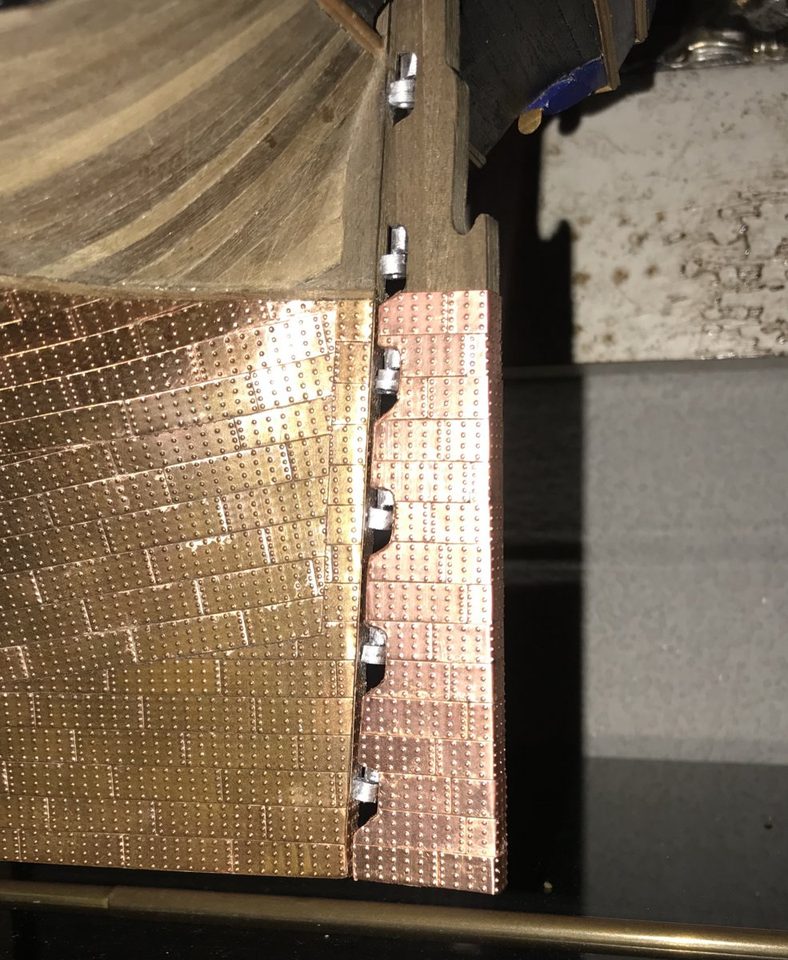
The rudder hung on the sternpost, still loose so it can come off for the gudgeons. Tip from HMSFly: Fit the pintles (364) to the rudder first and only then, with the rudder in place, the gudgeons (365) to the hull. The other way round, as the manual reads, you can no longer slide the rudder with its pintles into the gudgeons: there is no room in the slots of the rudder straps. (Ships of Scale, 30 October 2024)
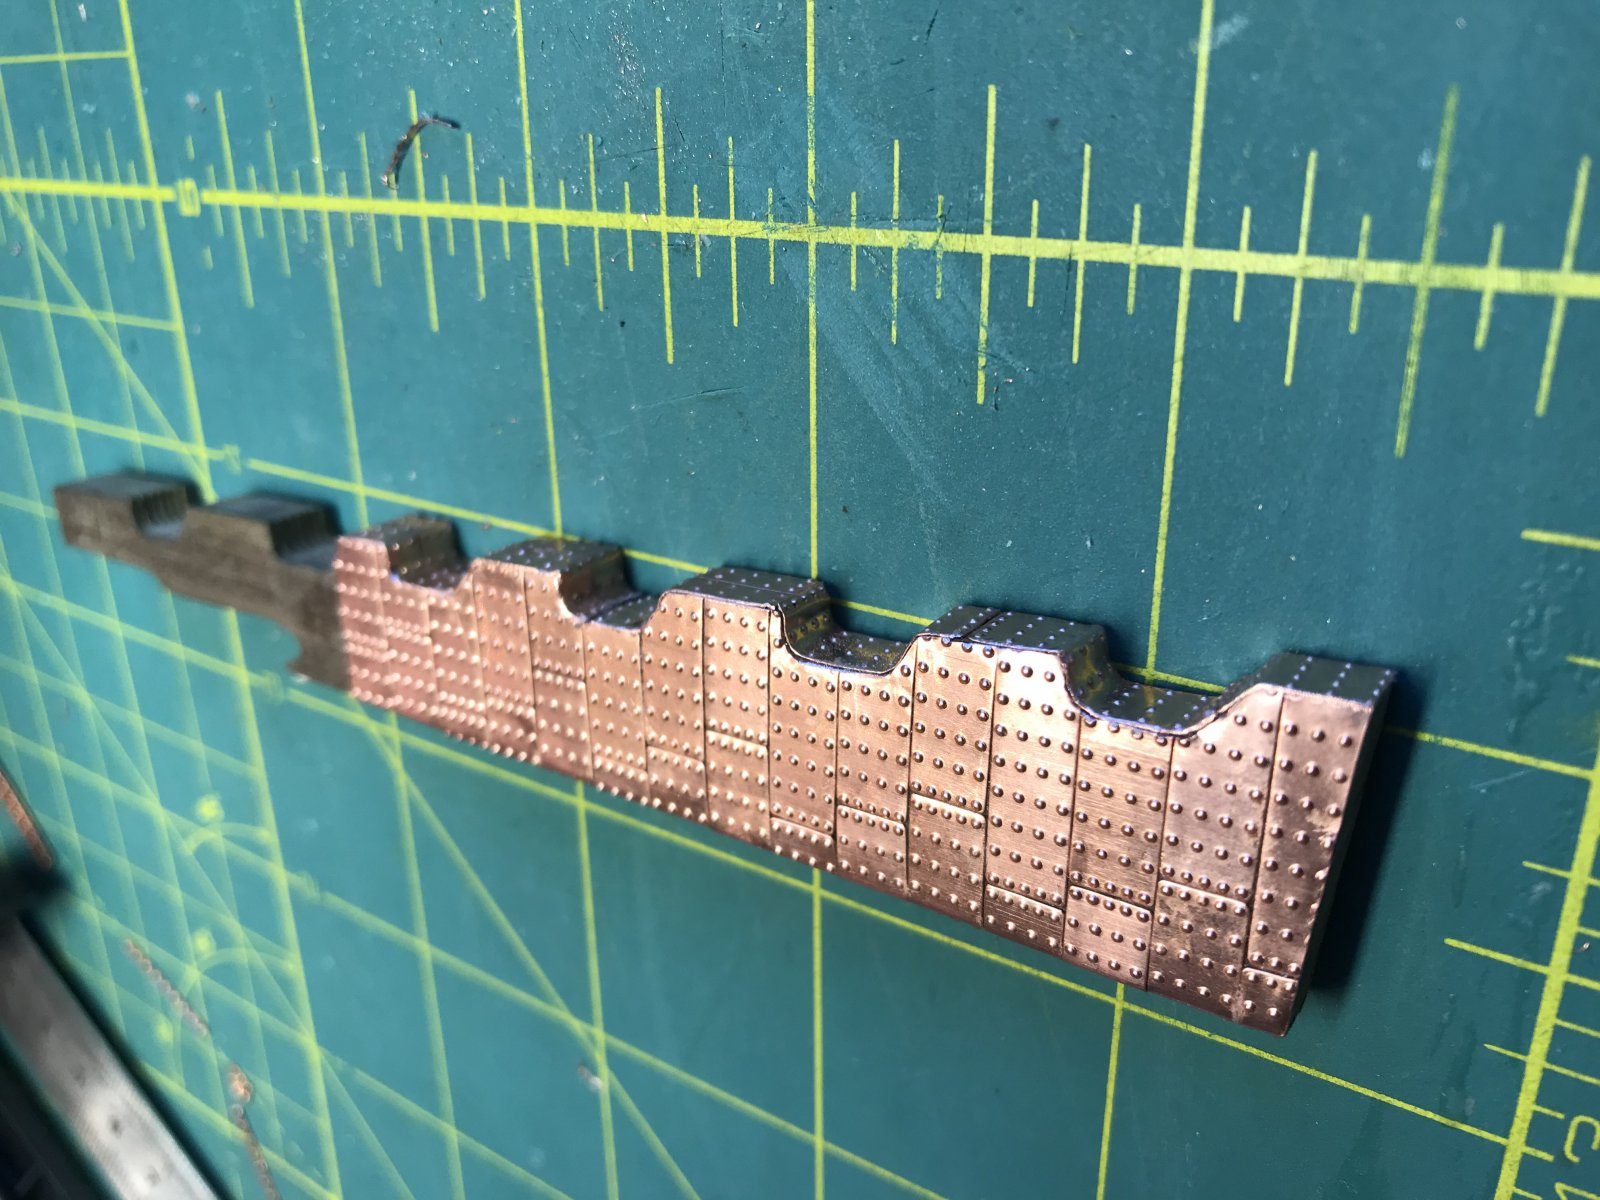
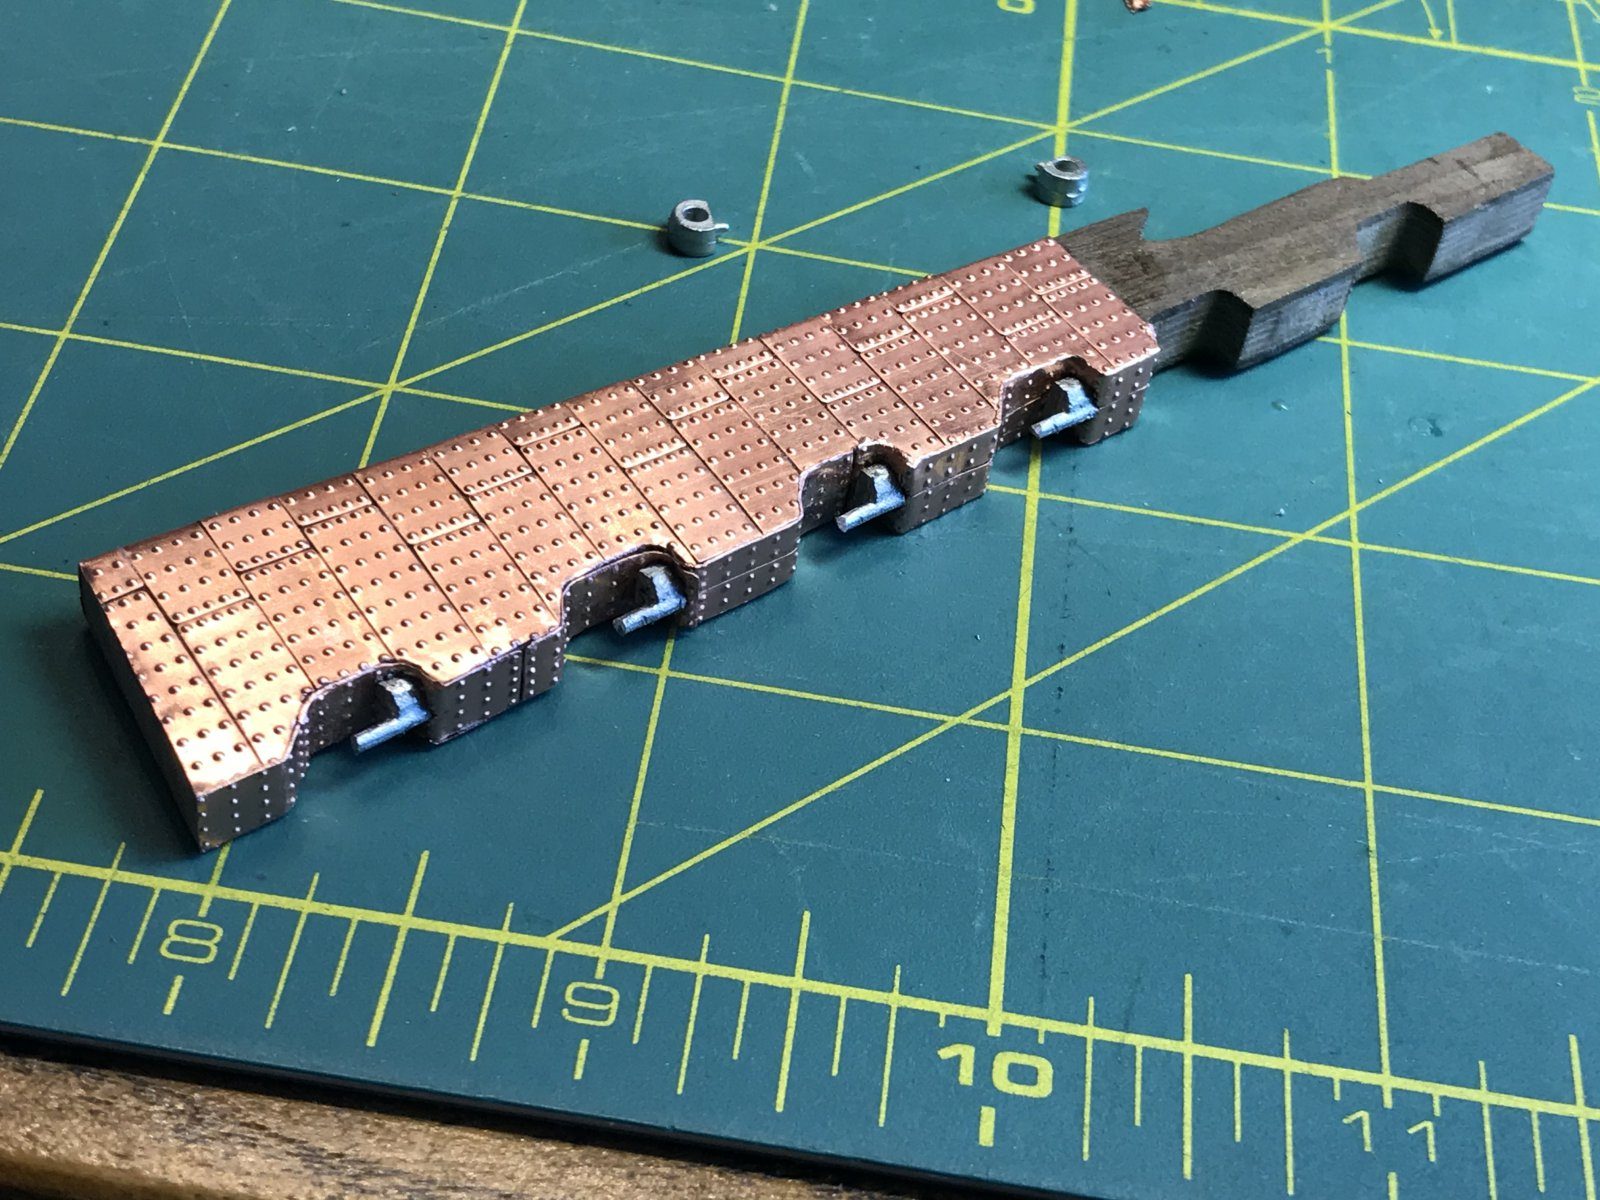
Result
The rudder now runs straight on in line with the keel and the copper finishes at the bottom with a whole plate; better than the kit drawing as far as we are concerned. Next time we check the shape against Anatomy of the Ship before the copper goes on.
Problems met with this technique
According to the kit plan the bottom of the rudder slopes upward, so a whole copper plate will not fit on it. Extended the rudder with a small triangle of the same thickness. to the register
The pintle pins do not stick to the copper and leave too little room. Cut holes in the copper the size of the pins. to the register
Kit errata
Kit plan with a bottom edge of the rudder sloping upward. Extended the rudder with a small triangle of the same thickness. to the register