A mast coat from dyed lining fabric, after the masts of the Victory
Replace the bare kit ring round the mast with a mast coat of wedges covered in pleated, tarred canvas, imitated with lining fabric.
What you need
- hobby knife
- tweezers
- fine brush
- PVA glue or a fabric glue
- mast coat rings from the kit (144 for fore and main mast, 143 for the mizzen; five in all for both decks)
- offcut of lining fabric
- brown paint (and black if you like)
- thin thread for the top edge
Dimensions
- three mast coats: foremast on the forecastle deck, mainmast in the waist, mizzen on the quarterdeck
- the smallest mast coat is the one on the quarterdeck
- Time
- several evenings
- Difficulty
- moderate
- When in the build
- Phase 10,
- From the log post
- Mast coat in wind and weather · forum
Before you start
The decks are planked and the masts dry fit in their mast holes, so you can try the mast coat in place. Read up in zu Mondfeld on how a mast coat is built: separate wedges round the mast with tarred canvas over them. Find photographs of the Victory's mast coats as a reference. Also look in the Anatomy book, C3/1 on page 44: the mast in the partners with wedges and the canvas coat over them, closer to Diana than the Victory. The kit contains five rings (144 for fore and main mast on both decks, 143 for the mizzen). The forum has a separate thread on the mast coat (WilV, Mees Ippel and Erik B, 'Mast doorvoer op boven dek', October 2022, forum post).
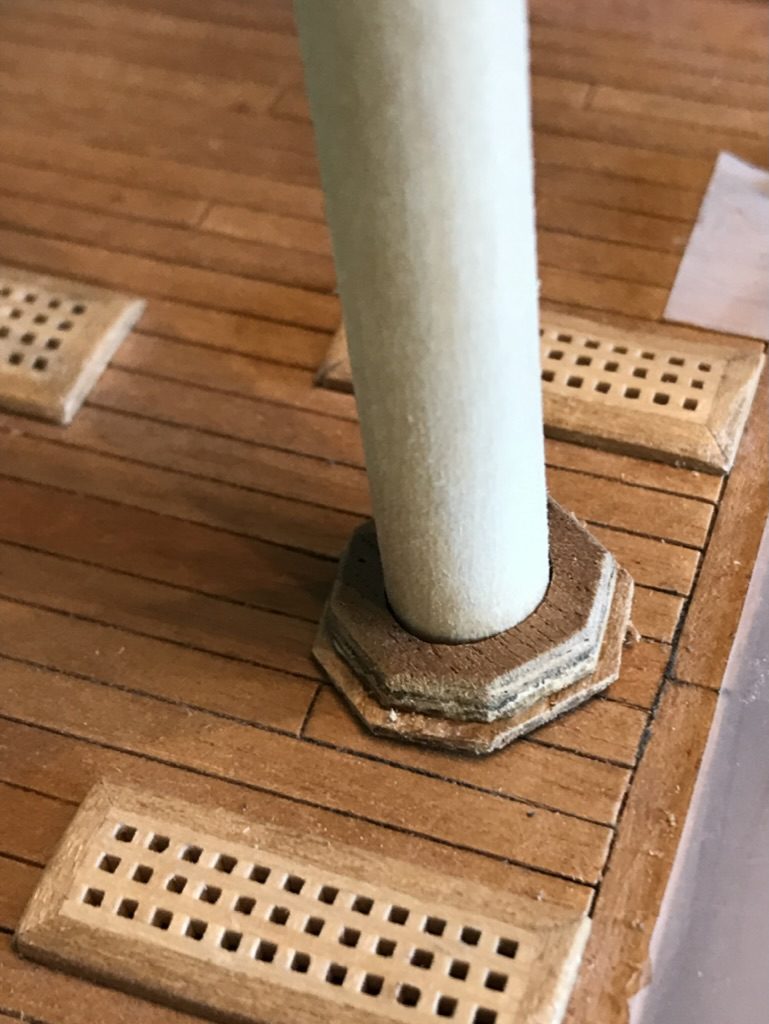
Take the supplied ring and cut notches into it with the hobby knife, so that it resembles the separate wedges that were driven in round the mast on the real ship. It need not be exact: the wedges will largely disappear under the cloth. Slide the ring over the mast and check that it sits flat on the deck.
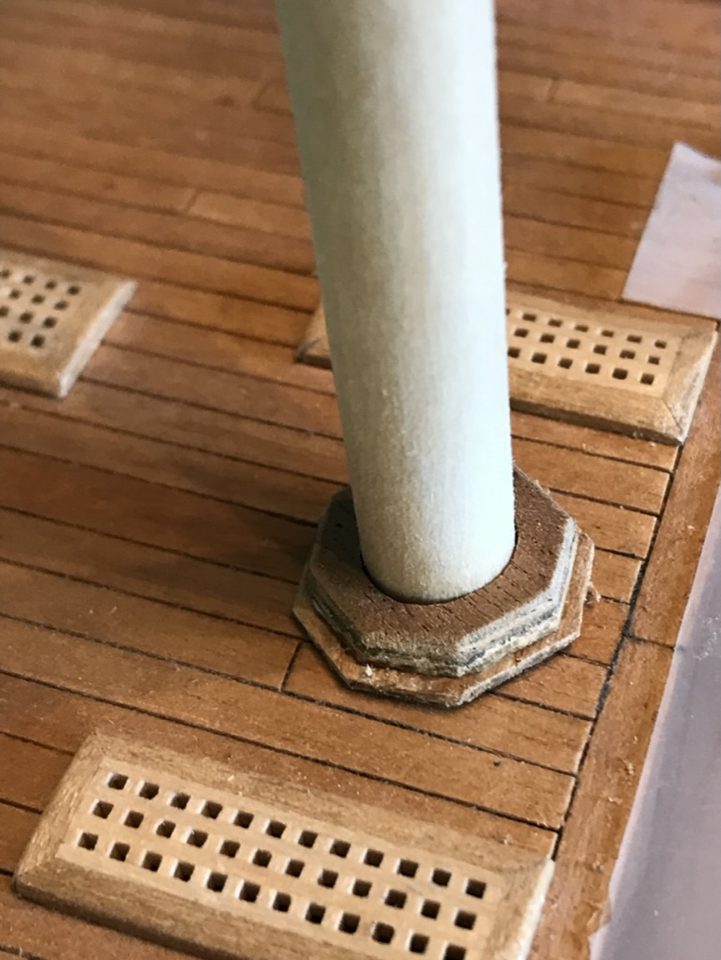
The bare mast coat: the kit ring with wedges cut into it, round the mainmast. Watch out: On most models you only see a notched ring. Historically that is not quite right, because canvas lay over the wedges. Decide beforehand how far you want to take this.
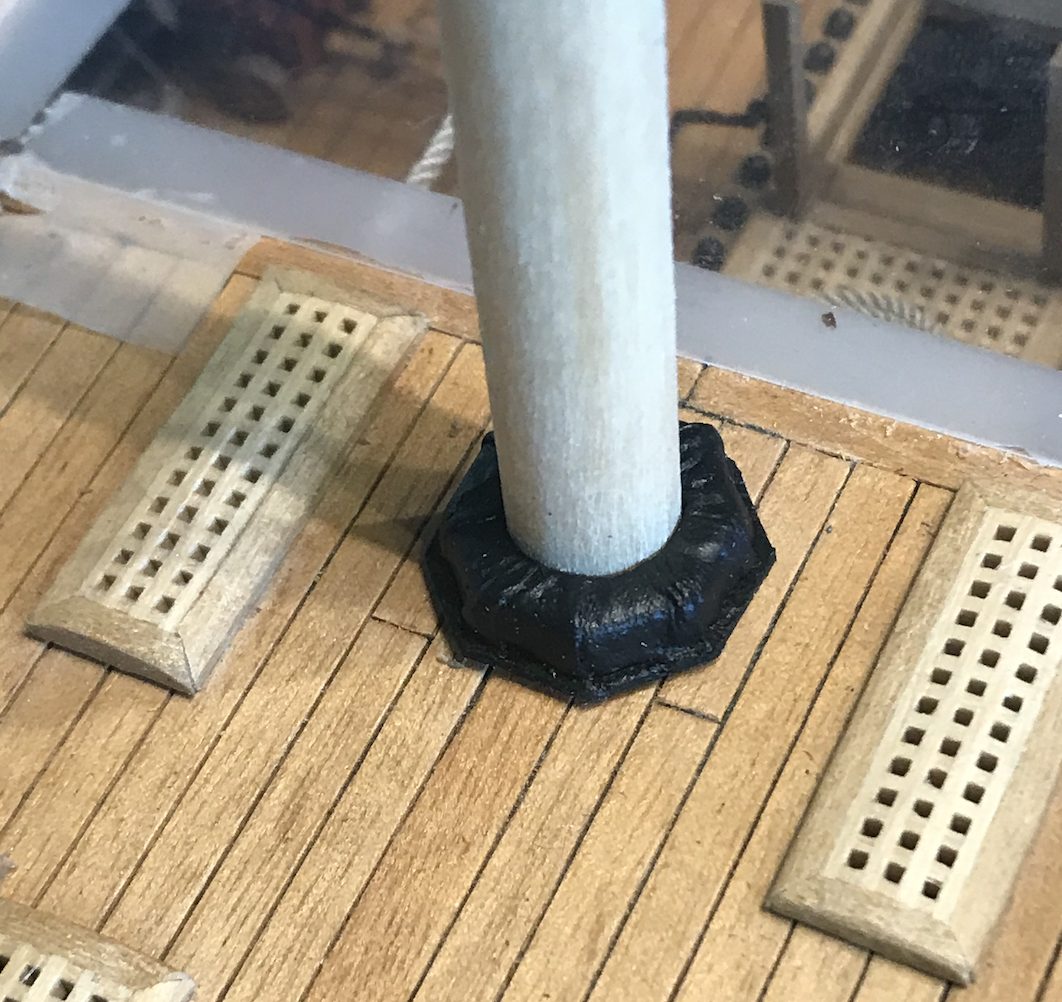
Use a thin, supple piece of lining fabric and dye it beforehand in the colour you want. Black cloth from the household fabric stash works too, but the weave stays visible and the whole looks flat. Cut a strip that goes round the ring with room to spare, with extra at the top.
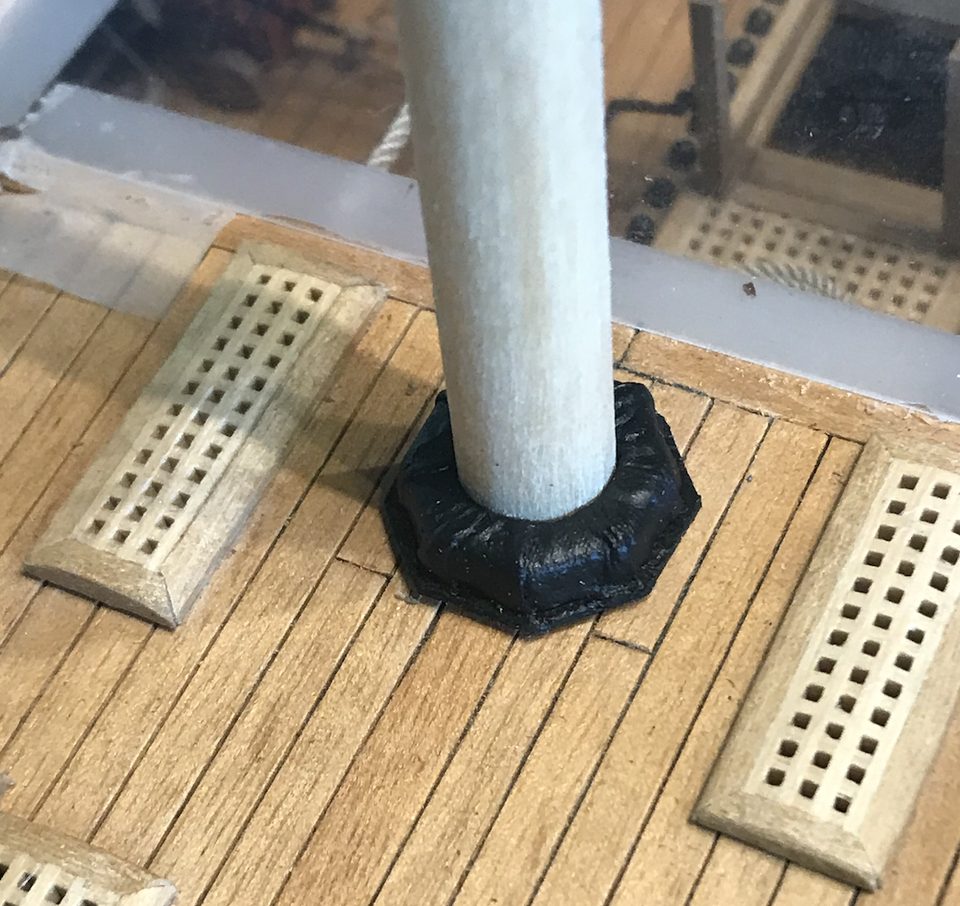
The first version with black cloth stretched tight over the ring: neat, but not yet the feel of a real coat. Tip from Jaques: I would paint it a little brown and then it is perfect.
Watch out: Thin lining fabric frays at the cut edge. Bear that in mind in the following steps.
Lay the fabric over the ring and pull it tight round the mast, so that the wedges underneath remain slightly visible. Glue the fabric to the bottom edge and against the mast. Work with tweezers, because the piece is small and the glue grabs quickly.
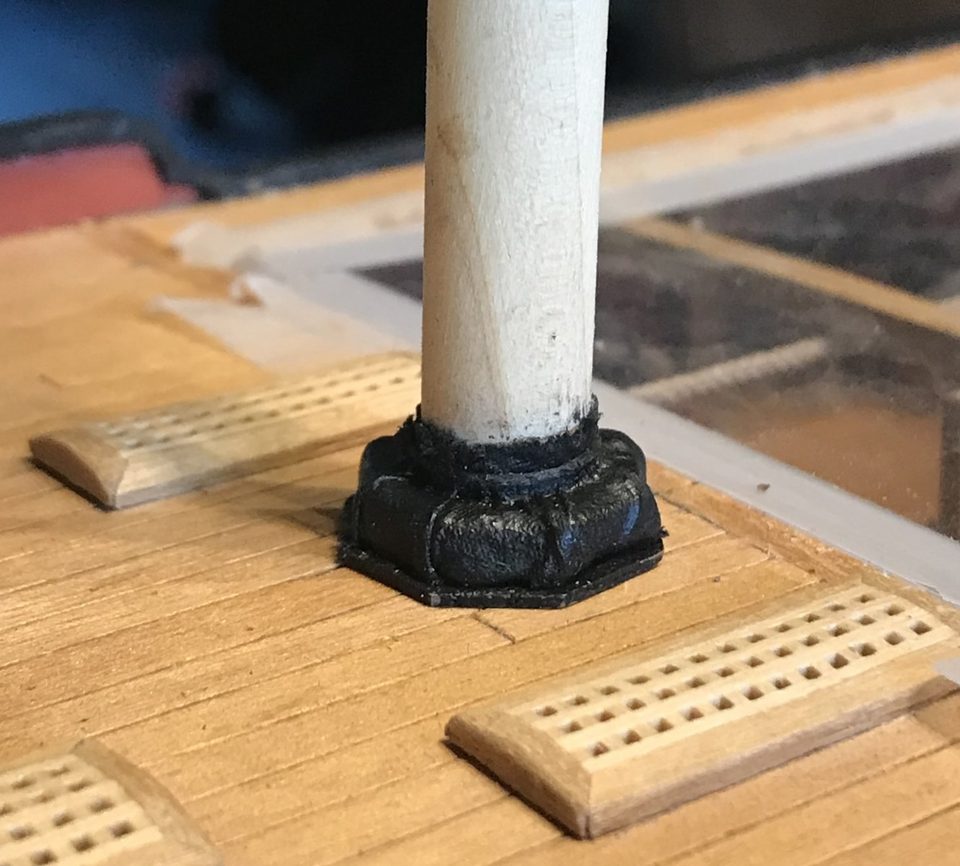
The tight version after a small adjustment: the notches of the wedges show through the cloth, with black smears from the tarring on the mast. Tip from Pingu57: The notches may well be seen.
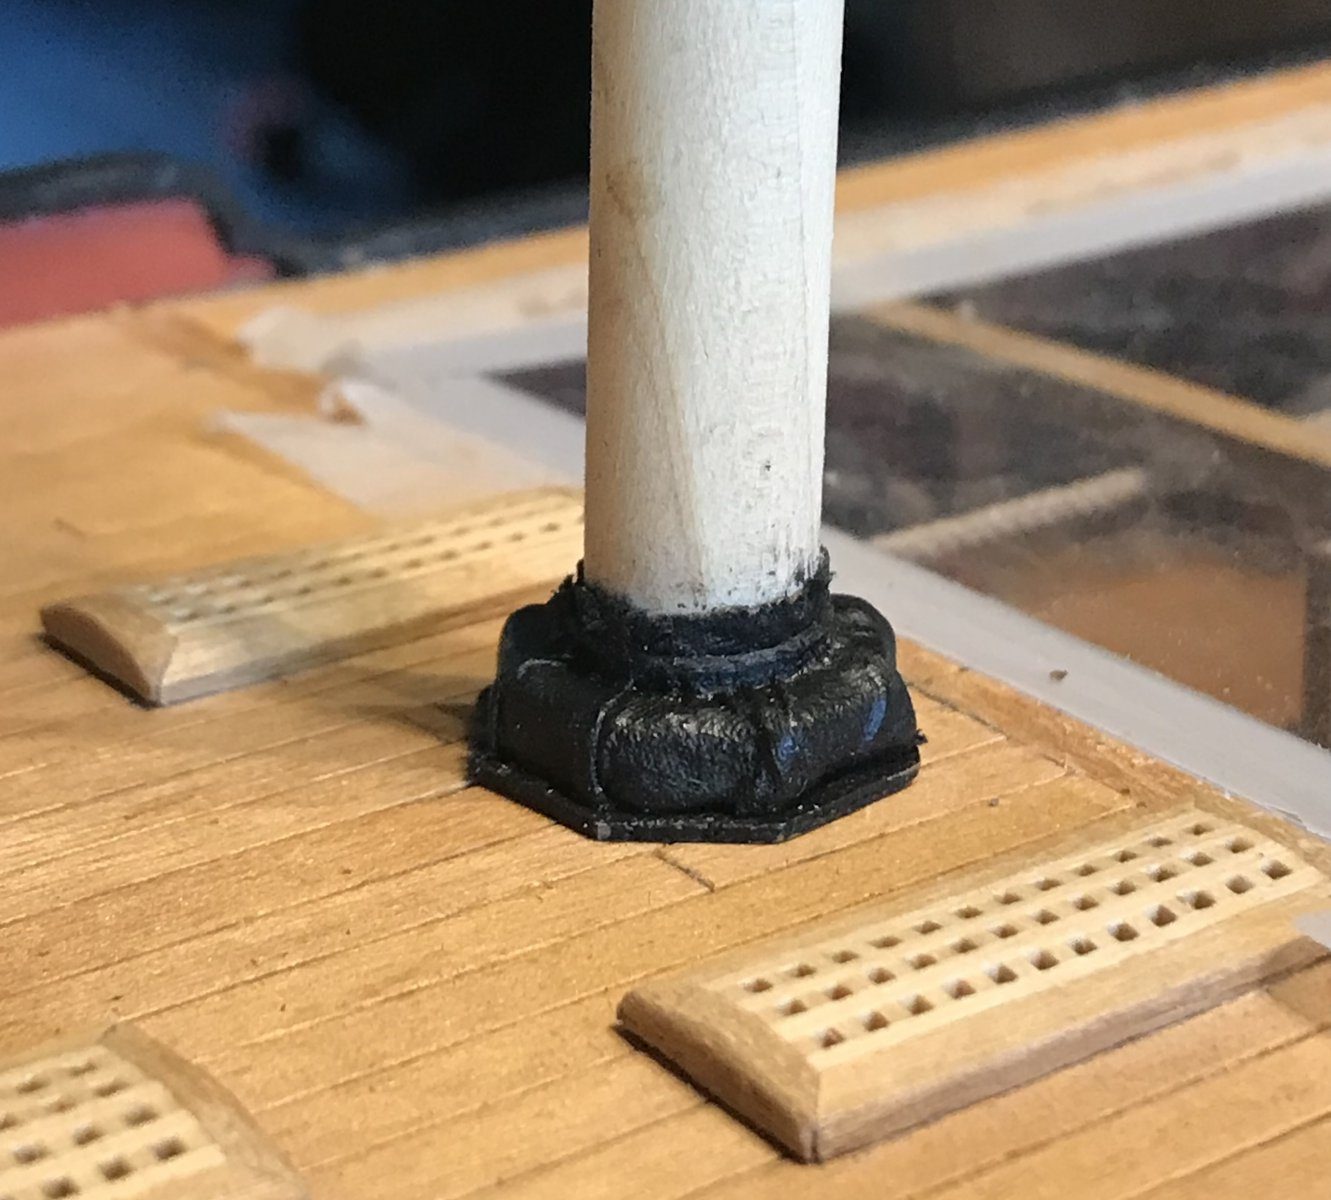
If you want a weathered coat like the ones on the Victory, lay pleats in the fabric before the glue dries. Push the cloth into folds round the mast with the tweezers and press them down at the bottom. Keep the reference photograph beside you and compare often.
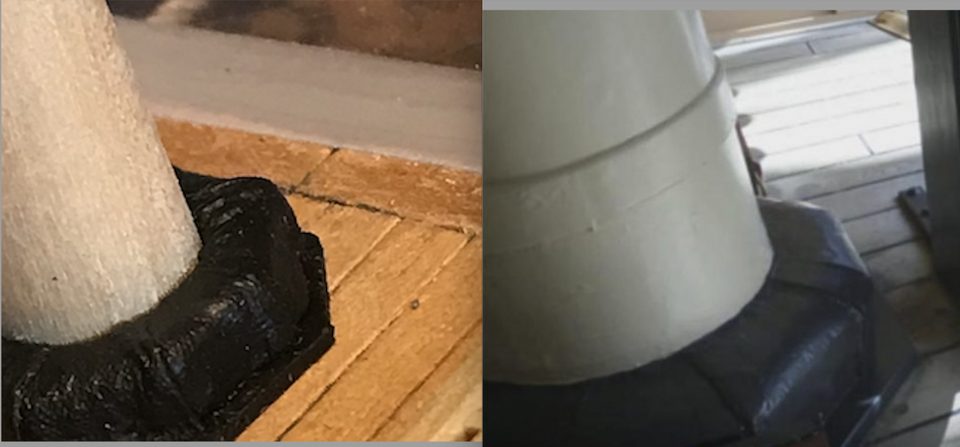
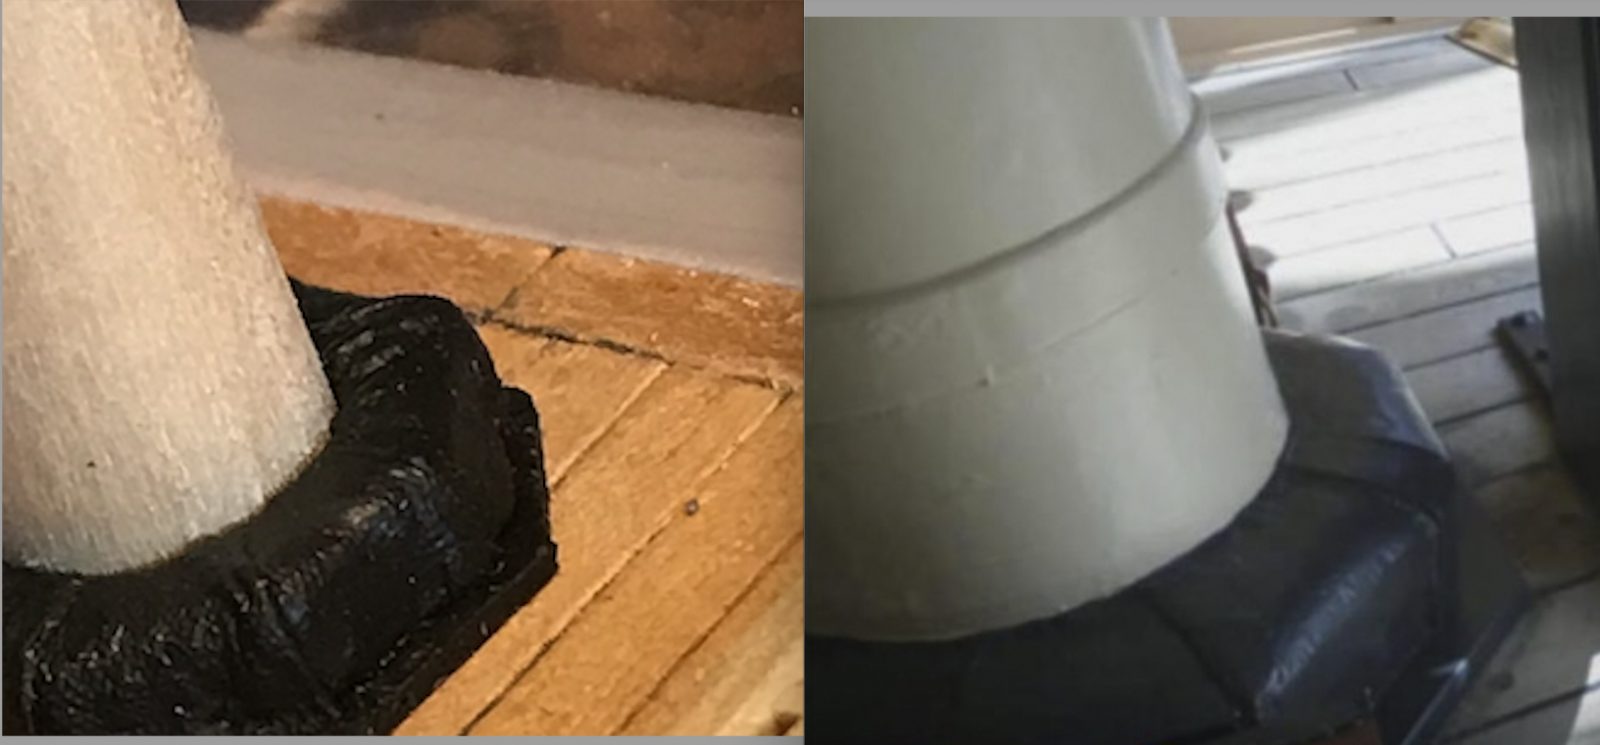
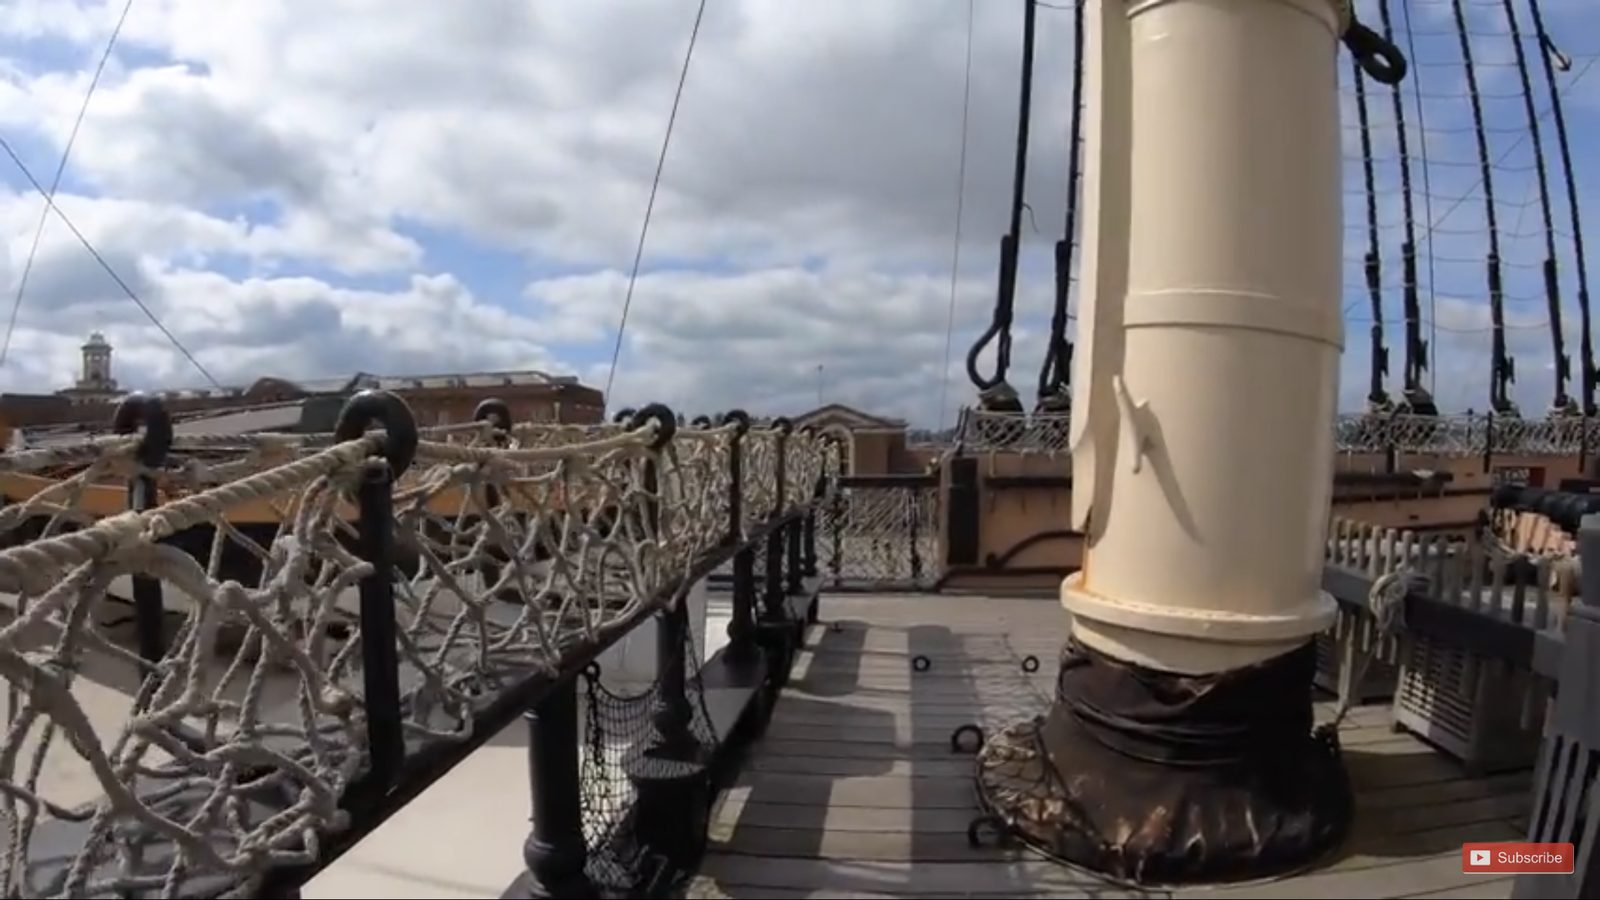
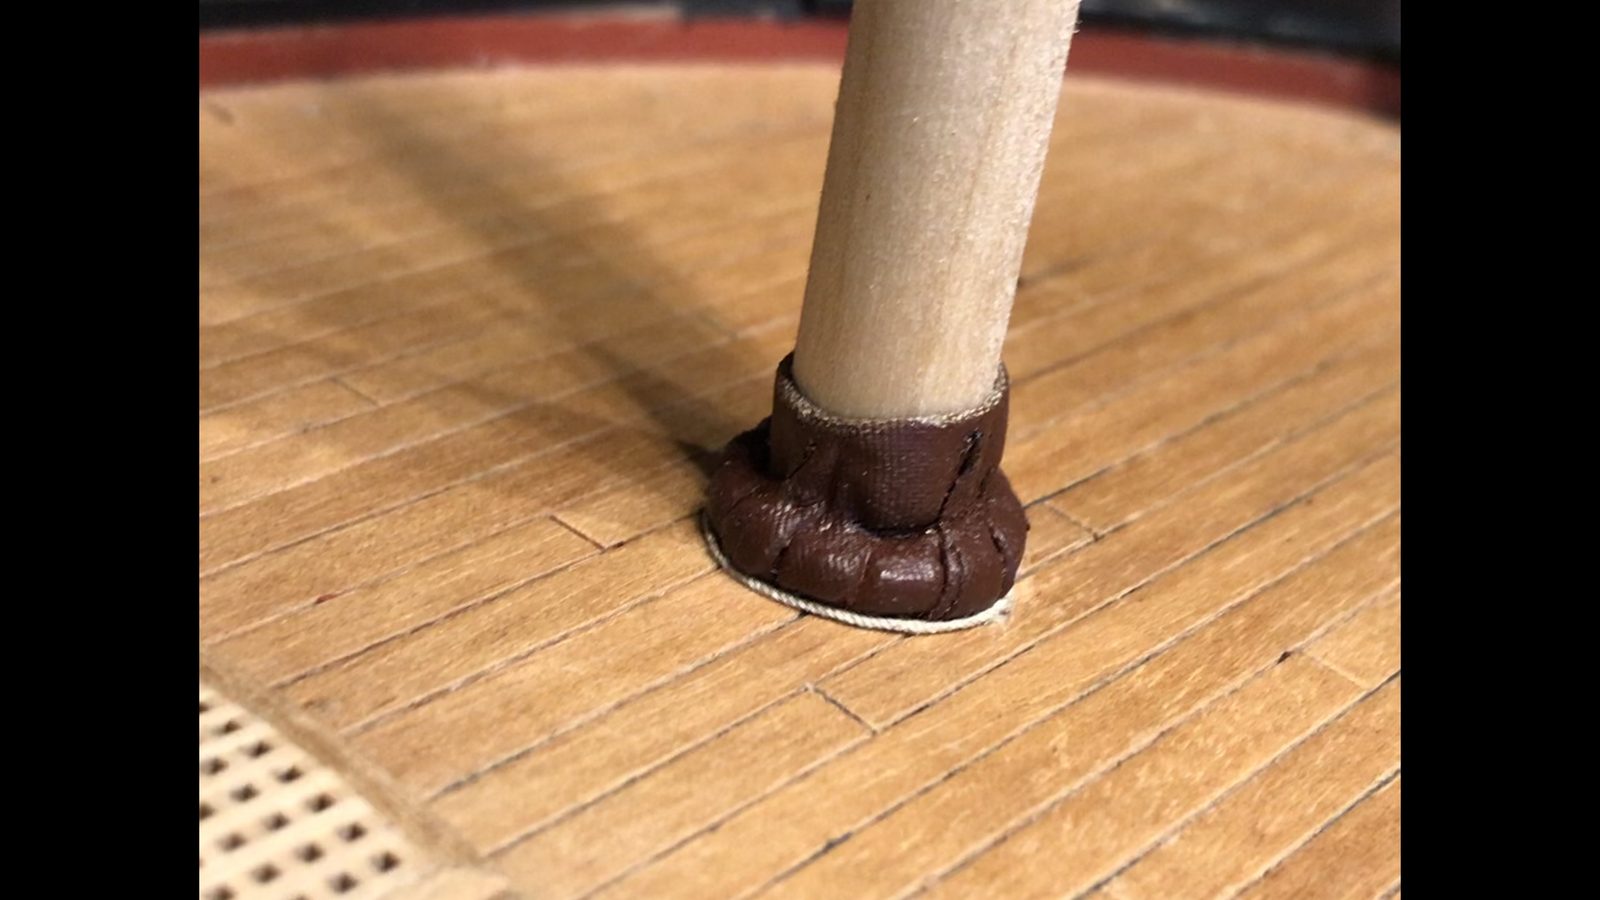
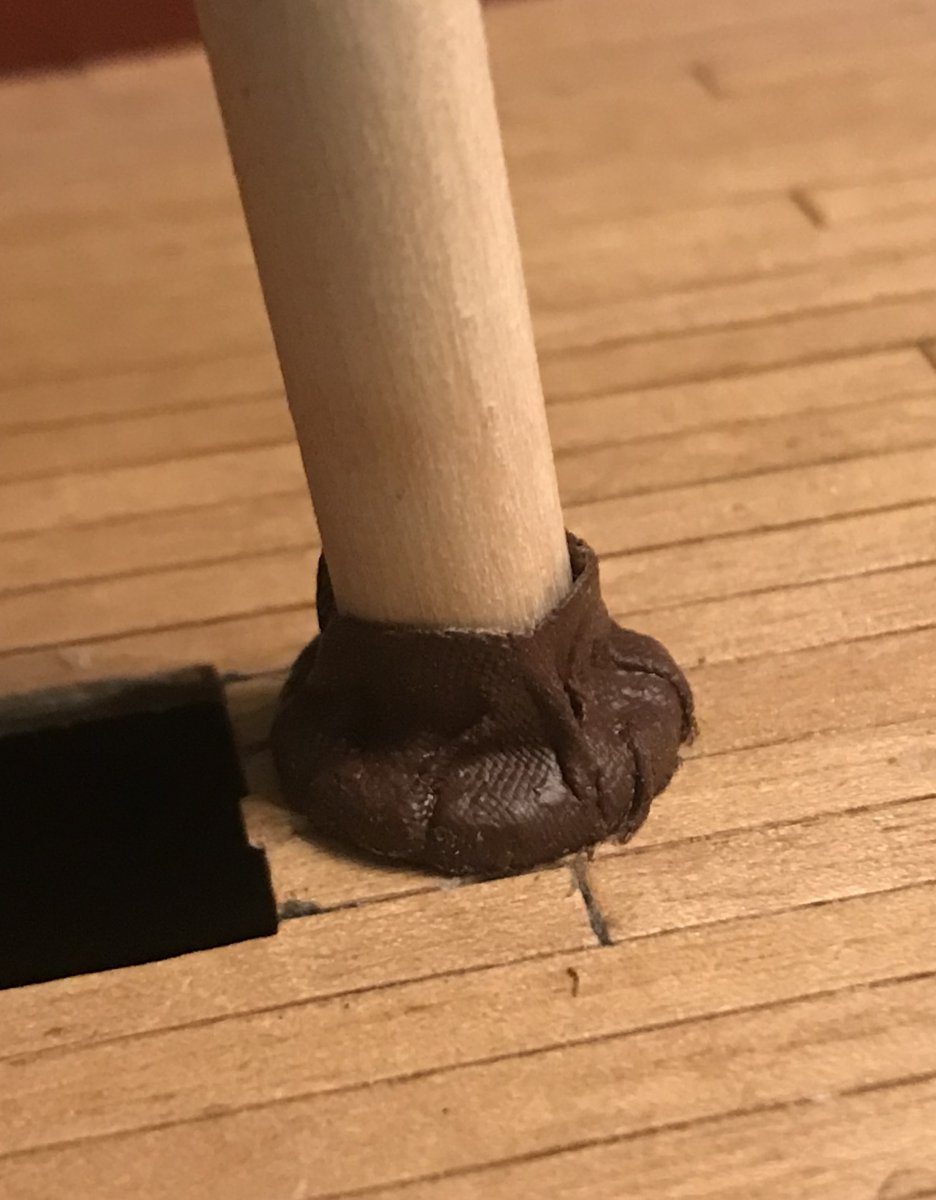
Left the pleated trial version, right the example on the Victory: this is how close you get in 1:64 with lining fabric. 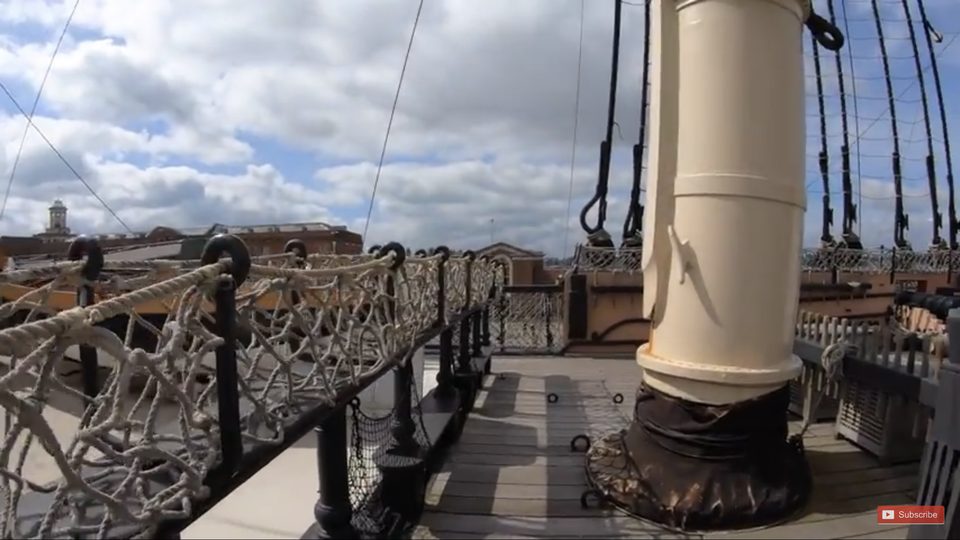
The final reference: a mast coat on the Victory standing in wind and weather. Tip from Herby63: Generally speaking the top edge is fastened to the mast itself, at least on decks that are fully exposed to wind and weather.
Watch out: Laying those pleats is a job. On the forum the tight version won 5-1, but from a little distance the pleated version gave the effect of a real coat. Make both and choose on the model.
Work a thin thread into the top edge of the fabric and fold the cloth round it, so that the frayed edges disappear. Glue the folded edge against the mast. The edge also becomes a little thicker, which strengthens the impression of folded-over canvas.
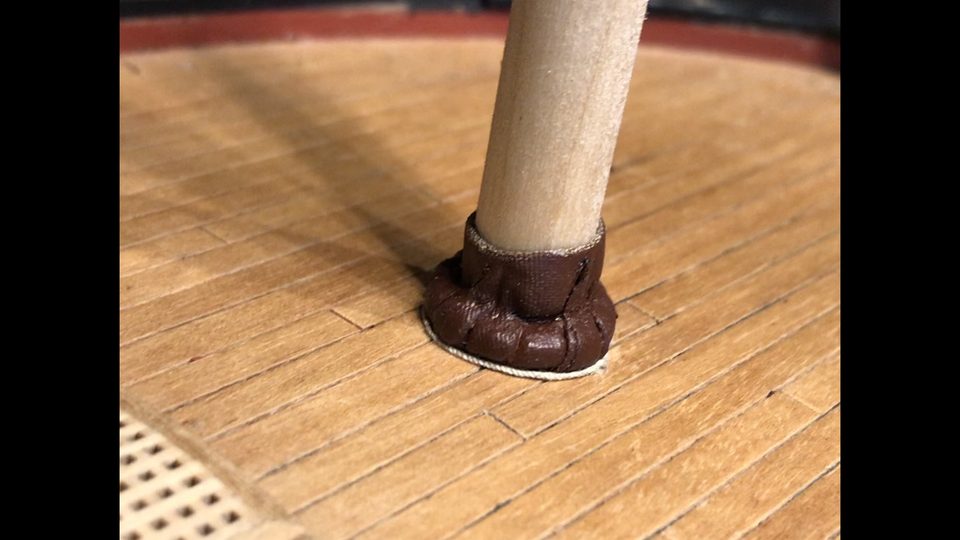
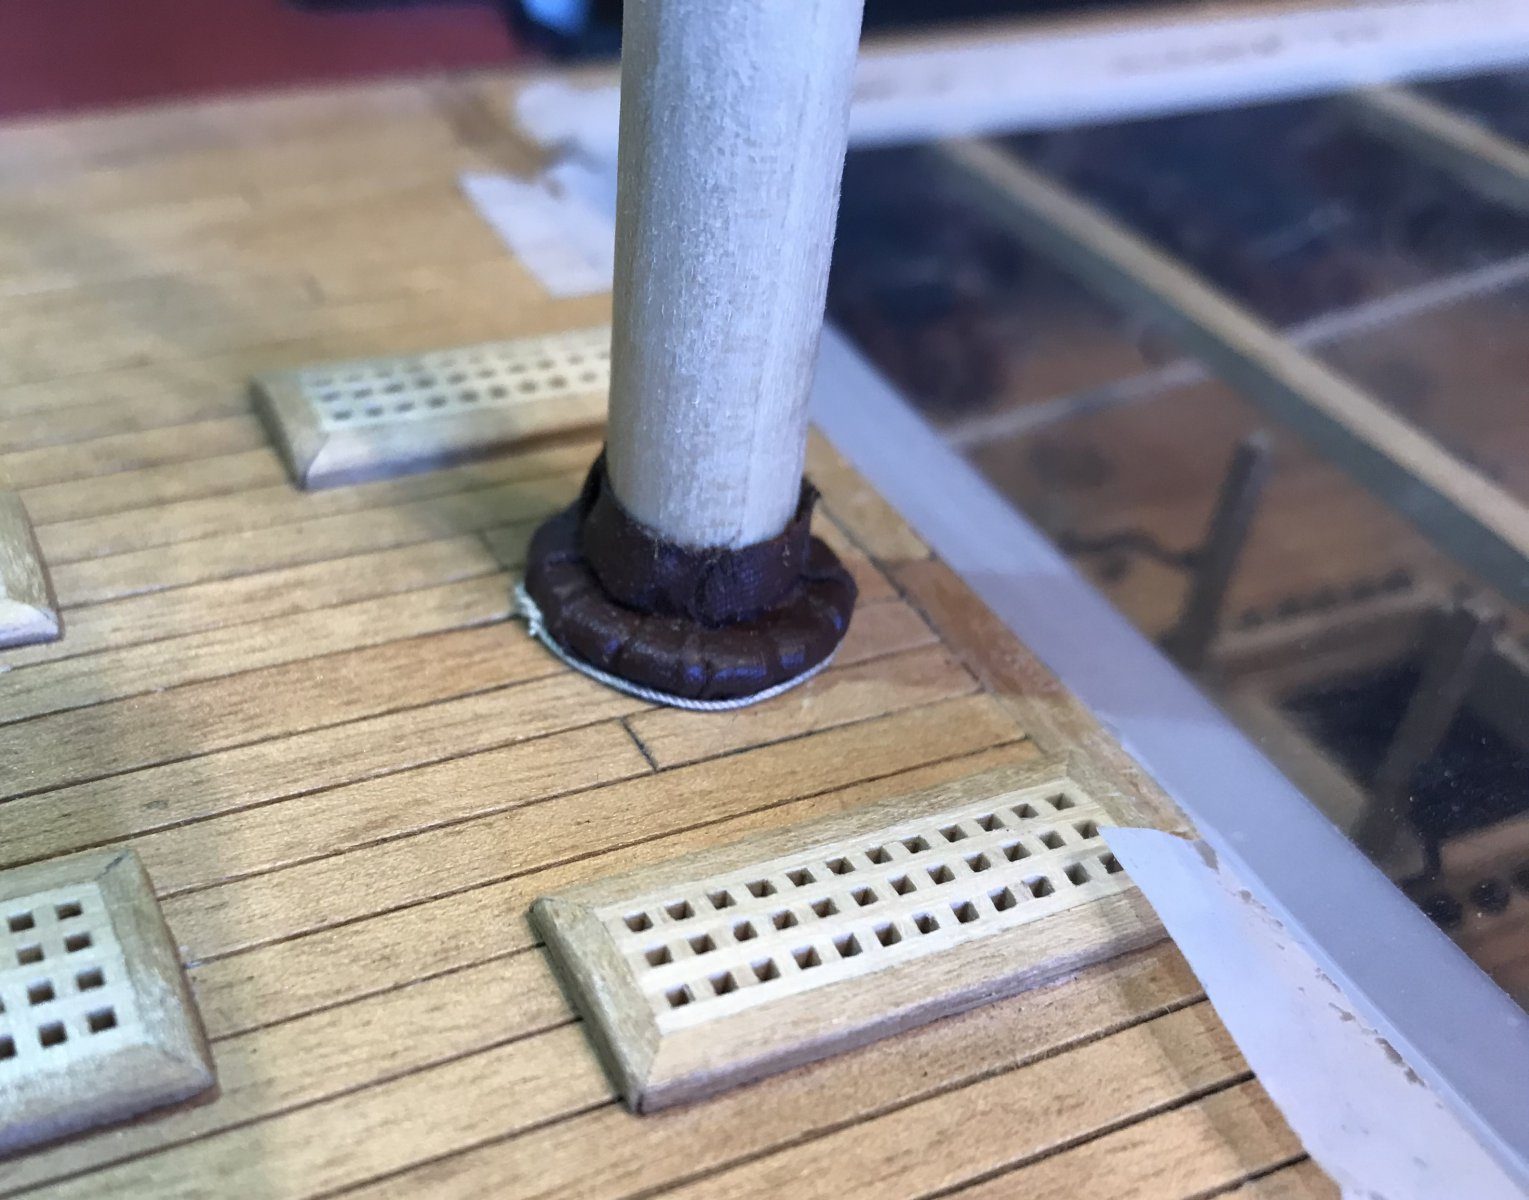
The coat for the foremast on the forecastle deck: the top edge is folded round a worked-in thread and no longer frays. Watch out: On the first coat the frayed edges were clearly visible up close. The thread was only thought of on the second coat; do it straight away.
Paint the fabric brown, so that the weave disappears and the coat looks like tarred canvas. Repeat the steps for the other two masts. On the smallest mast coat, the one for the mizzen on the quarterdeck, the wedges vanish almost completely under the cloth.
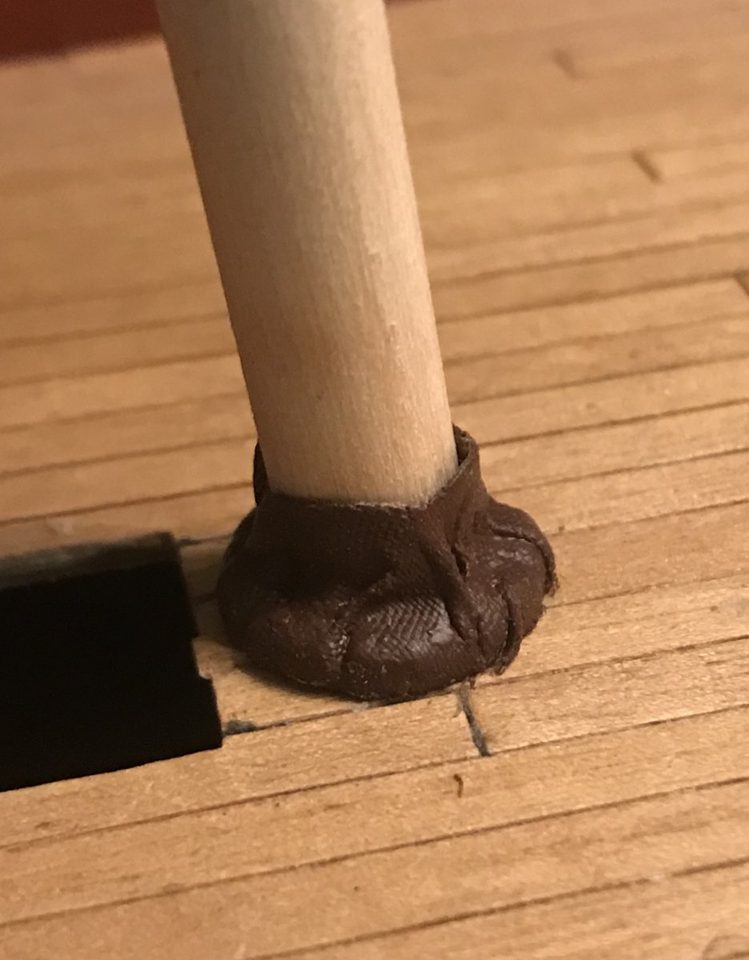
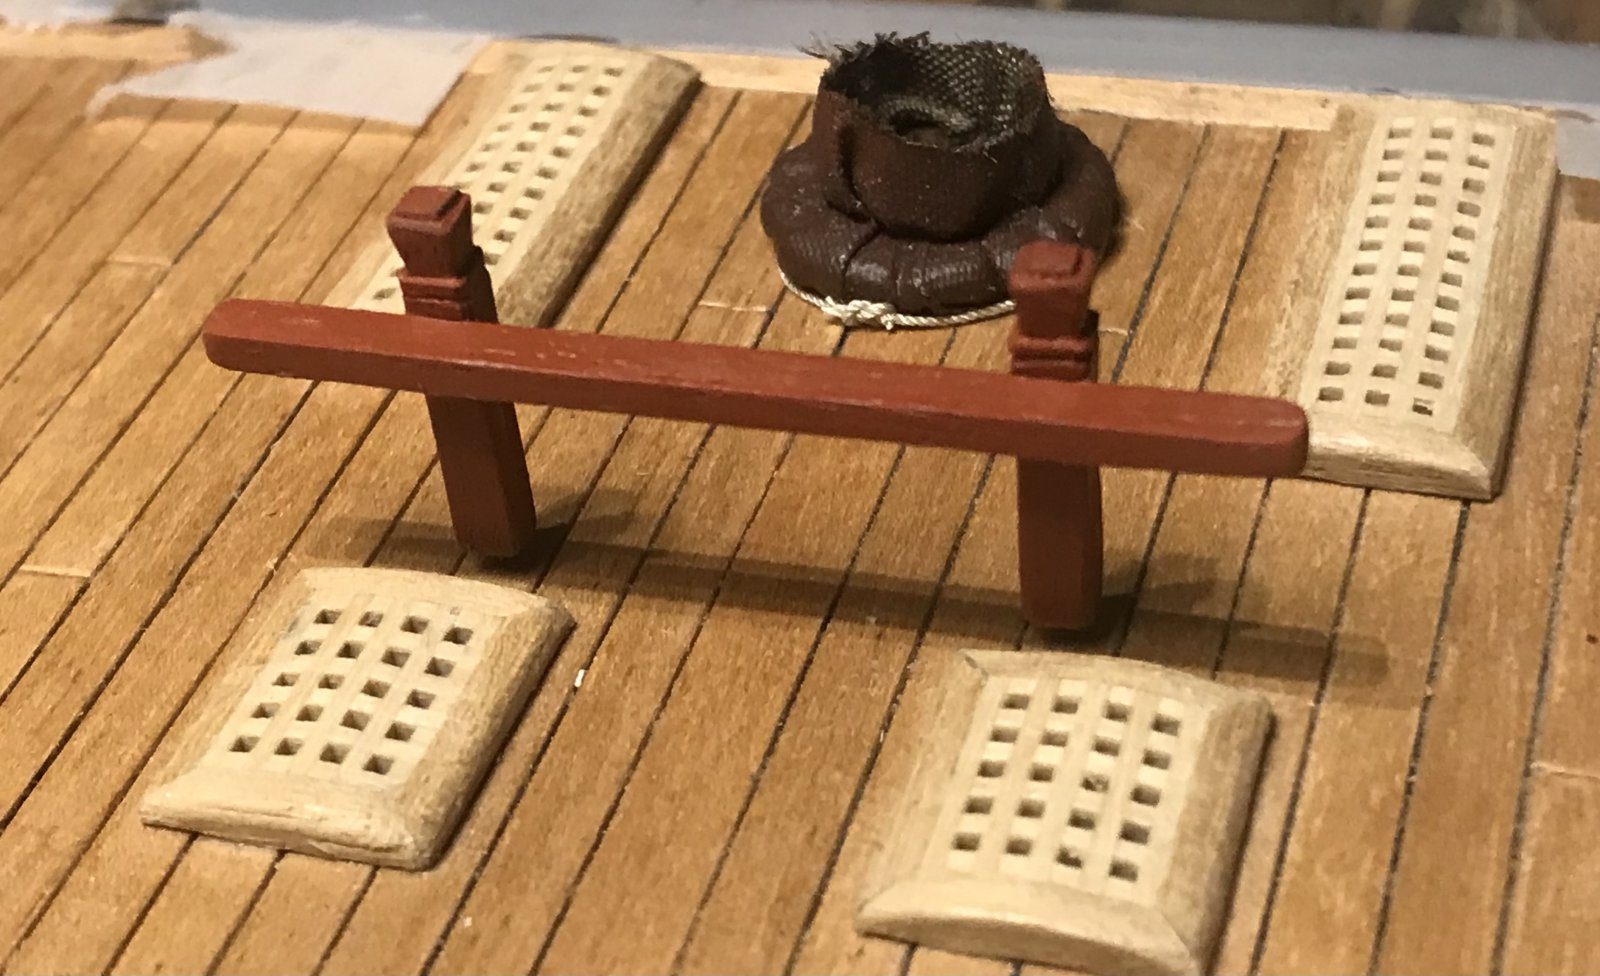
The third and smallest mast coat on the quarterdeck: painted brown, with the wedges no longer visible. Watch out: The first attempt at the quarterdeck coat failed hopelessly. A small ring leaves little room for pleats, so keep the cloth thinner and the pleats smaller there.
Result
Up close the pleated coat looks a bit messy, but from a little distance it gives exactly the effect of a mast in wind and weather. The black trial version was not thrown away: it replaced a ring that had come loose on the gun deck, where you hardly see it.
Problems met with this technique
According to zu Mondfeld the mast coat consists of separate wedges covered with tarred canvas, so the kit ring is not right. Trimmed the ring and stretched black fabric over it; later a version with folds modelled on the Victory. (Tips from Jaques, Herby63, Pingu57, Erik B, Stephan Kertész) to the register
In the same series: Deck fittings
- Shot garlands with every shot equally spaced, using a small template
- Making the upper deck gratings lower with a camber
- Bending a strip for the planksheer in a PVC pipe of water
- Building up a drumhead from seven layers of walnut
- Turning and fitting rail stanchions for the ladderway
- A mast coat from dyed lining fabric, after the masts of the Victory
- A ship's wheel rim from ten walnut segments, turned round on a faceplate
- Turning spokes for the ship's wheel with a pre-shaped blade
All how-tos · Deck fittings: capstan, ship's wheel, gratings and bitts